
One of our favorite tasks when it comes to ConfigMgr management is SCCM Report Creation. Not only it bring value to an SCCM installation, but it also brings visibility to your hard work toward your management. Without SCCM reports, this huge management tool is running silently on all your devices but you’re not benefiting from all the advantages. It’s like having a sports car and discovering the Autobahn … ok maybe not.
But what makes a good SCCM report?
- Data, data, data
- This is the more important part of your reports. You need to query the right SQL views in the SCCM database. If you’re showing incorrect information, your report will be useless
- Building an efficient SQL query is the hard part of report creation. Without any SQL skills, it will be hard to achieve what you want… but, everything can be learned. Two years ago I’ve never done an SCCM report and today we’ve built many and sells them to businesses like yours.
- Visually attractive
- A report full of data is useful but if it’s presented awfully, you won’t get readers’ attention
- Try to keep it clean: add pie charts and graphs if possible. Microsoft proves this with their latest Software Update dashboard and Office 365 dashboard.
- The little details :
- Try to add links between your report to direct your reader in the right direction
- Add tooltips to explain the data shown
In our opinion, the default SCCM Reports are lacking many of those points. Yes, they offer valuable data but they are often not adapted to your environment and are visually… basic.
For all those reasons, we started to create our own set of reports and due to their growing popularity, we decided to help you begin your own SCCM report creation process. For this example, we will show the process that we took when designing our free Office 365 report.
Building the SQL Query
SCCM 1606 introduce a new way to inventory Office 365. A new inventory class is created on the client and this data is stored in the v_GS_OFFICE365PROPLUSCONFIGURATIONS. We found this view by browsing the v_GS_* classes in the SCCM database. These classes are usually related to hardware inventory information.
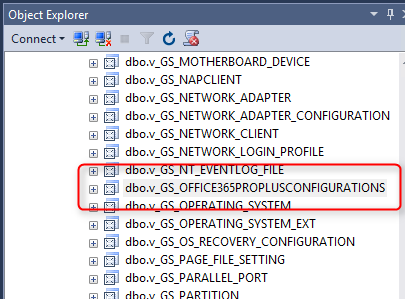
By using a simple query we can see all data stored in this view:
Select * v_GS_OFFICE365PROPLUSCONFIGURATIONS

By looking at the results, we know that this is the right view to use.
The machine name is not included in this view. We need to use a JOIN SQL command to get it from the V_R_System view which is the “main” discovery view containing your clients. An SQL JOIN clause is used to combine rows from two tables, based on a common field between them. In our case (We join V_R_System and v_GS_OFFICE365PROPLUSCONFIGURATIONS based on the same ResourceID)
SELECT * FROM v_GS_OFFICE365PROPLUSCONFIGURATIONS OFI
JOIN v_R_System SYS ON SYS.ResourceID = OFI.ResourceID
After that, we’re adding SYS.Name0 in the SELECT to add the machine name from the V_R_System view and we use a WHERE clause to exclude all NULL records.
SELECT SYS.Name0,* FROM v_GS_OFFICE365PROPLUSCONFIGURATIONS OFI
JOIN v_R_System SYS ON SYS.ResourceID = OFI.ResourceID
WHERE CDNBaseUrl0 is not null
We end up with something like this :

You can modify the query to exclude unwanted data. Once your query is created, we can create the report.
SCCM Report Creation
To create SCCM custom report, follow these steps :
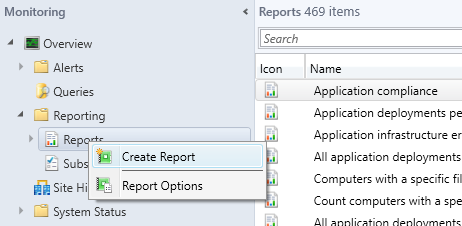
- Open the SCCM console and go to Monitoring / Overview / Reporting
- Right-click on Reports and select Create Reports
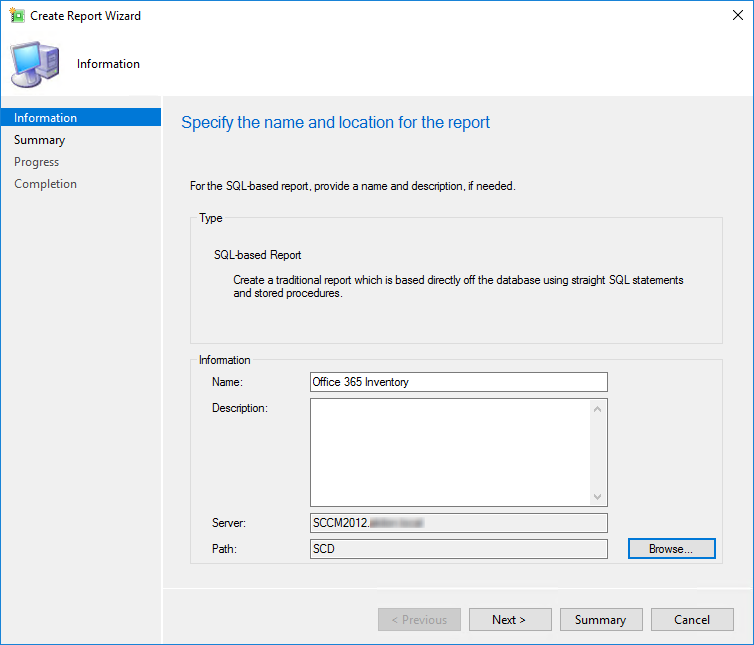
- On the Create Report Wizard, select type SQL-based Report
- Enter the name of the report Office 365 Inventory
- Enter a report Description if desired
- Click on Browse and select the folder where the report will be saved
- Click Next
- Review the Summary and complete the wizard
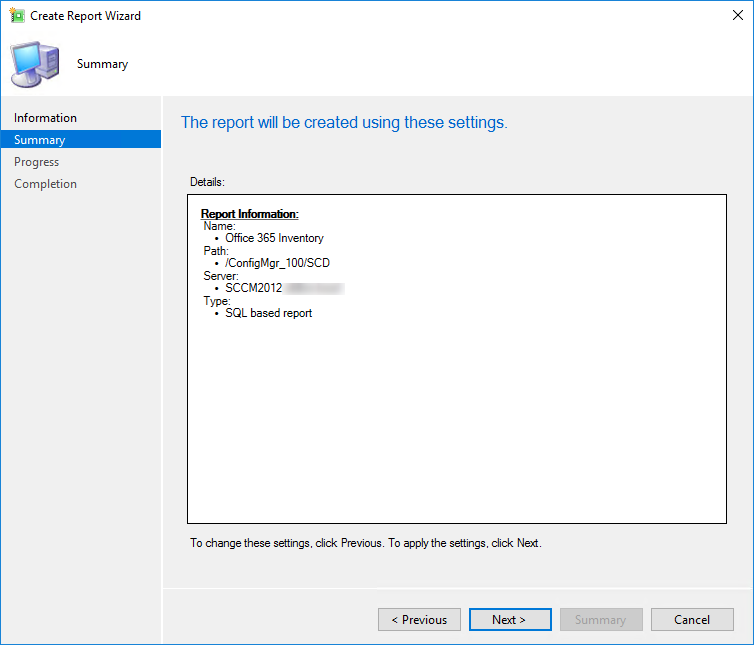
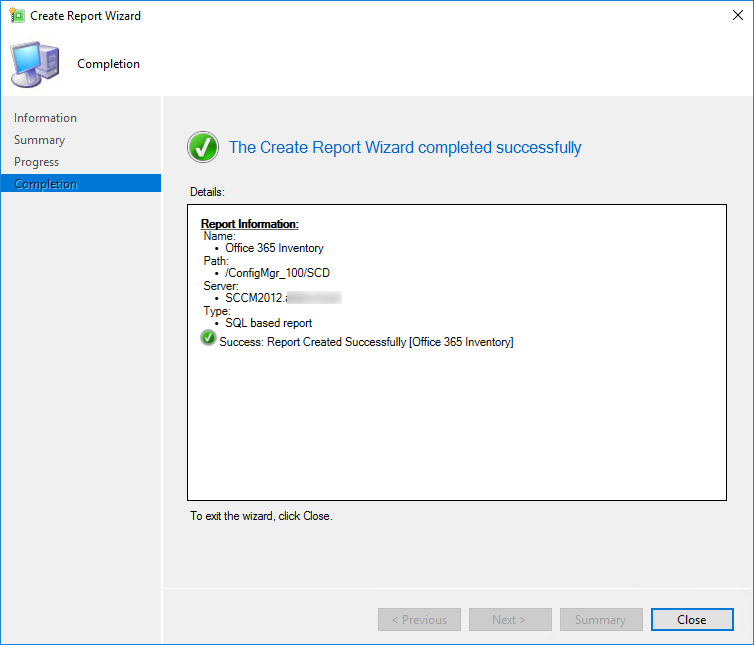
- Report Builder will automatically run
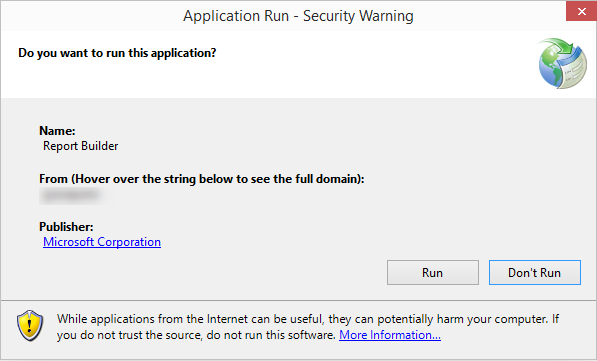
- Click Run
Report Builder
Report Builder is a simple tool to create reports. You can also use Visual Studio but you need a license, so we’ll stick to Report Builder. We will explain the basic steps for creating a report.
Once Report Builder is launched, look at the left part of the screen, we will focus on the Report Data section.
Data Sources and Datasets folder is the most important to start. The Data Source section will be used to configure the database and Dataset will be used for the SQL query.
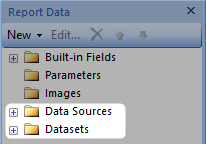
In our case, we won’t use Built-in Fields and Parameters but they are very useful when you want to standardize your reports. For example, if you want to scope a report to a specific collection, you will need to use the Parameters section. If you want to include your company logo in the report, you will need to import it into the Images folder.
SCCM Report Creation – Configure the Data Sources
We first need to connect to the SCCM database :
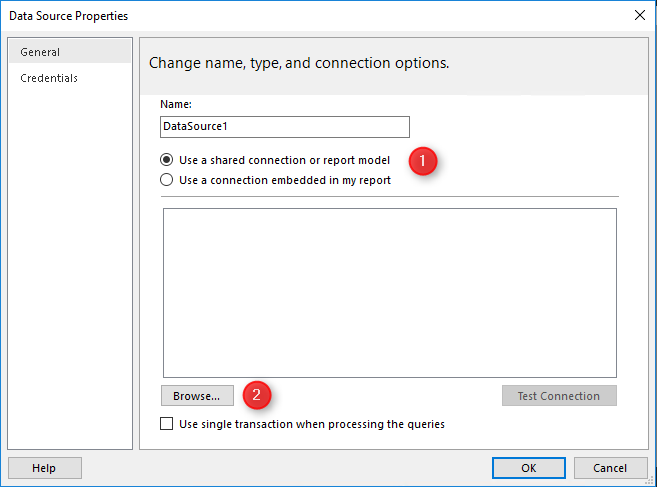
- Right-click on Data Sources in Report Data on the left panel and select Add Data Source
- In the General tab, enter a name for your data source
- Select Use a shared connection or report model
- Click on Browse
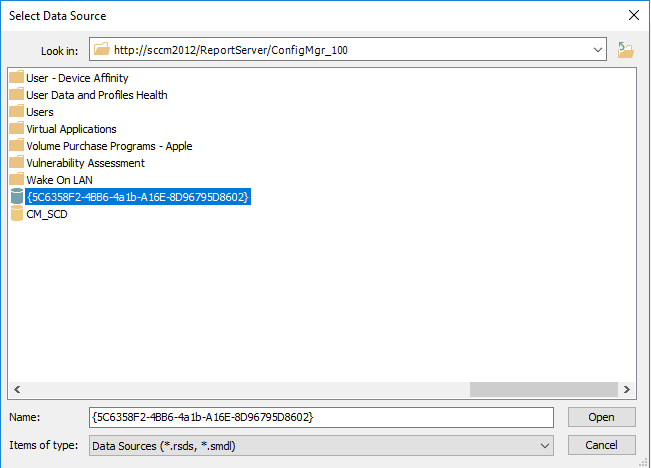
- Browse to the end and select your SCCM Database GUID and click Open
- Back in Data Source Properties, click Test Connection to test your configuration and OK when you’re done
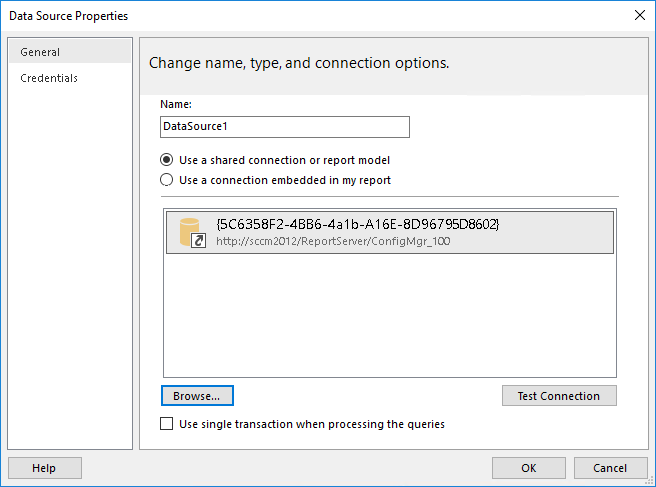
Make sure that your account has access to the database. If not, set up another account via Credentials on the left panel.
Create a Dataset
The Datasets section is where your SQL query will be created.
- Right-click Datasets in the left panel and select Add Dataset

- Select Use a dataset embedded in my report and select the data source you just created
- In the Query field, paste this SQL query
SELECT SYS.Name0,* FROM v_GS_OFFICE365PROPLUSCONFIGURATIONS OFI
JOIN v_R_System SYS ON SYS.ResourceID = OFI.ResourceID
WHERE CDNBaseUrl0 is not null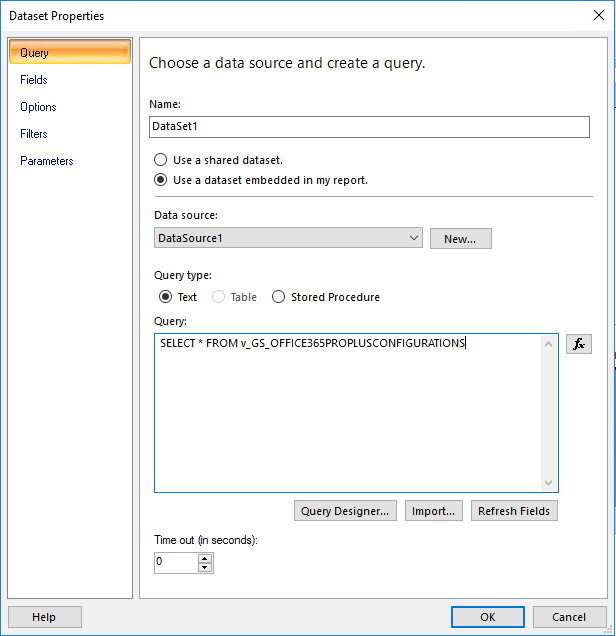
- Click Ok
- You can see on the right side all fields returned by your query
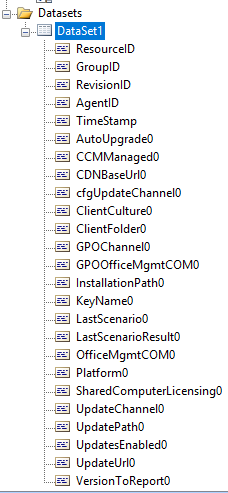
Report Design
We are now ready to create the visual side of the report. We will include the data returned by the query.
- Double-click the title and rename it to Office 365 Inventory
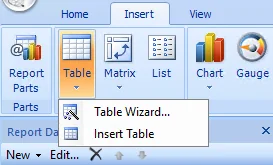
- On the top menu select Insert / Table / Table Wizard

- Select the Dataset that you just created, click Next
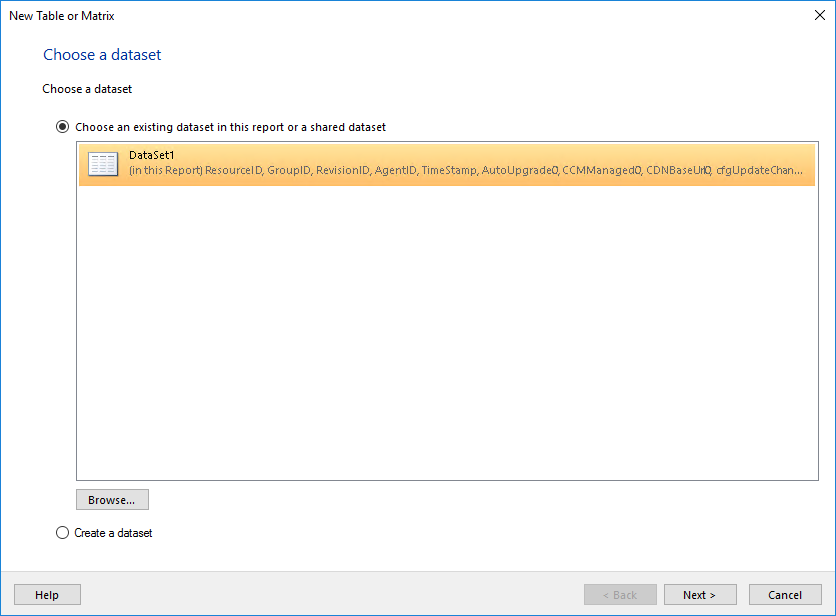
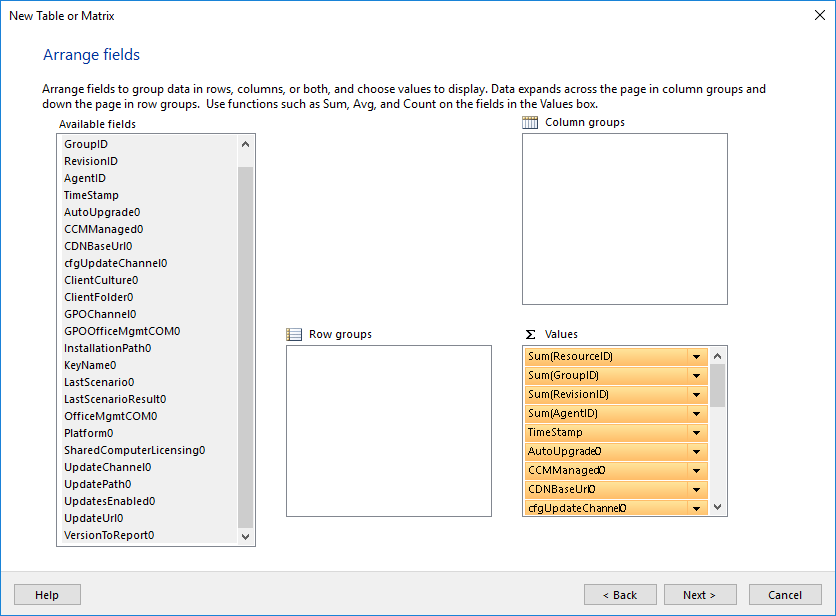
- Select desired fields to be displayed in the table and drag them to the Values box. In our example we simply just take everything.
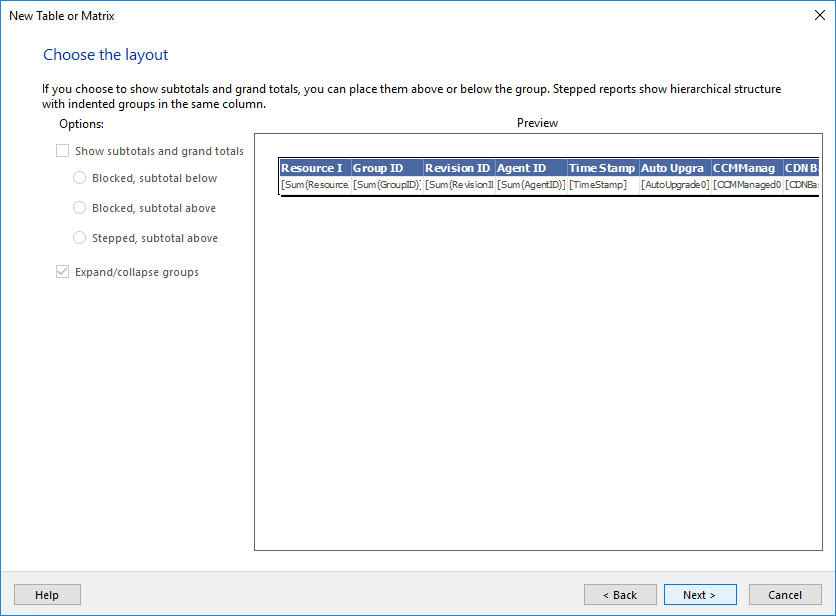
- In the Layout section, just hit Next
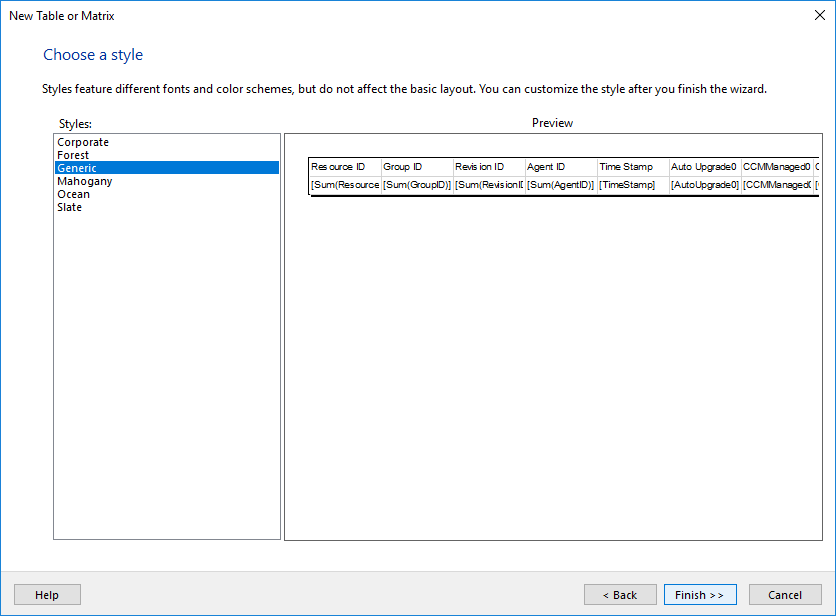
- In the Style screen, choose Generic because we’ll modify the font and color ourselves, click Finish
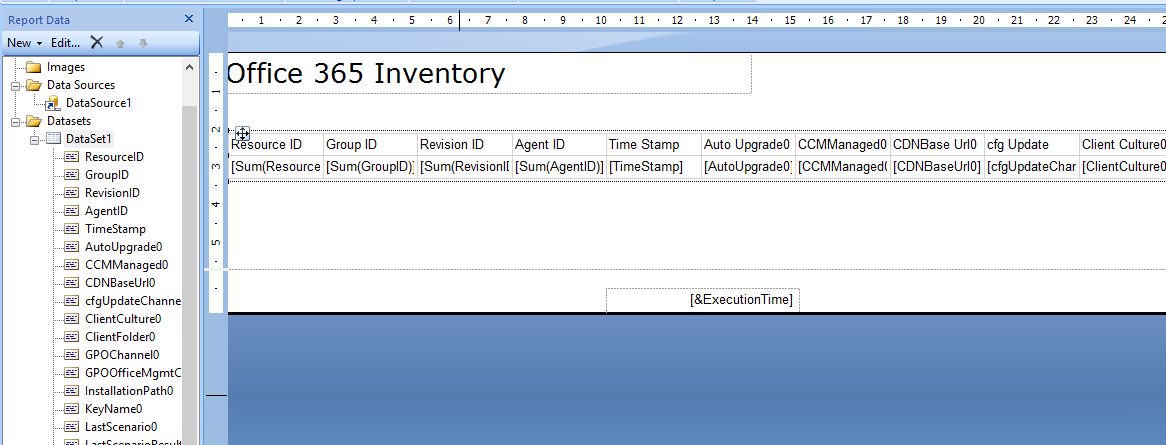
- You will end up having a basic report with a title and the table you just created
Visual Modification
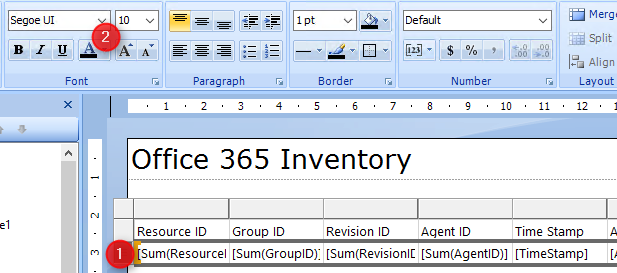
- We will now change the default font
- Select the whole row and select the desired font and color on the top
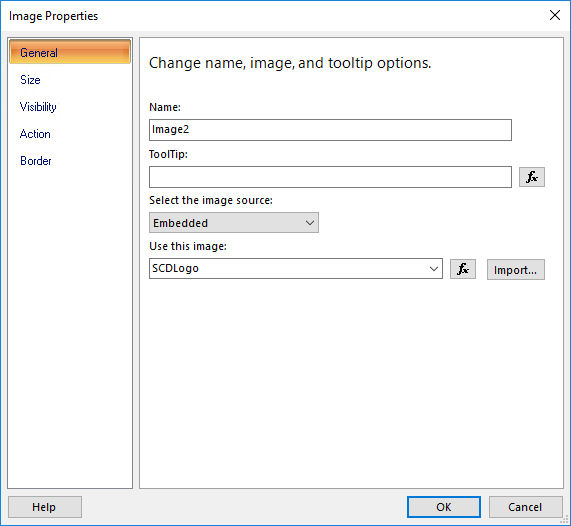
- We will now import our company logo in the report
- Right-click Image and select Add Image

Once imported, drag the Image to your report, click OK on the Image Properties box
- Size it and place it where you need it
- It already looks much better :

- Another thing we suggest to change :
- Column name and column size
- Include tooltip if any fields are non-descriptive
- Remove any unwanted column (Delete the column or remove it from the SQL query)
After all modifications, our final report looks like this :
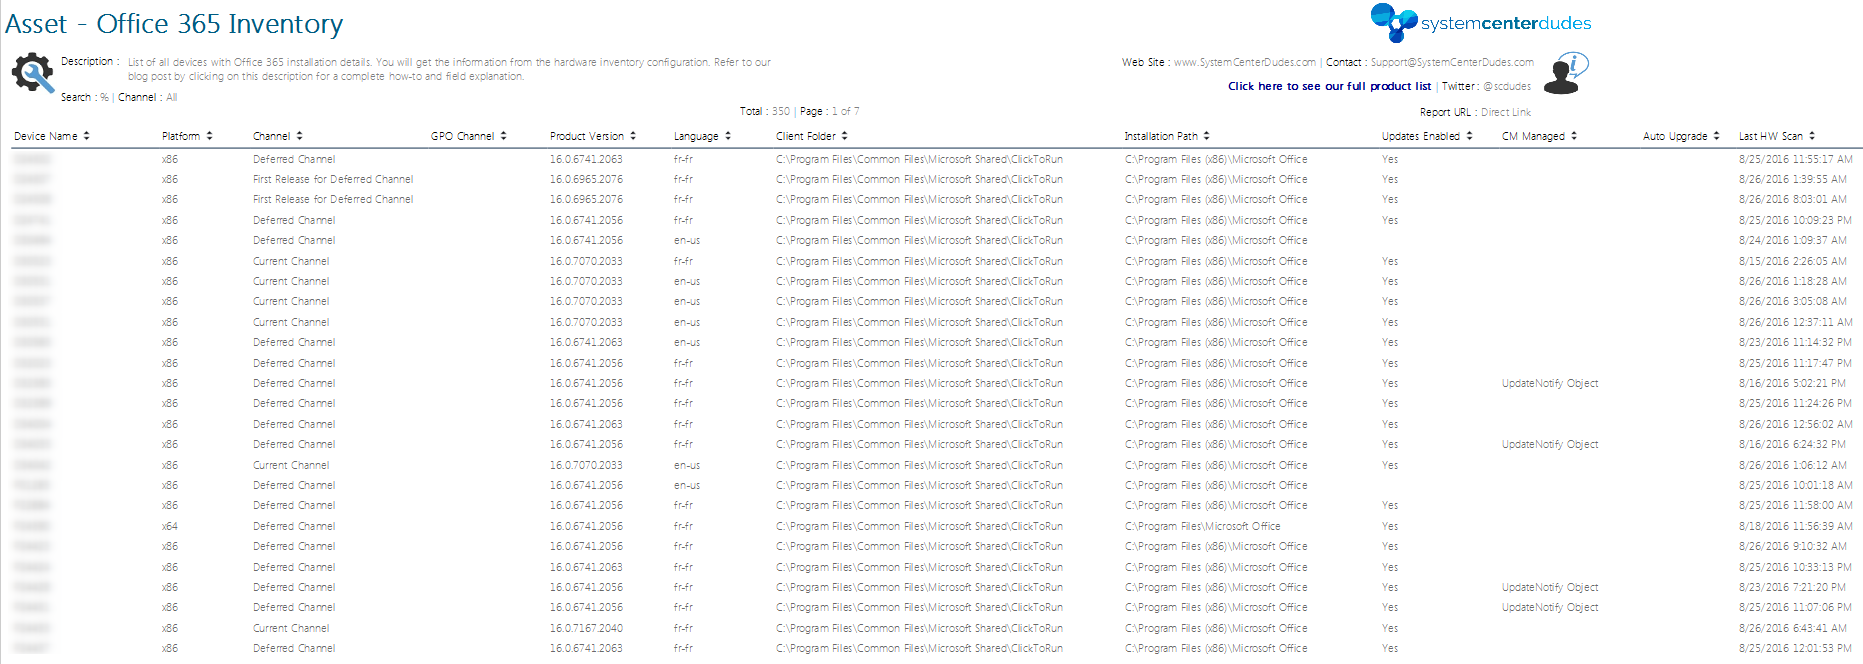
SCCM Report Creation -Testing
When we’re done with the design, we will test the result in Report Builder before saving it to our production folder.
- Click Run button on the top left

Go back and modify if needed, when you’re satisfied with the results, click Save button on the top left. The report is automatically available on your reporting point in the folder you specified.
Verification
By saving the report in Report Builder, your report will be updated in SSRS and in the SCCM console.
SSRS
- Open your web browser, go to your reporting website (usually http://nameoftheserver/reports). Your report should be published in your folder.
 Console
- From the SCCM console, go to Monitoring / Reporting / Reports. Your report should be published in your folder.

Your first SCCM Report Creation might not be the best one but with perseverance, you’ll get better and develop your skills. Happy reporting!







Stefan
01.25.2021 AT 03:46 AMCarlo
03.03.2020 AT 03:13 PMAshwini kumar
01.12.2020 AT 08:51 AMDinkus McPlinkus
10.31.2018 AT 02:32 PMNyamza
10.25.2018 AT 07:54 AMDominique
08.25.2018 AT 04:59 PMMohan chinta
08.31.2018 AT 02:30 AM