

Deploy SCCM Wifi Profiles with Password to Windows 10 Devices
Founder of System Center Dudes. Based in Montreal, Canada, Senior Microsoft SCCM Consultant, 8 times Enterprise Mobility MVP. Working in the industry since 1999. His specialization is designing, deploying and configuring SCCM, mass deployment of Windows operating systems, Office 365 and Intune deployments.

Benoit Lecours
PresidentTable of Content


Share


Get the latest insights and exclusive content delivered to your inbox
Introduced since SCCM 2012 R2, SCCM Wifi profiles are used to send Wifi configurations to clients. It can be useful if your company is not using certificates or any automated authentication methods. A smaller organization that uses a simple WPA2 setup can use SCCM Wifi profiles to send Wifi SSID and password so that the computers connect automatically to that network.
You can also use Wifi profile to manage mobile devices with Intune but we won’t cover this scenario in this post.
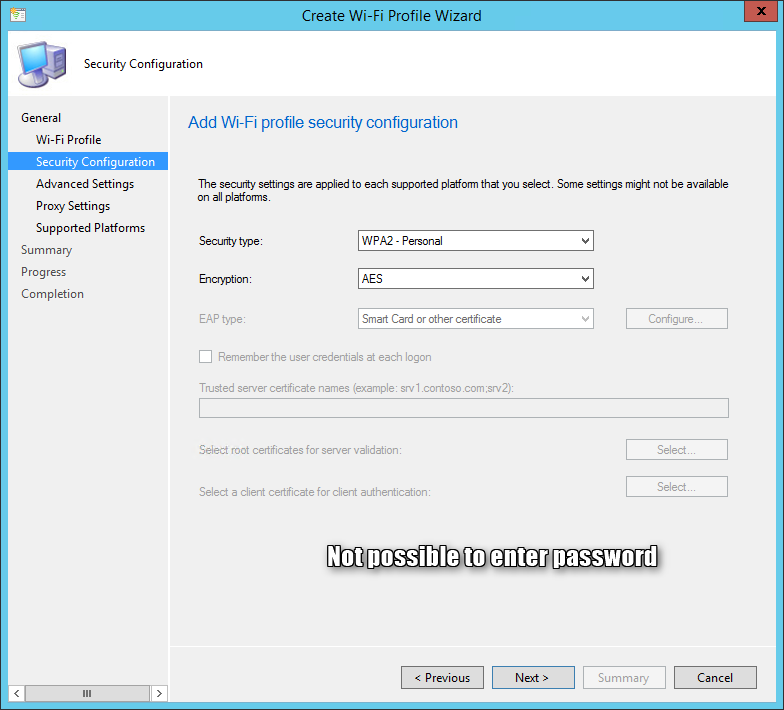
The major drawback of the SCCM Wifi Profile is that it’s impossible to enter the Wifi password using the console UI. (Even in the newest versions). We will show you how to deploy Wifi profiles on a Windows 10 or Windows 8.1 computer, including the Wifi password using an XML file.
How to deploy SCCM Wifi Profiles with password to Windows 10 devices
Since it’s not possible to enter a password in the SCCM console, we’ll create an XML file and use it to create an SCCM Wifi profile based on this file.
The first step is to connect on a Windows 10 computer and connect to the desired Wifi network manually. You can disconnect once done, it’s only important to connect to the network at least once.
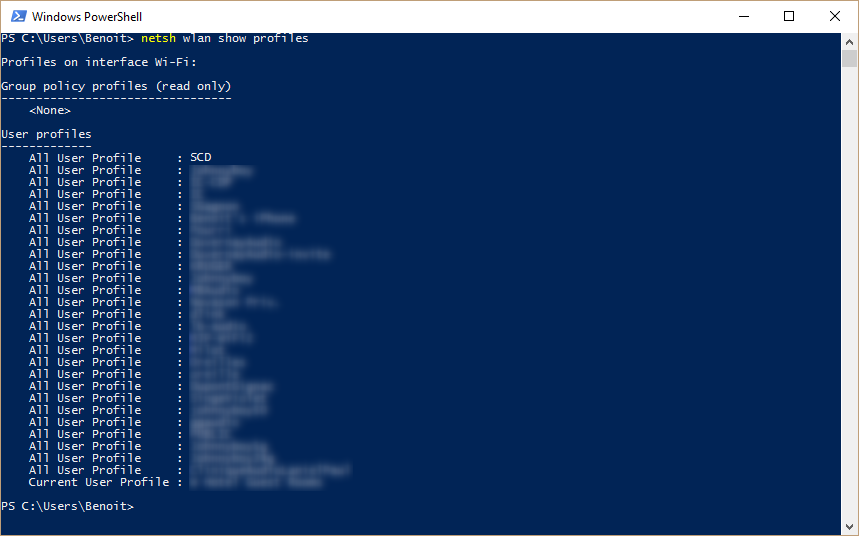
- Open a PowerShell window and enter the following command to list all Wifi profiles on the computer :
netsh wlan show profiles
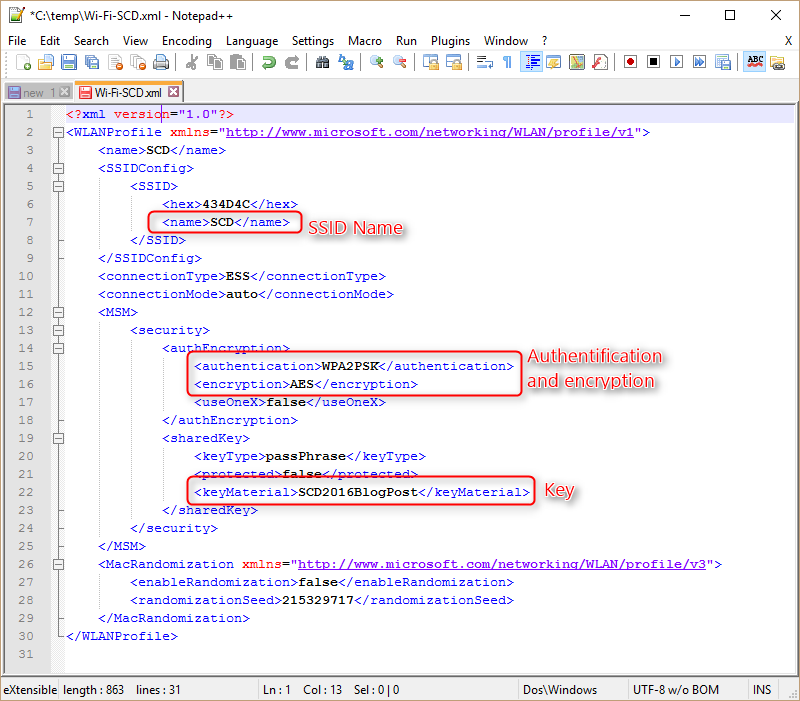
- Enter the following command to create the XML file : (replace the name of your network and location you want the file to be created)
netsh wlan export profile name=”SCD” key=clear folder=c:\temp

- Using any text editor, you can see the Wifi information including the WPA2 pre-shared key
- We are now ready to create the Wifi profile in the SCCM console using this XML file
- Open the SCCM console
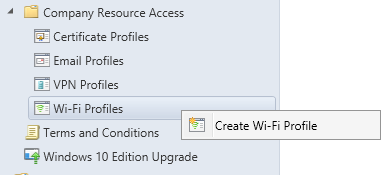
- Go to Assets and Compliance / Compliance Settings / Company Resource Access / Wi-Fi Profiles
- Right-click Wi-Fi Profiles and select Create Wi-Fi Profile
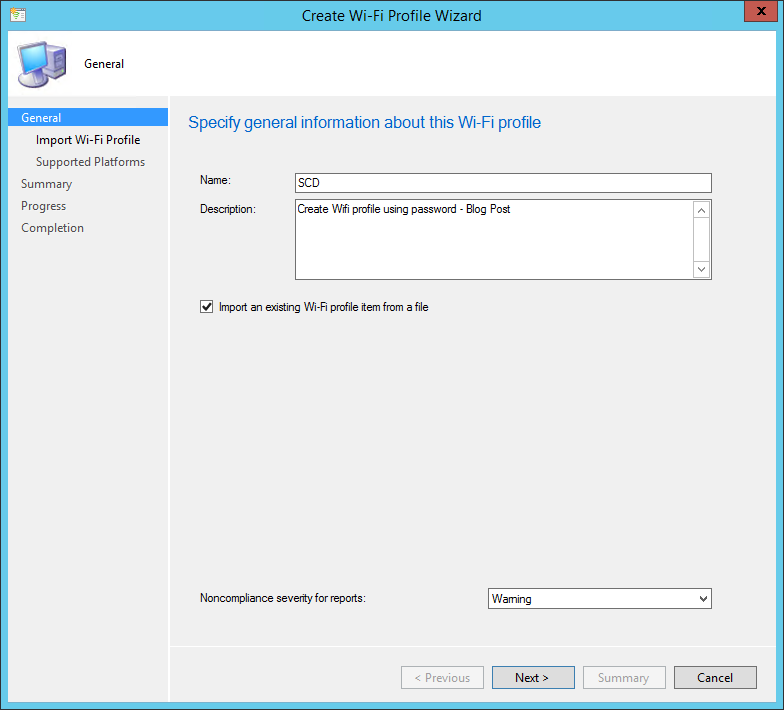
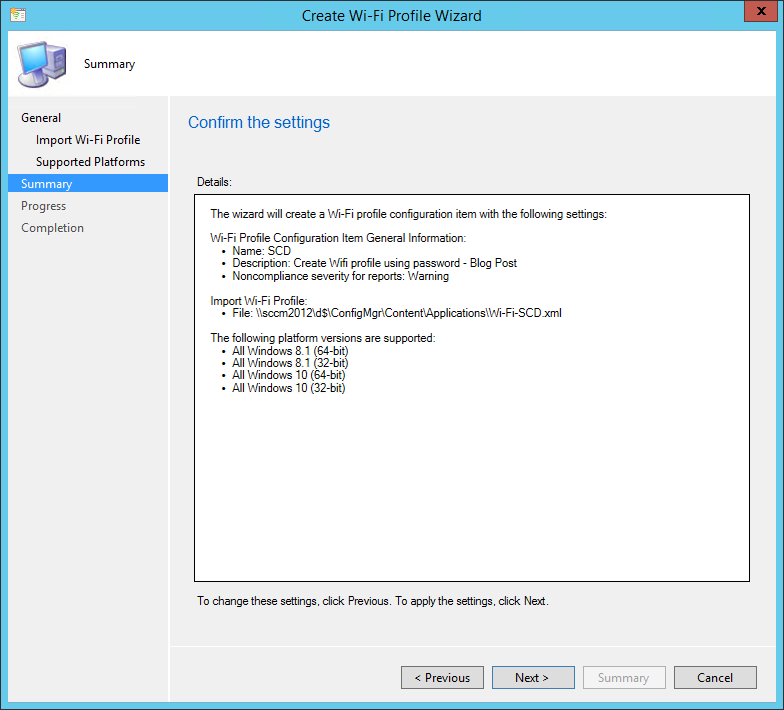
- On the General pane, enter a Name and Description
- Check the box Import an existing Wi-Fi profile item from a file, click Next
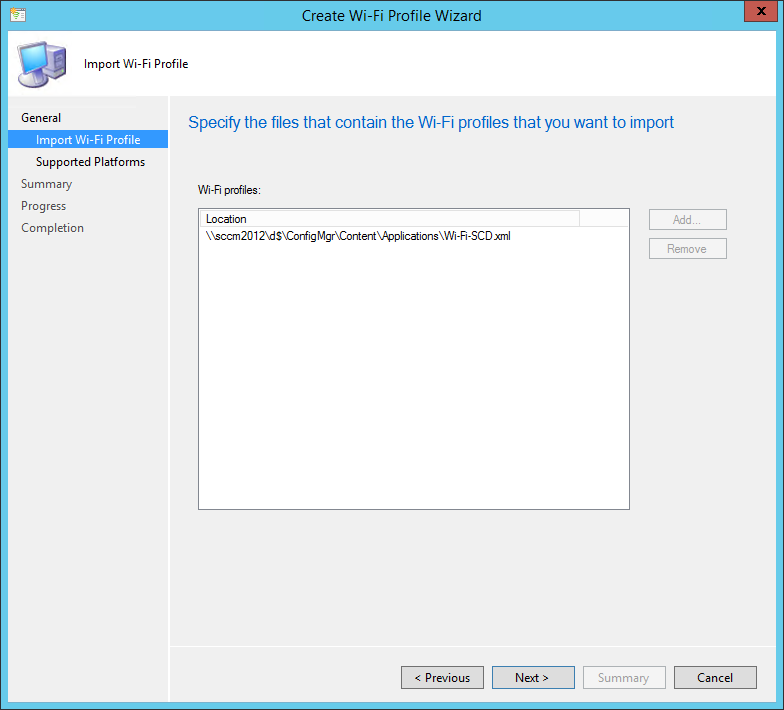
- On the Import Wi-fi Profile pane, click Add

- Browse to the location where you saved the XML file created in the first step of this post, click Open
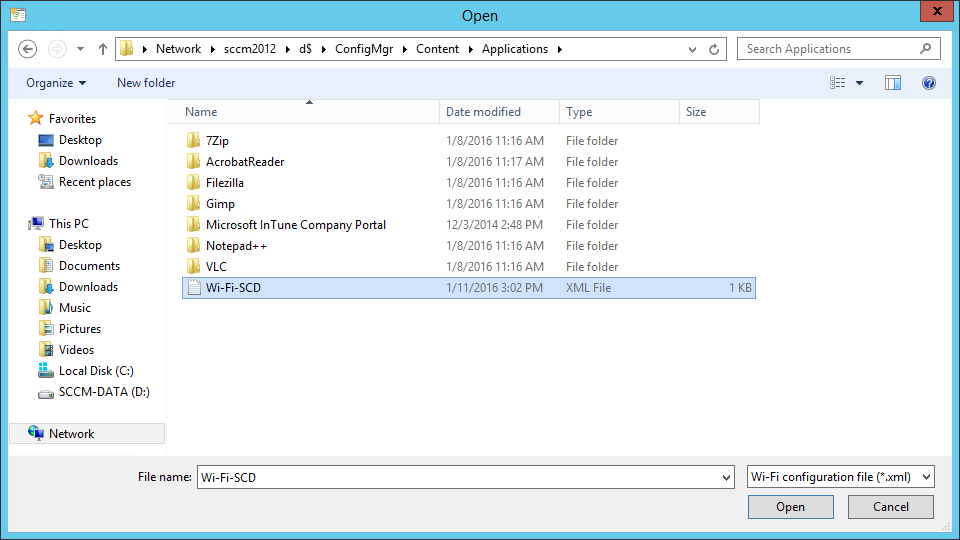
- Validate the file, click Next
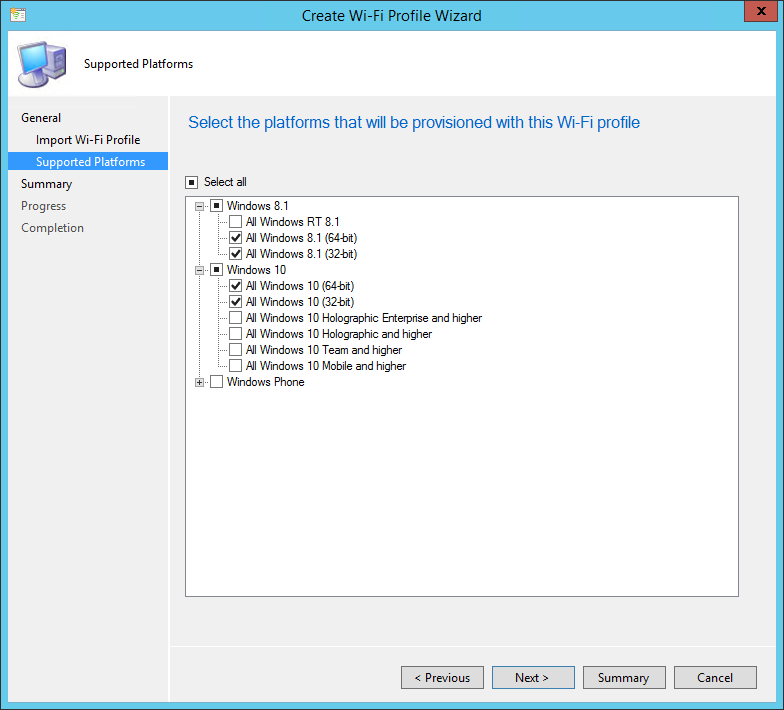
- On the Supported Platforms pane, select All Windows 8.1 (64-bits), All Windows 8.1 (32-bits), All Windows 10 (64-bits) and All Windows 10 (32-bits), click Next
- On the Summary pane, review your settings and click Next
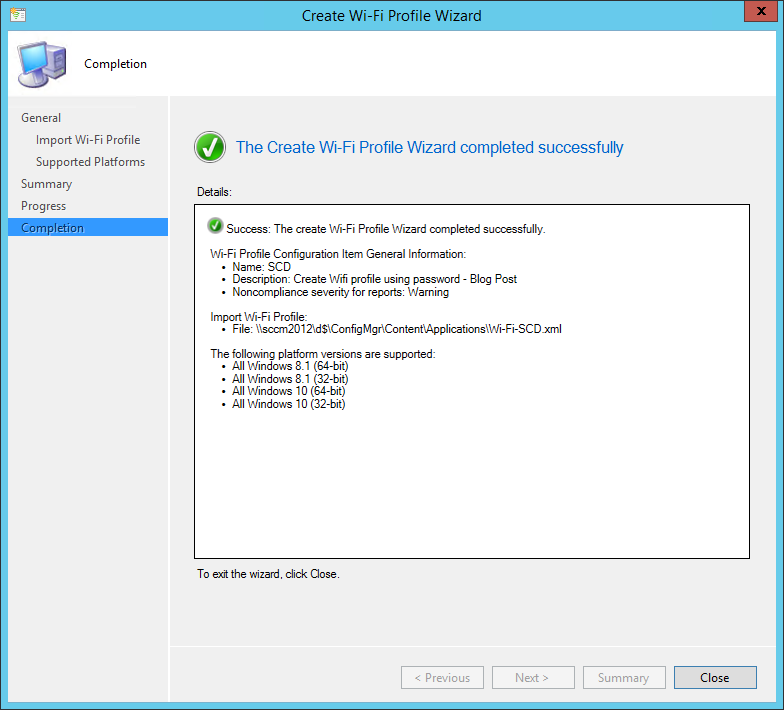
- Wait for the wizard to complete and click Close
Deploy the Wifi Profiles
You are now ready to deploy the profile to your devices
- Open the SCCM console
- Go to Assets and Compliance / Compliance Settings / Company Resource Access / Wi-Fi Profiles
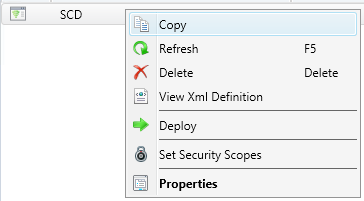
- Right-click the profile and select Deploy
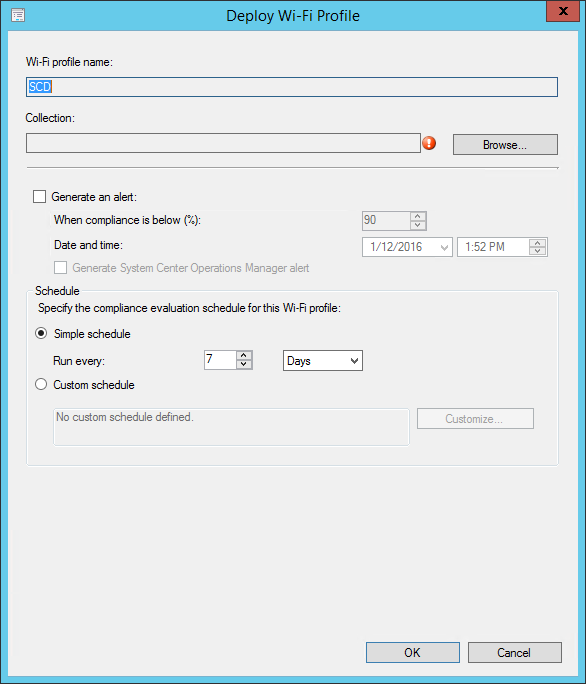
- Click Browse and select your collection
- Specify the evaluation schedule, click Ok
Monitor the deployment
Like every deployment, you can monitor the status in the SCCM Console under Monitoring / Deployments

You may notice that the Wifi Profiles deployments are treated as they were Configuration Items.
Once successfully deployed, the computers receiving the Wifi Profile will automatically connect to the specified network.
Delete SCCM Wifi Profile
A generic failure error 0x80041001 when deploying your SCCM wifi profile is usually caused because you already have a profile with the same name on the computer. SCCM can’t overide or delete an existing wifi profile.

In such case, we suggest to create a collection with the systems that gives an error and deploy a script to delete the wifi profile and starts an evaluation of the WiFi profile baseline you just created. To delete the wifi profile on a Windows 10 computer, use this command :
netsh wlan delete profile name=”network-name”
The simpliest way to send this command would be to use the script function in the SCCM console.
Share
Get the latest insights and exclusive content delivered to your inbox


farid
08.26.2019 AT 11:09 PMDirk
07.11.2019 AT 12:50 AMTariq
05.09.2019 AT 07:47 AMBrandon Hilgeman
07.09.2019 AT 09:37 AMStrensnik
05.23.2017 AT 09:26 AMPageyUK
10.28.2016 AT 04:45 AMunk
08.24.2016 AT 07:52 PMMike
05.11.2016 AT 10:04 AMJPBreton
01.13.2016 AT 10:05 PMBenoit Lecours
01.22.2016 AT 09:17 AM