Enable and Manage Windows Defender Firewall using Intune
If you’re managing your device using Microsoft Intune, you may want to control your Windows Defender Firewall policy. This can be useful to make sure that every device has the Windows Firewall enabled and that you’re controlling the inbound and outbound connections.
The Microsoft Intune interface makes this configuration pretty easy to do. The key is to create a configuration profile to target your Windows 10 devices. In this article, we’ll describe each step needed to manage the Windows Defender firewall using Intune.
Windows Defender Firewall Intune Requirements
The only requirement to manage your Windows Firewall with Intune is that your device runs Windows 10 and that it’s enrolled into Intune.
Create a Configuration Profile
To Begin, we will create a profile to make sure that the Windows Defender Firewall is enabled.
After, using the same profile, we will block certain applications and ports.
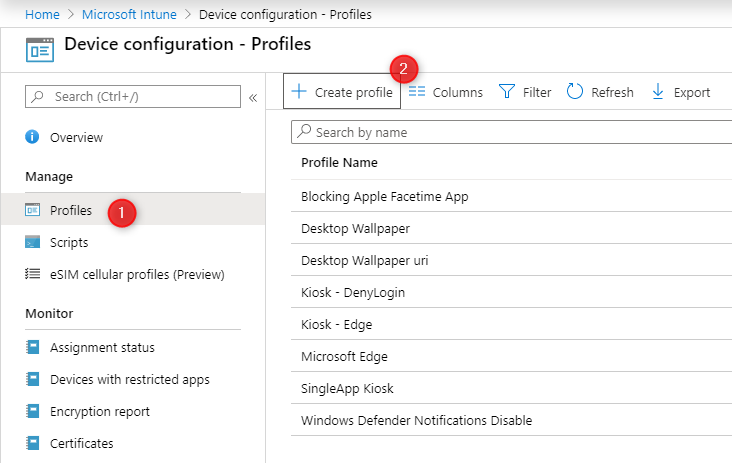
At the top of the Profile pane, select Create Profile
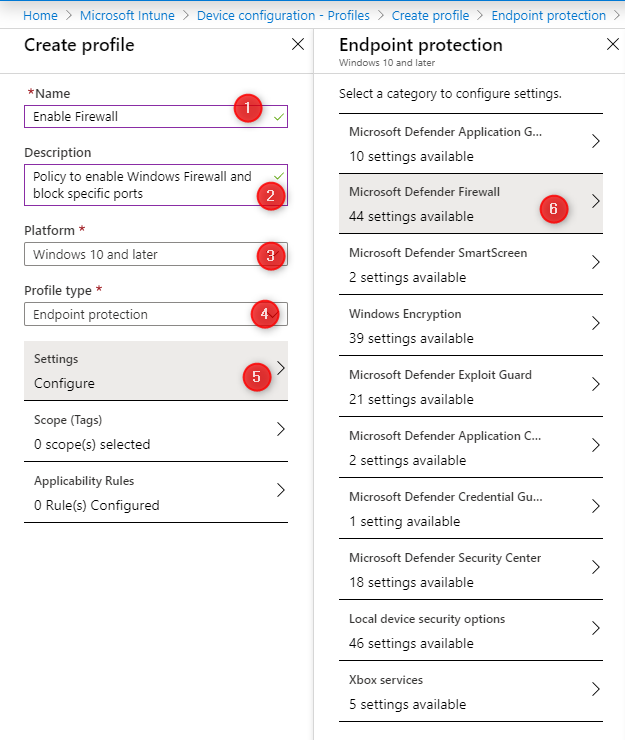
On the Create profile Pane
Enter a Name for your profile (1)
Add a Description (2)
Under Platform, select Windows 10 and later (3)
Under Profile Type, select Endpoint Protection (4)
Under Settings, click Configure (5)
The Endpoint Protection Pane opens
Select Microsoft Defender Firewall (6)
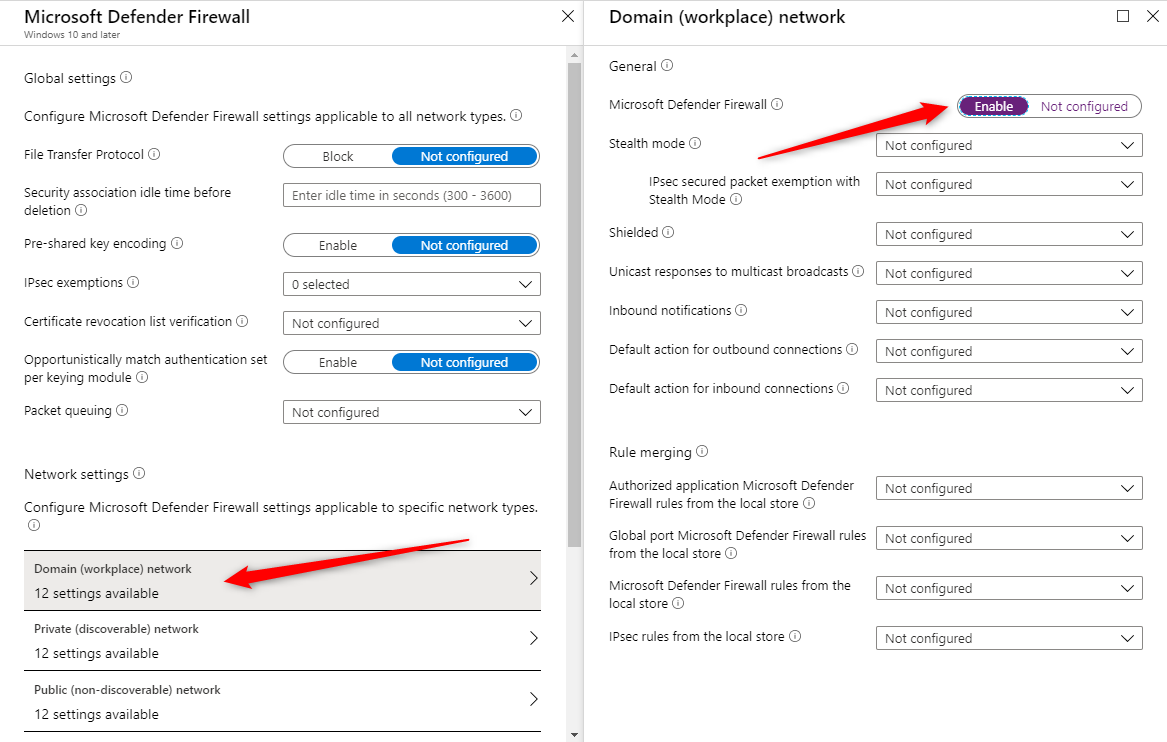
On the Microsoft Defender Firewall screen, at the bottom, we select the Domain network and in the opening pane, we select Enable under Microsoft Defender Firewall
Click Ok at the bottom to close the Domain network pane
This ensures that the device has the Firewall enabled
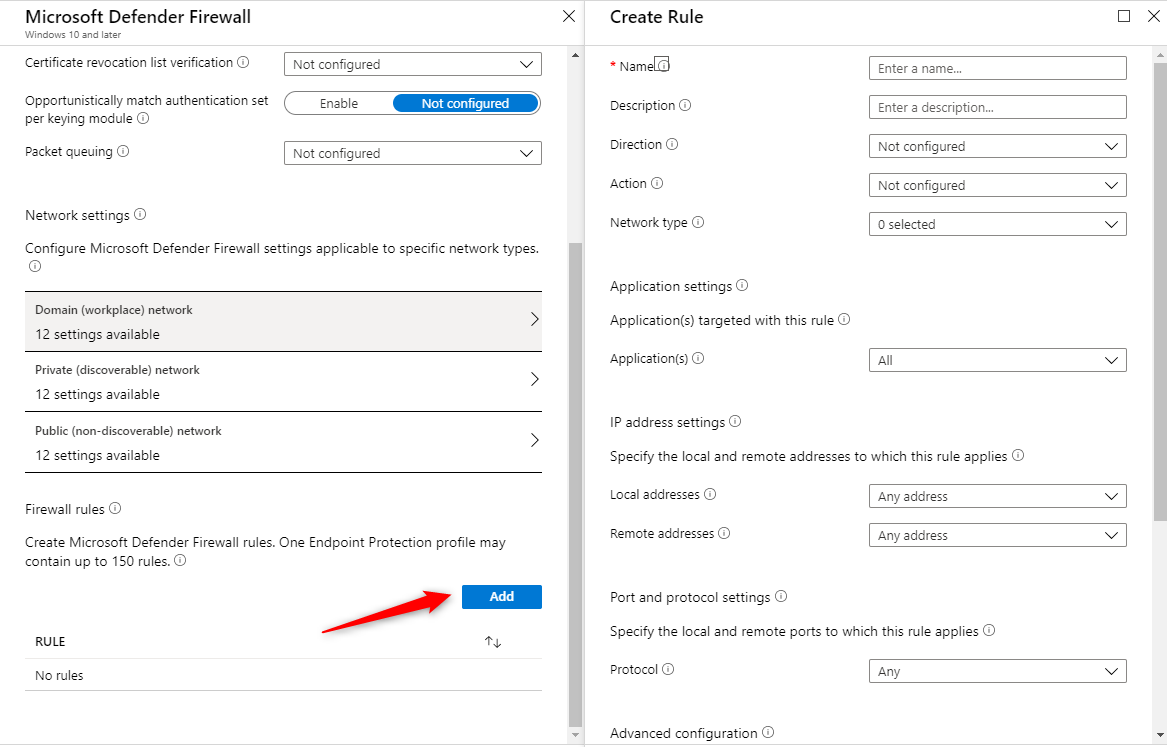
We will now create a firewall rule to block inbound port 60000 to communicate with our device.
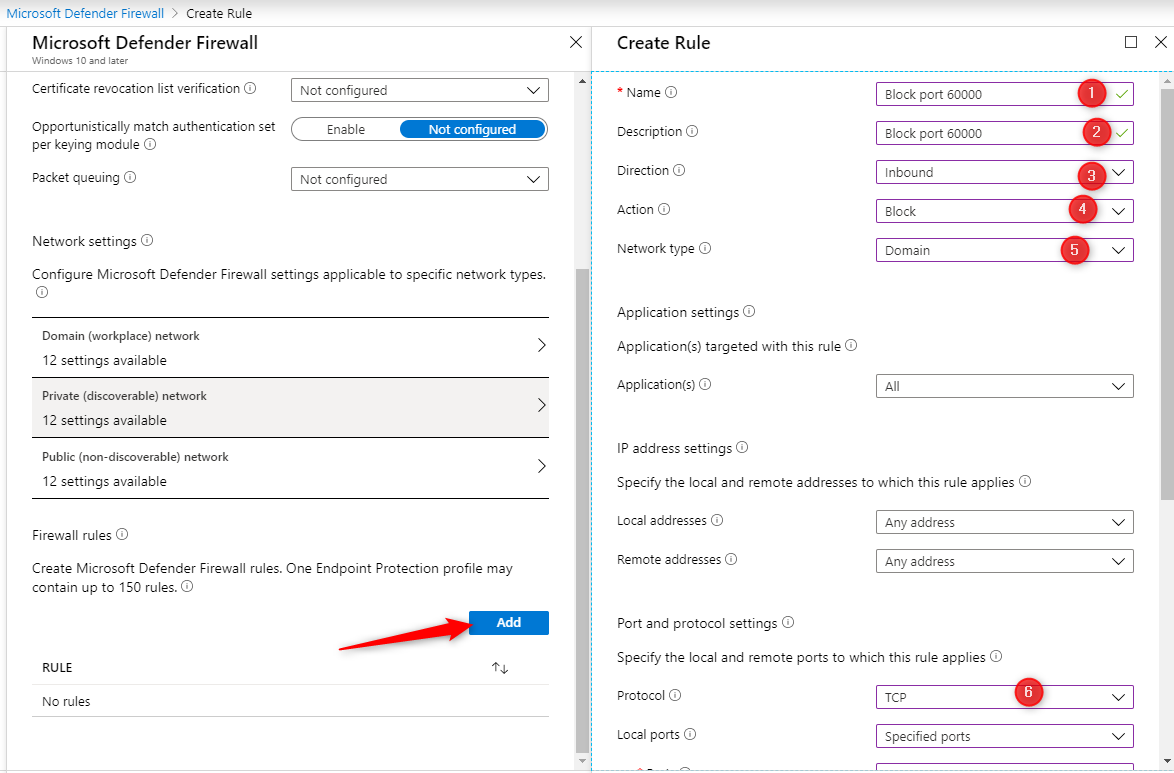
Back in the Microsoft Defender Firewall pane, click the Add button at the bottom to add a Firewall rule
In the Create Rule pane, enter the desired information
Enter a rule Name
Enter a rule Description
In Direction, enter Inbound
Under Network Type, select Domain
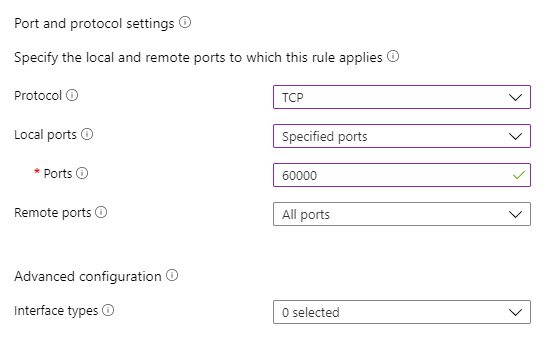
In the Protocol box, enter TCP
In Ports, enter 60000
Click Ok at the bottom
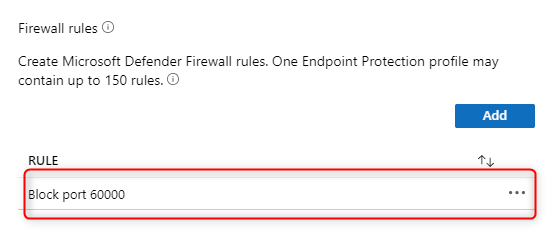
Back in the Windows Defender pane, ensure that your Rule has been added
Repeat the steps if you need to add more firewall rules
You can remove it by clicking on the 3 dots at the right if needed
Click Ok twice and click Save to save your profile.
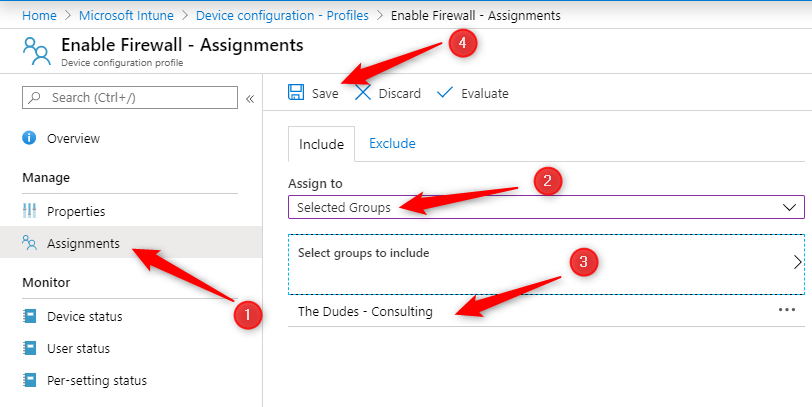
Now, it’s time to assign your profile to your devices. Without an assignment, your profile is not applied.
Click Assignments at the left (1)
Select Include and in the Assign to box, select the group you want to assign your Windows Firewall profile you just created (2-3)
Click Save at the top (4)
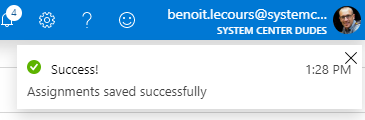
You’ll see a confirmation at the top right
On a managed device, you’ll see the following message: For your security, some settings are controlled by Group Policy
In the Inbound Rules section, you’ll see our rules that have been applied
Request a Quote
Please fill out the form, and one of our representatives will contact you in Less Than 24 Hours. We are open from Monday to Friday.
Never share sensitive information (credit card numbers, social security numbers, passwords) through this form.
Request Sent
Thank you for subscribing to our newsletter or requesting a quote.
You will receive our next month's newsletter. If you have requested a quote, we will get in touch with you as soon as possible.
Comment Sent
Thank for your reply!
Error
Something went wrong!
We use cookies to ensure that we give you the best experience on our website. If you continue to use this site we will assume that you are accepting it.


Thank for your reply!