Download and own this SCCM Installation Guide in a single PDF file.
The PDF file is a 162 pages document that contains all informations to install and configure SCCM Current Branch. Use our products page or use the button below to download it .
SCCM Current Branch Installation – Prerequisite Check
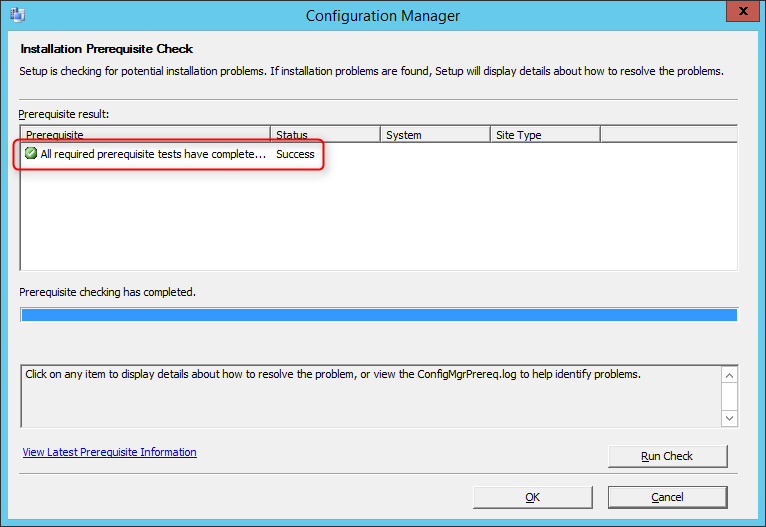
Before launching the SCCM installation, we recommend launching the Prereqchk tool in order to verify if all components are configured correctly. The SCCM installation wizard will also run this check but if you’re missing a requirement, you’ll have to go through the whole installation wizard again after fixing it. We prefer to use the standalone tool before running the setup.
To start the prerequisite check tool :
Open an Administrator command prompt
Browse to .\SMSSETUP\BIN\X64
Run the following command: Prereqchk.exe /AdminUI
If you follow the prerequisite guide correctly you’ll have this result :
Refer to this Technet article to see the list of all checks done by the tool.
If you have any warning or error refer to this Technet article in order to resolve it, or go thought part 1 and part 2 of this guide.
New SCCM Installation
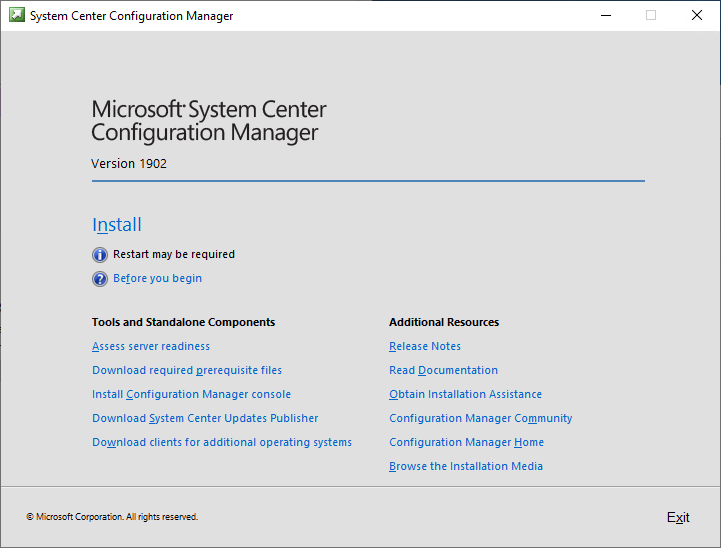
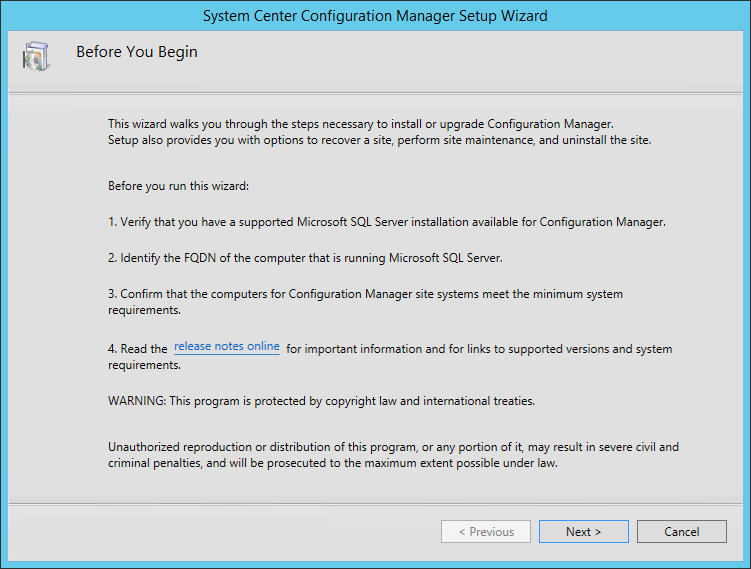
We are finally ready to launch the setup. First, reboot the server. This will make sure that the machine is not in a Reboot pending state.
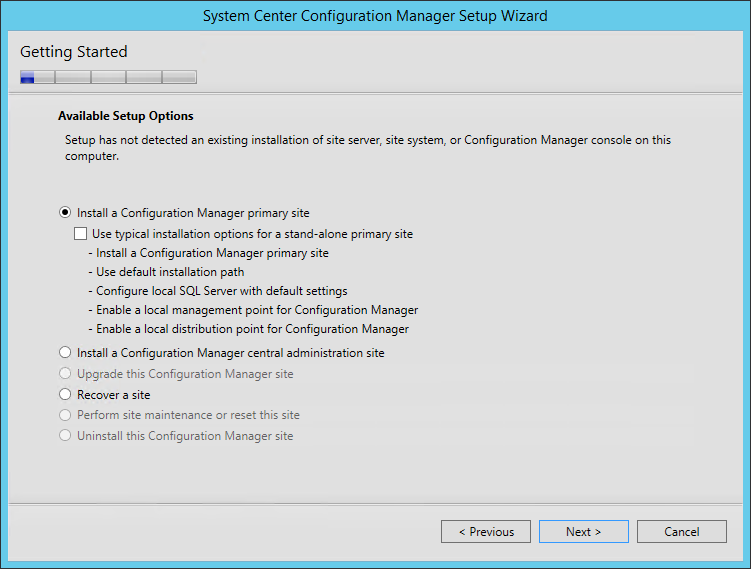
On the Getting Started screen, Select Install a Configuration Manager Primary Site and click Next
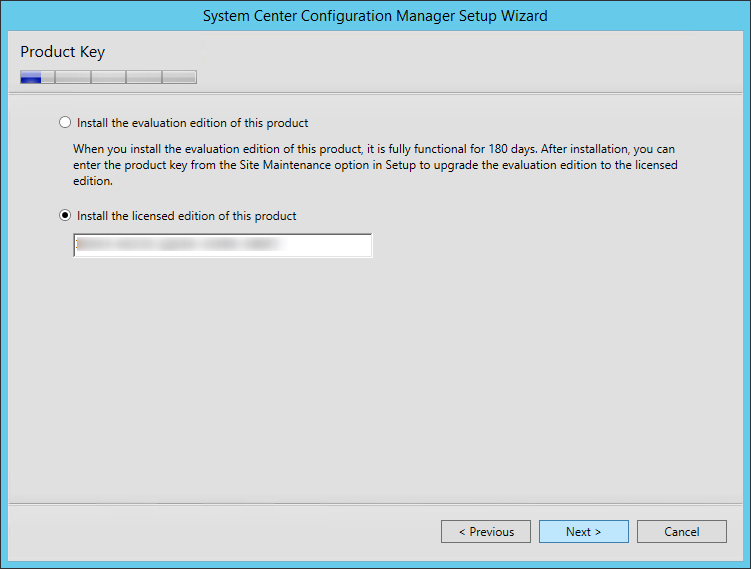
On the Product Key screen, enter it and click Next
On the Microsoft Software License Terms screen, accept the terms and click Next
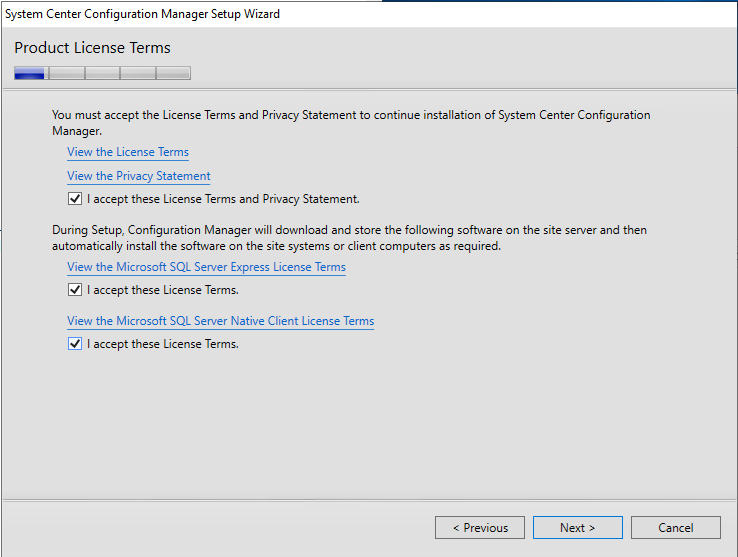
On the Product License Terms screen, accept the License Terms and click Next
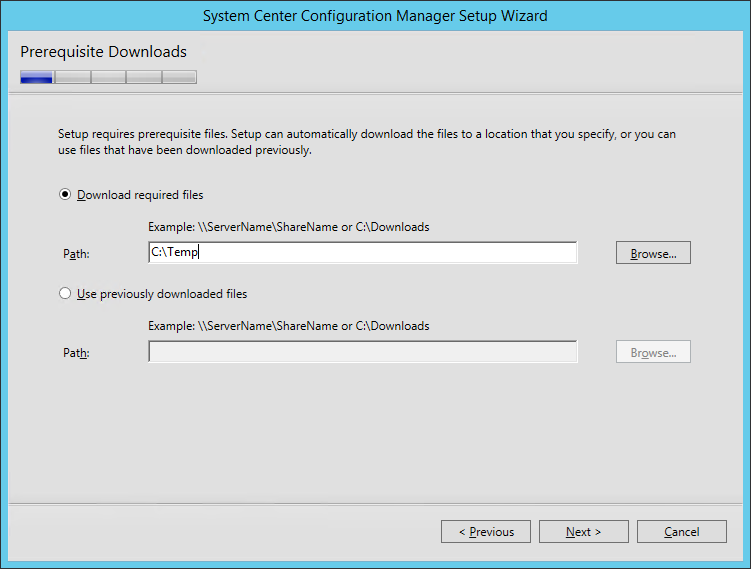
On the Prerequisite Downloads screen, specify a location to download the prerequisite file. This folder can be deleted after setup
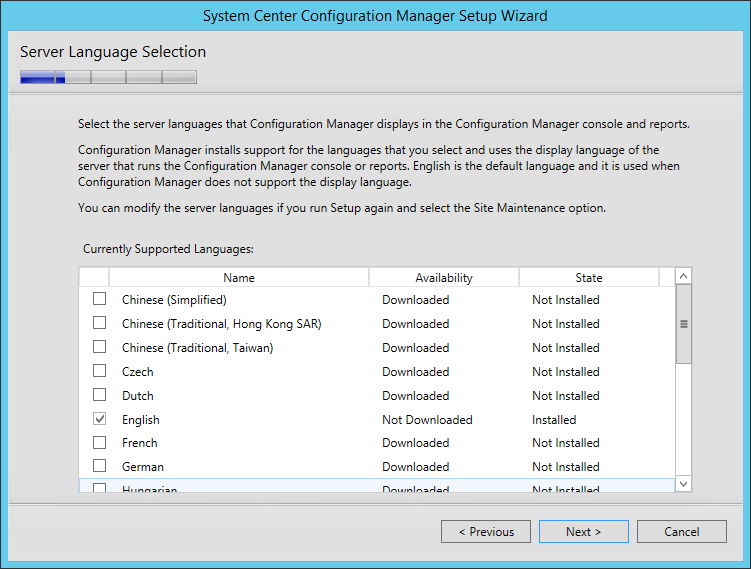
On the Server Language Selection screen, select the language you want to display in the SCCM Console and Reports. You can modify language later by running setup again and select the Site Maintenance option
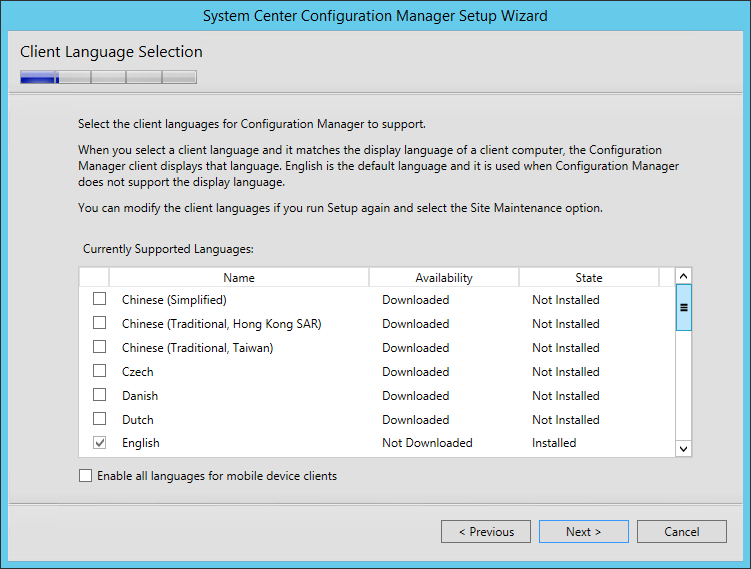
On the Client Language Selection screen, select the Client language to support. You can modify languages later by running setup again and select the Site Maintenance option
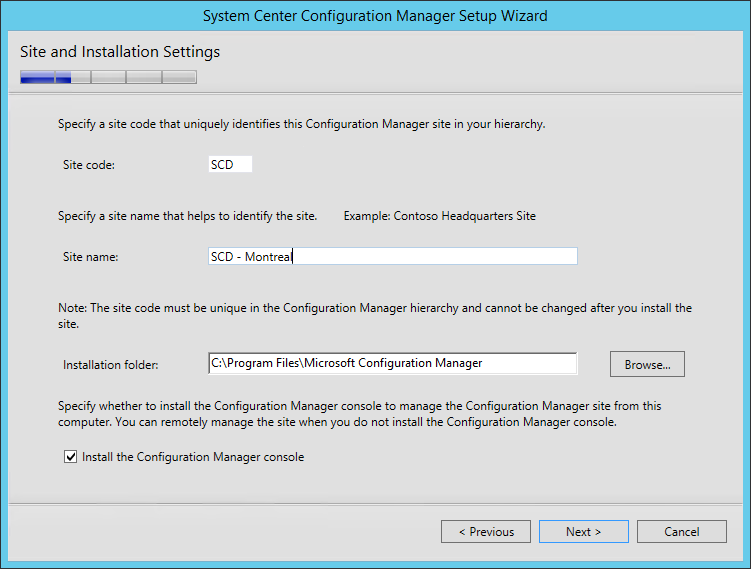
On the Site and Installation Settings screen, enter your Site Code. Use the same Site Code as you specified when creating your Database
Note : Site codes cannot be used more than one time in a Configuration Manager hierarchy for a central administration site or primary sites. If you reuse a site code, you run the risk of having object ID conflicts in your Configuration Manager hierarchy. This applies also if you’re doing a migration from an earlier version.
Enter your Site Name. This name will appear in the console so choose accordingly
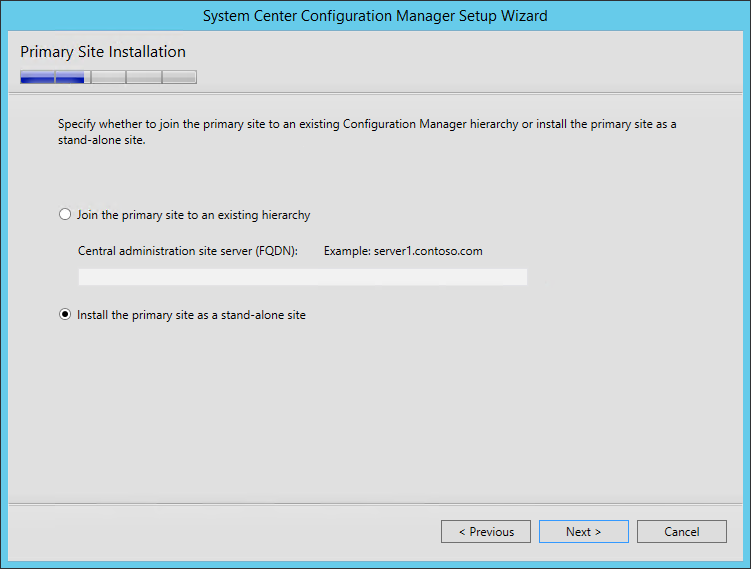
On the Primary Site Installation screen, select Install the primary site as a stand-alone site. If you have a Central Administration site, this is where you would join the Primary Site to the existing hierarchy
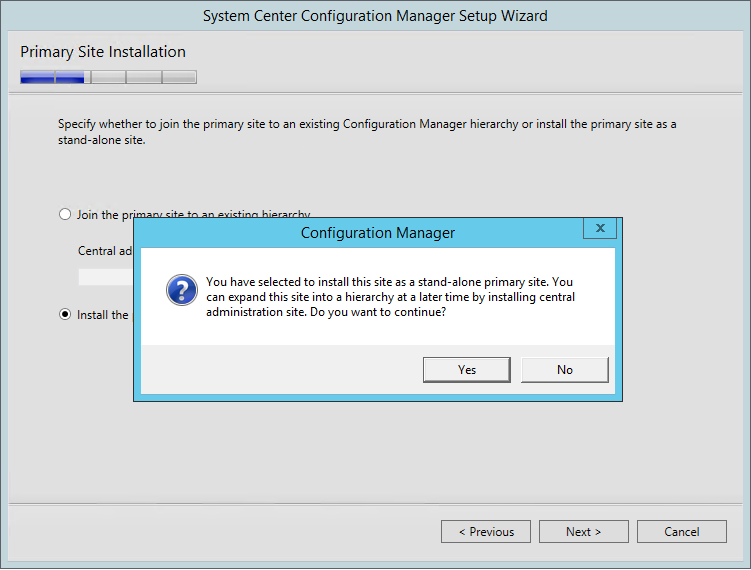
On the warning, click Yes
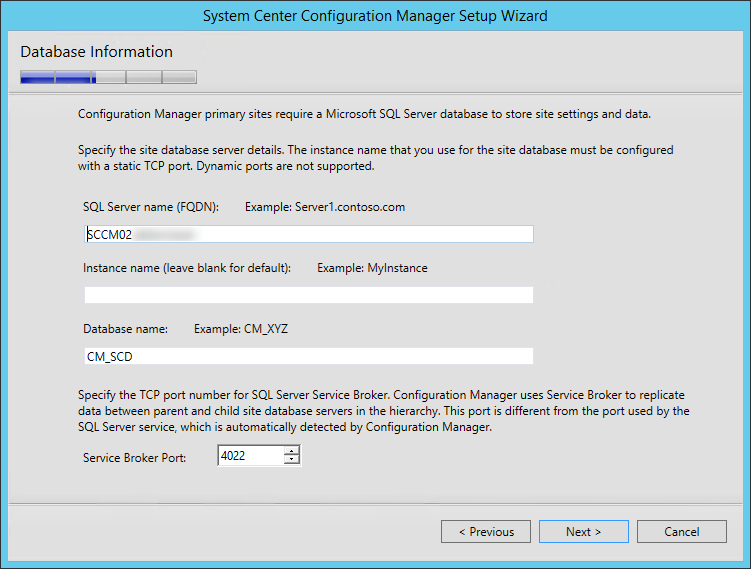
On the Database Information screen
Enter your SQL Server Name. In our case the SQL server is the same box as SCCM
Leave the Instance Blank
Enter your Database name. Once again, this must match the previously created Database in part 2
Leave the Service Broker Port to 4022
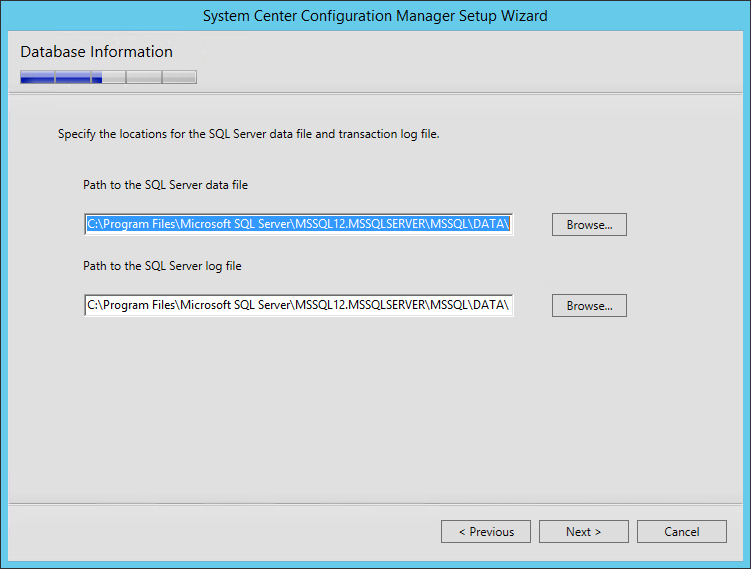
On the Database Information screen :
Enter the path to the SQL Server data file. Locate this on the SQL Volume
Enter the path to the SQL Server log file. Locate this on the SQL Logs Volume.
I like to use the same directory where I created my database and logs (E:\SCCMDB, G:\SCCMLogs)
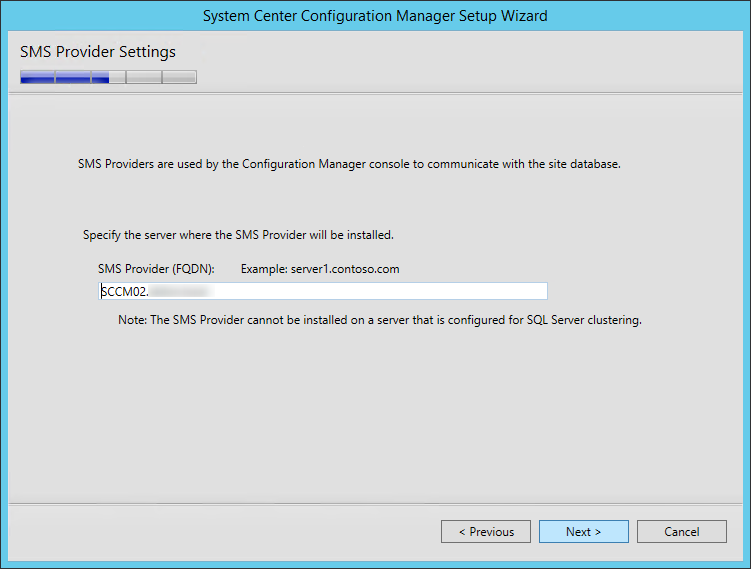
On the SMS Provider Settings screen, leave the SMS Provider to the default value which is the local server. Refer to the following Technet article to read about the SMS Provider.
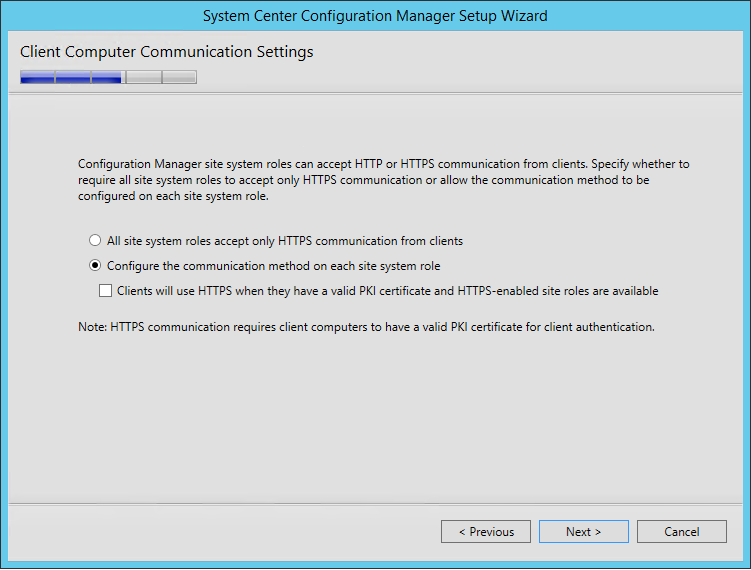
On the Client Computer Communication Settings screen, select Configure the communication method on each site system role. This is where you select to have HTTPS or not on your initial Management Point and Distribution Point. This setting can be changed later
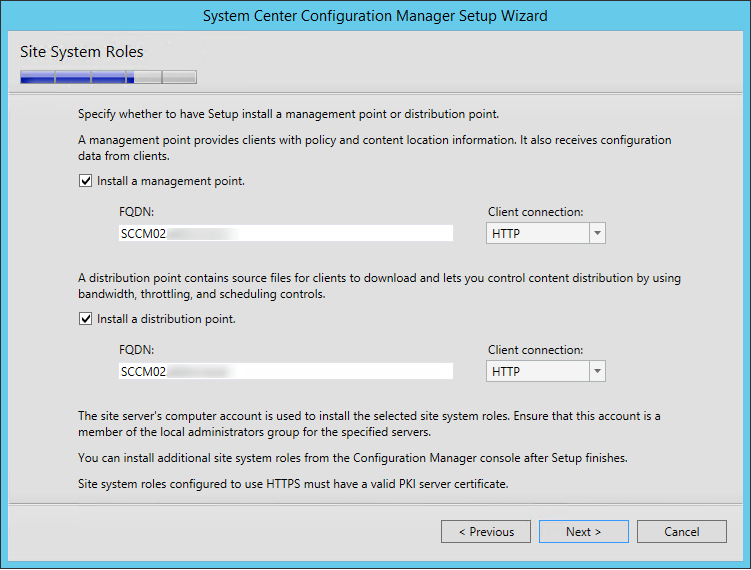
On the Site System Roles screen :
Check Install a Management Point
Check Install a Distribution Point
We will install both MP and DP on the same box so leave the FQDN as is
The Client connection drop-down is unavailable due to our previous selection
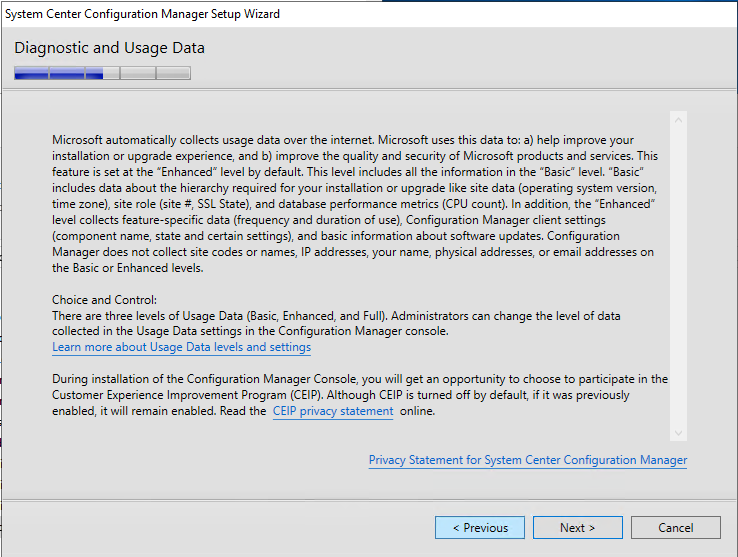
On the Usage Data screen, click Next. This new screen basically tells that you accept that you will send some telemetry data to Microsoft
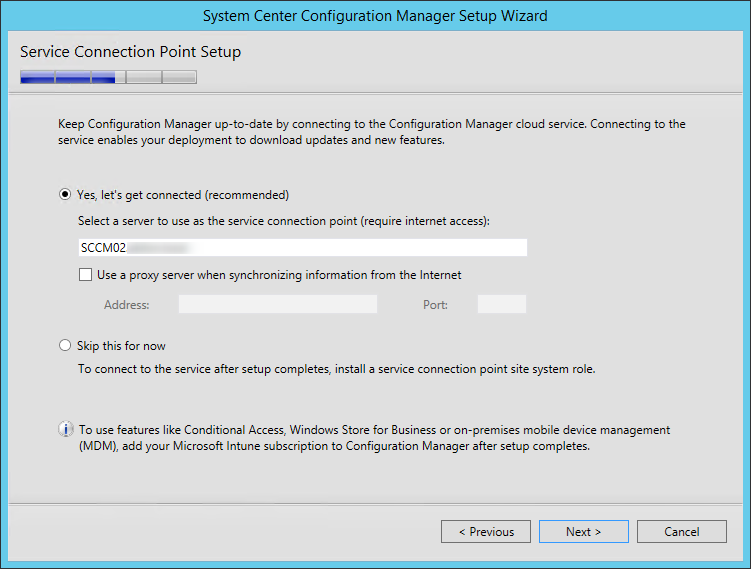
On the Service Connection Point screen, click Next. This new role enables your deployment to download updates and new features
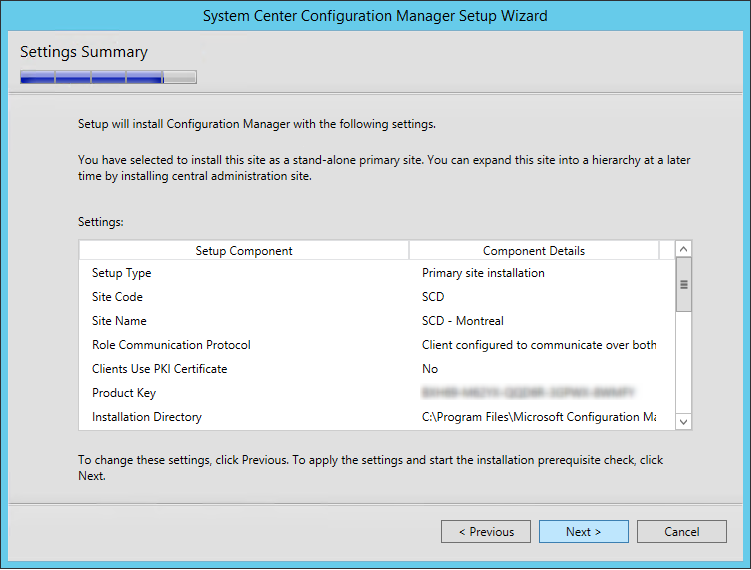
On the Settings Summary Screen, review your options and click Next
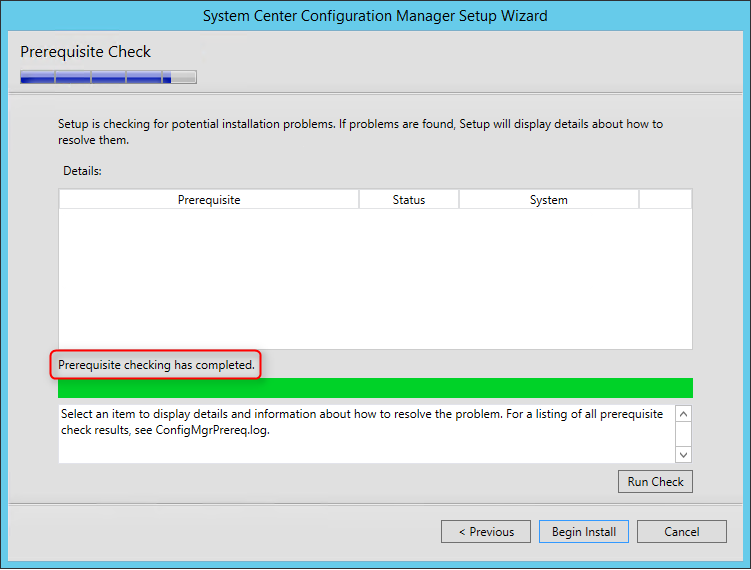
On the Prerequisite Check screen, you should have no error since you’ve run it before setup, click Next
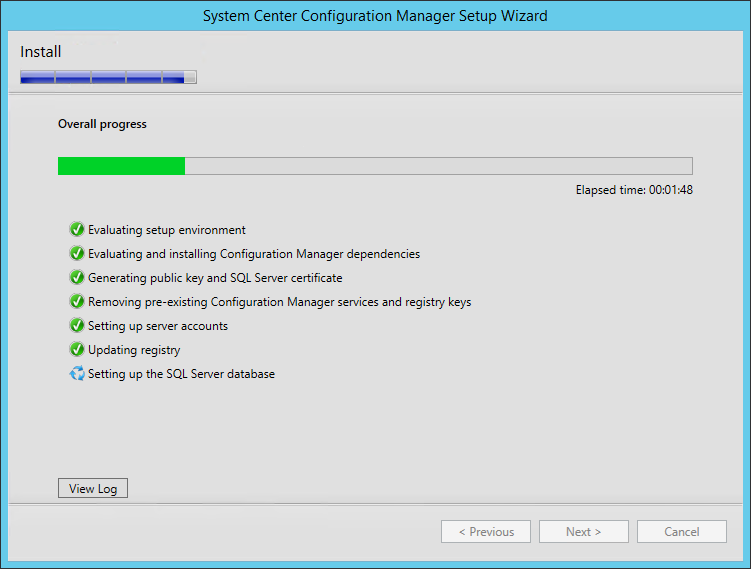
The installation is in progress. You can count between 15 and 30 minutes depending of your server specifications
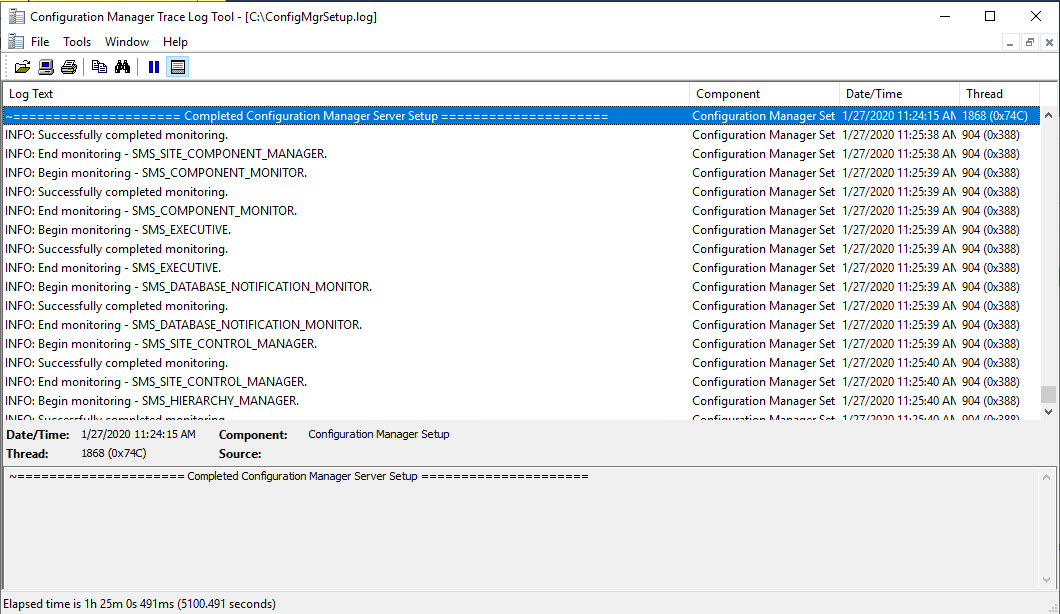
You can follow the progress by clicking the View Log button or open the ConfigMgrSetup.log file on the C: drive
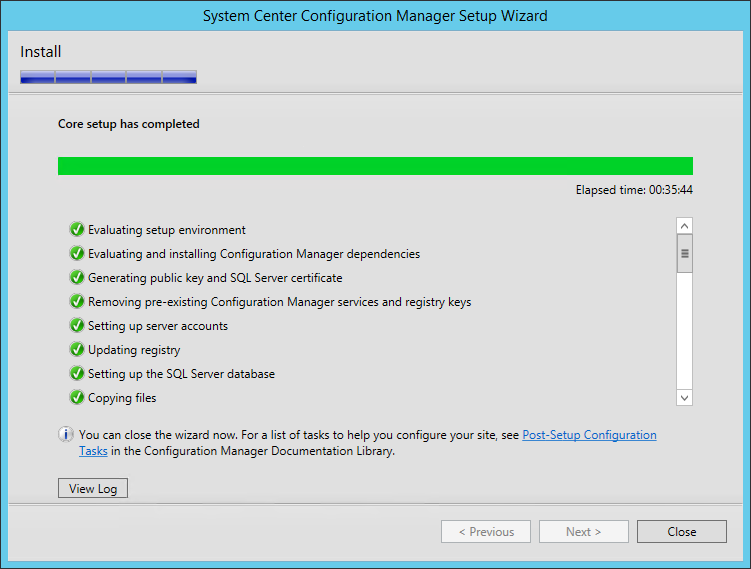
Wait for Core setup has completed and close the wizard
We’re still not done yet ! Before opening the SCCM console, we suggest to install the following tools :
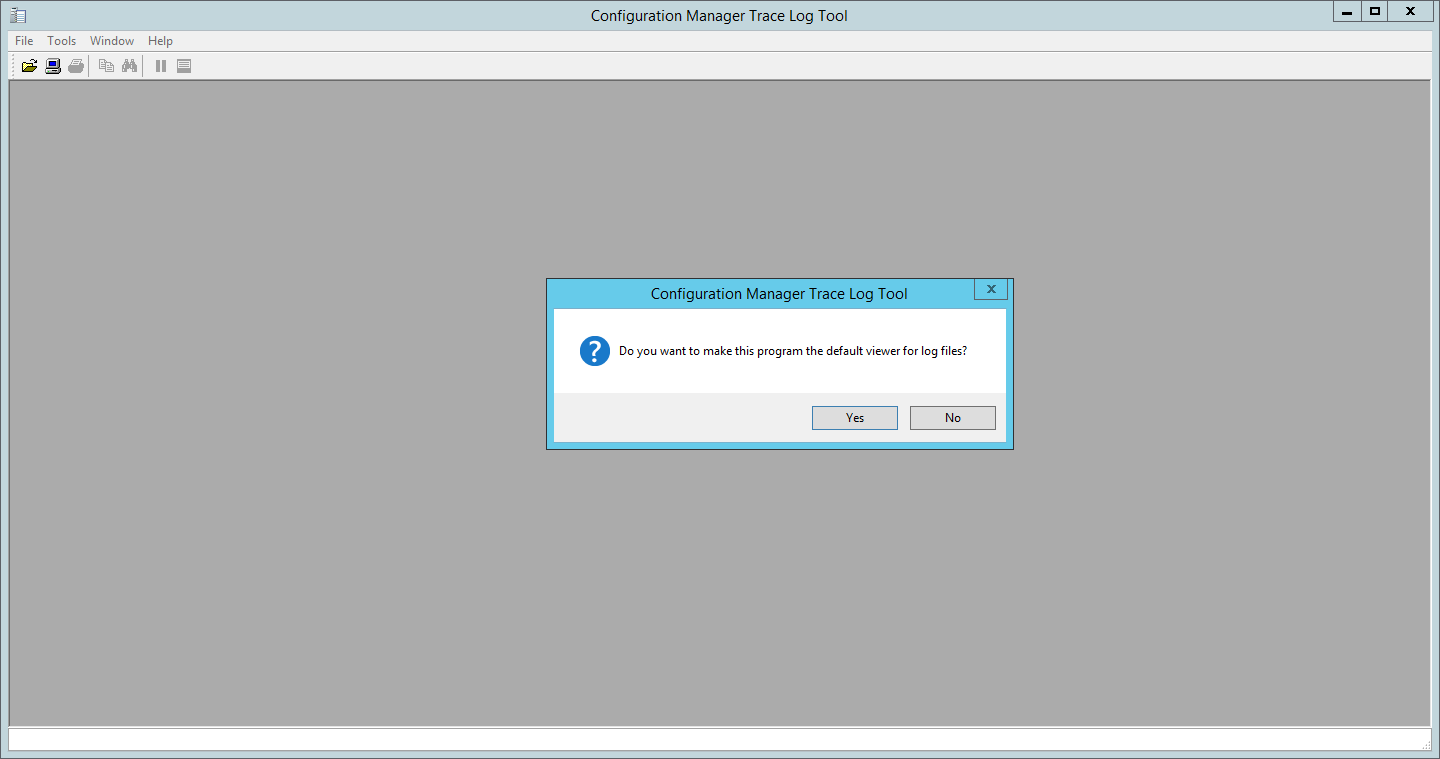
CMTrace
CMTrace will become your best friend when reading log files.
SCCM Current Branch Installation Extra Information
You can also refer to our blog post about Useful Resources to help you begin with SCCM. If you need further help to understand and configure various SCCM site components, consult our Step-by-Step SCCM 1511 Installation Guide blog series. It covers all you need to know.
SCCM Current Branch Configuration
If you need help configuring your new SCCM installation, refer to our complete blog post on this topic.
Request a Quote
Please fill out the form, and one of our representatives will contact you in Less Than 24 Hours. We are open from Monday to Friday.
Never share sensitive information (credit card numbers, social security numbers, passwords) through this form.
Request Sent
Thank you for subscribing to our newsletter or requesting a quote.
You will receive our next month's newsletter. If you have requested a quote, we will get in touch with you as soon as possible.
Comment Sent
Thank for your reply!
Error
Something went wrong!
We use cookies to ensure that we give you the best experience on our website. If you continue to use this site we will assume that you are happy with it.





Thank for your reply!