

Configure Windows Update for Business Reporting
SCD Consultant, Contributor. Specialized in Microsoft Endpoint Manager (SCCM, InTune), Windows Autopilot, Windows10 (11) and Office365 Deployment and maintenance.

Marc-Andre Chartrand
Table of Content


Share


Get the latest insights and exclusive content delivered to your inbox
As many enterprises are leaning towards cloud-driven technologies, Windows Update for Business (WUfB) integrated within Intune is gaining a lot of traction. There seems to be only one caveat with it, and it’s the level of reporting available in Intune for Updates compliance. While you can see the status of your expedited quality and Feature updates from the Intune portal, there’s no report for the regular monthly Cumulative Updates compliance. Thankfully, there is a Solution that resides within the Azure portal that leverages Log Analytics Workspaces (LAW). It requires a little setup, but you should be able to implement it easily following this guide. This blog post will show all the steps needed to Configure Windows Update for Business Reporting.
Windows Update for Business Reporting Limitations
- Doesn’t support Azure AD (Entra ID) Registered devices. The devices must be (Hybrid) Azure AD Joined
- Insider update channels will give compliance counts, but no details.
- Doesn’t support Windows Server, Surface Hubs, IoT.
Prerequisites
- An Azure subscription
- Note that even if a subscription is required, Microsoft states that there’s no additional charge for ingesting the telemetry data used for these reports.
- Your devices need to be (Hybrid) Azure AD Joined
- Devices need to be running Windows 10/11 Pro, Education, Enterprise, or Enterprise Multi-Session
- An Intune tenant (but you wouldn’t be here without one, right?)
- If you have a Proxy or Firewall, some URLs to allow through:
To do the setup, you will need an account with at the very least “Windows Update Deployment administrator” as an Azure role. Intune Administrator will do as well, and if you have an all-mighty Global Admin then you’re in business!
To view the configured report, the accounts will need at least Reader role in LAW permissions.
Creating a Log Analytics Workspace
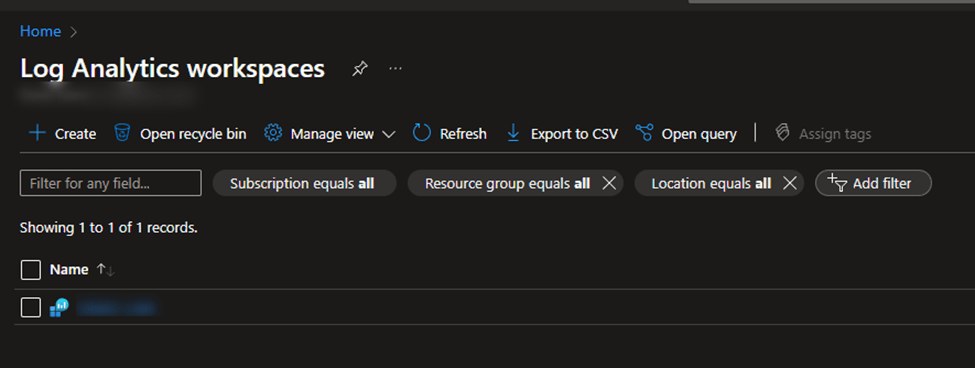
First, we’ll set up a Log Analytics Workspace. You can use an existing workspace, or create a new one. In this example, we’ll create one.
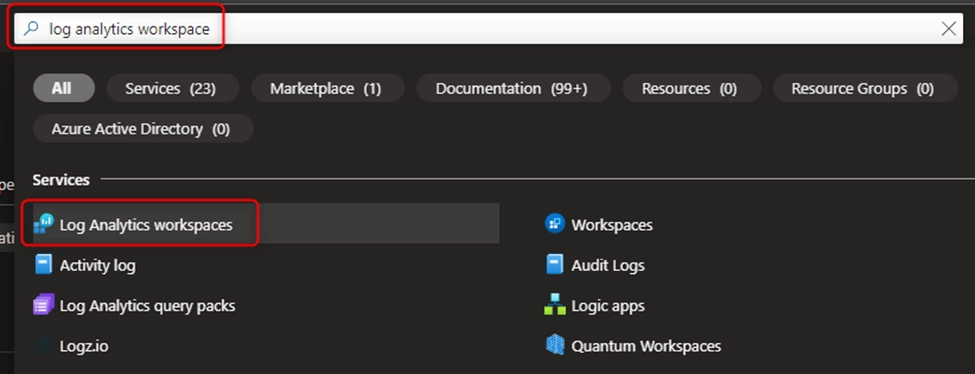
- Go to Portal.Azure.com
- In the search bar at the top, type (or copy) log analytics workspace.
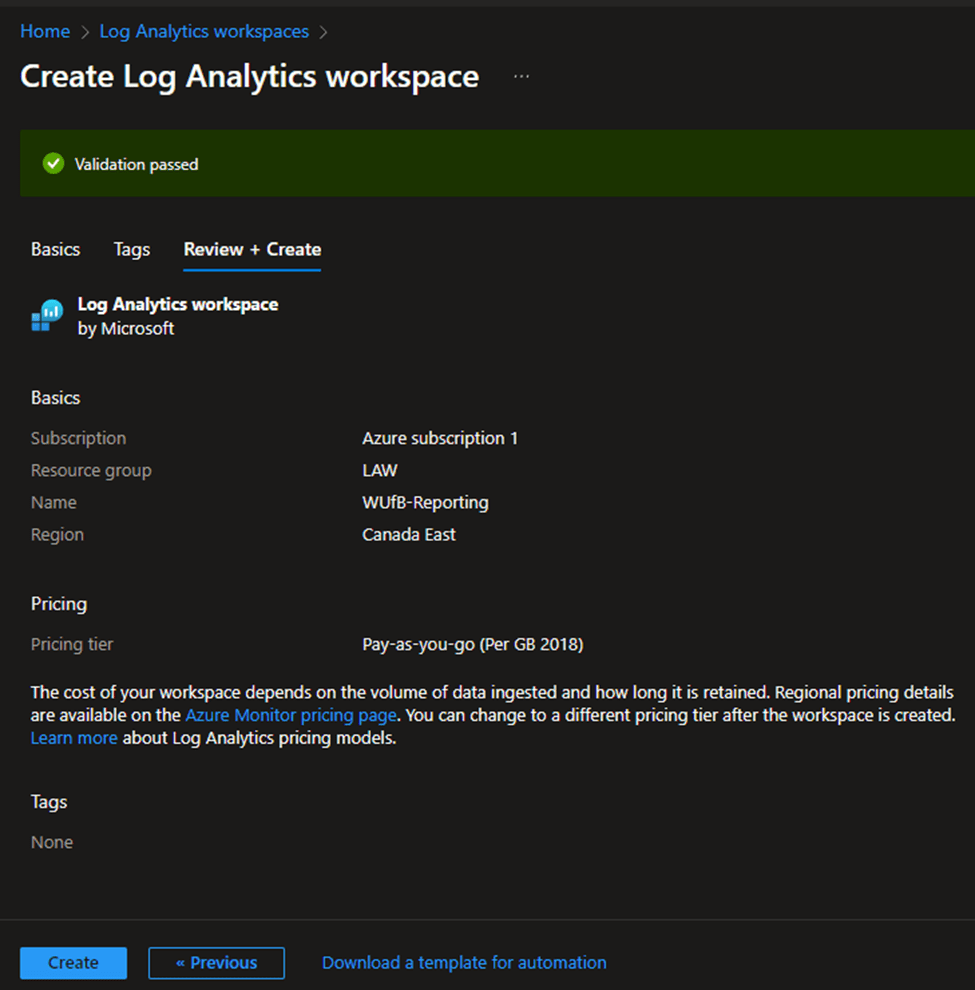
- Click Create
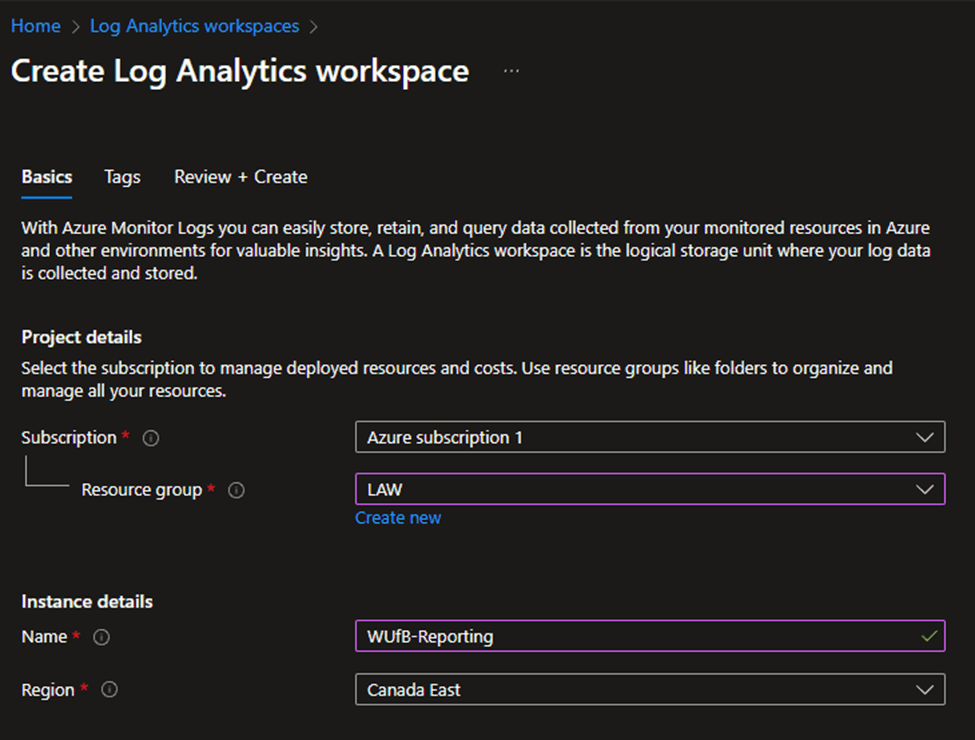
- Pick the subscription that you want to assign this workspace to
- Assign (or create) a Resource Group that will be used to host the workspace
- Name your Workspace
- Select the region where you want to host it
- CAREFUL! Not all regions listed here are actually supported. Refer to Microsoft’s list of regions supported by WUfB reports
Enrolling for Windows Update for Business
Now that we have a workspace to host our Data, we can create the Windows Update for Business Reporting workbook.
- From the main menu bar to the left of the Azure portal, click on Monitor
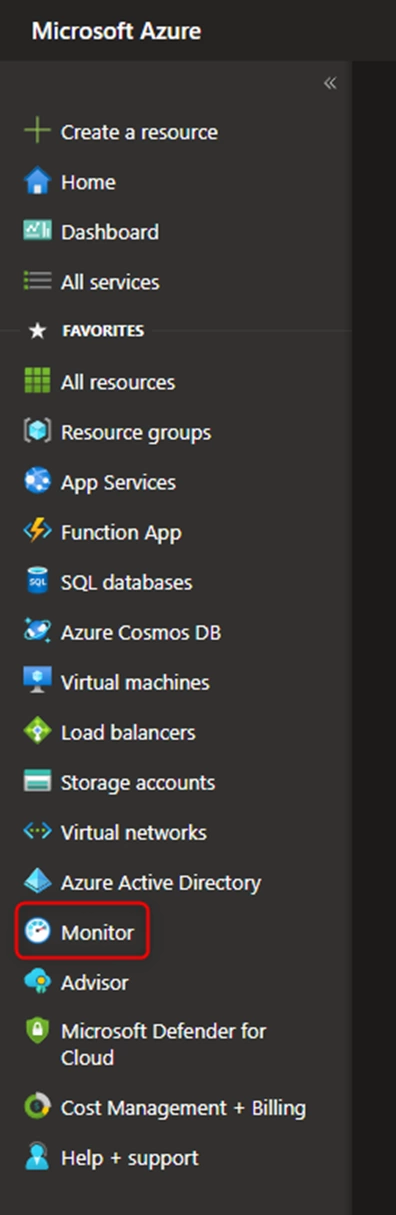
- Click on Workbooks
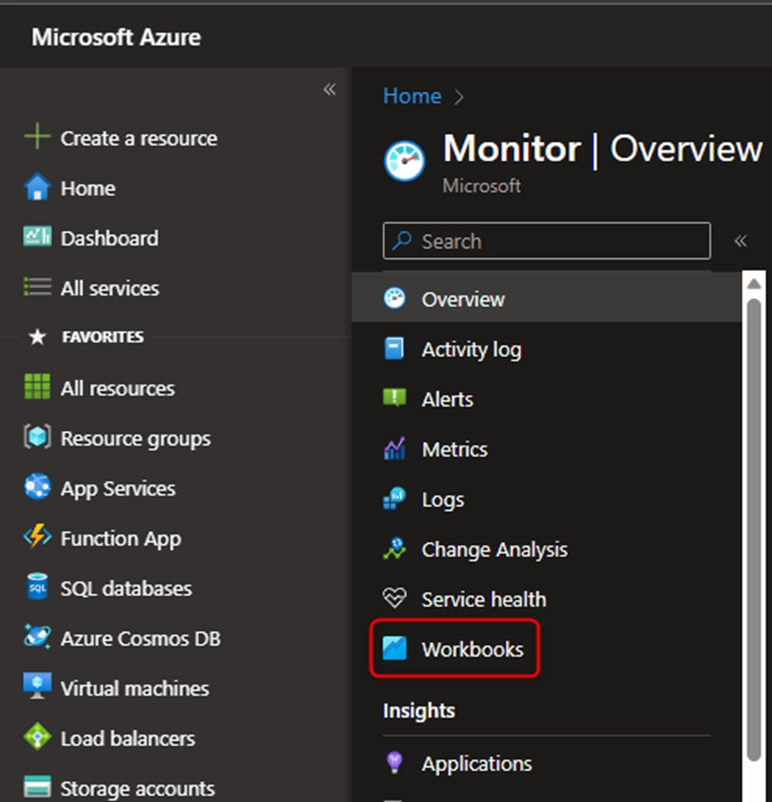
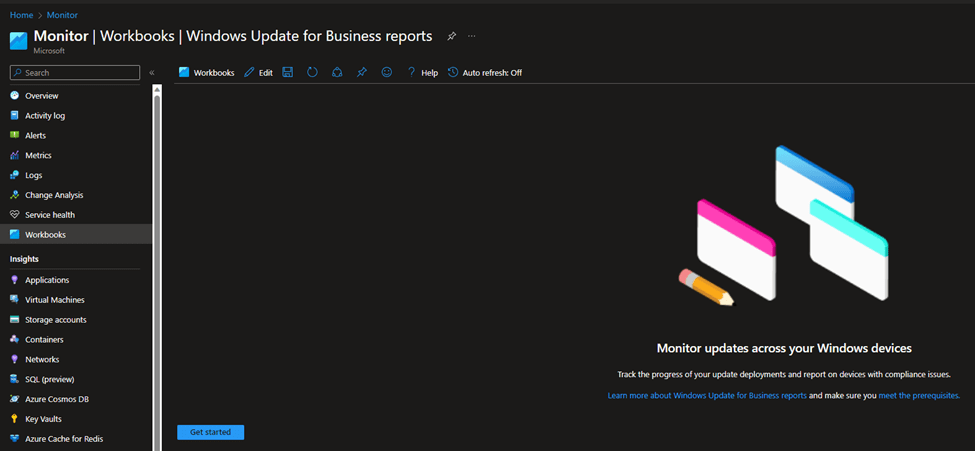
- All the way down, under the Insights Category, you’ll find Windows Update for Business

- Click the Get Started blue button
- Select the Subscription, and Log Analytics Workspace that we created earlier, then click Save Settings
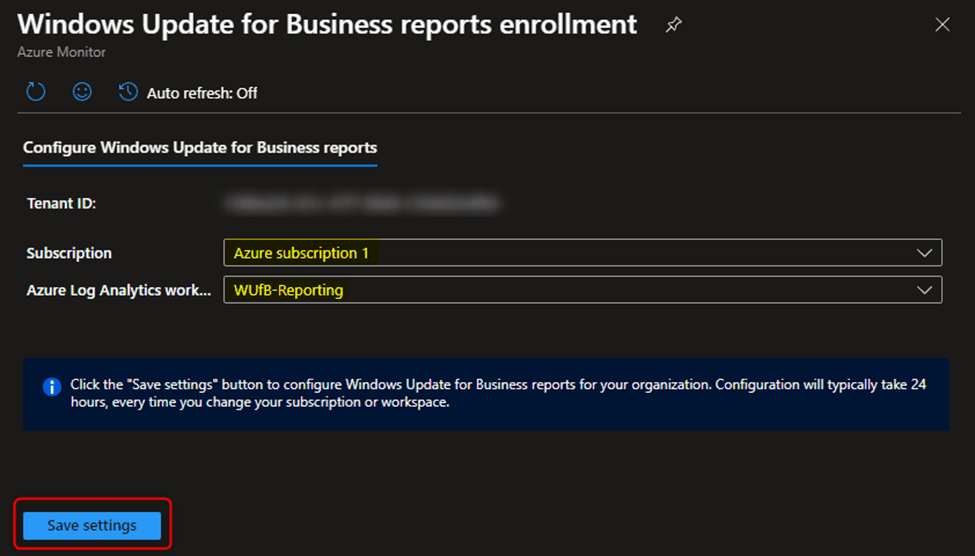
- IMPORTANT: Click Save again to confirm the presented settings are correct
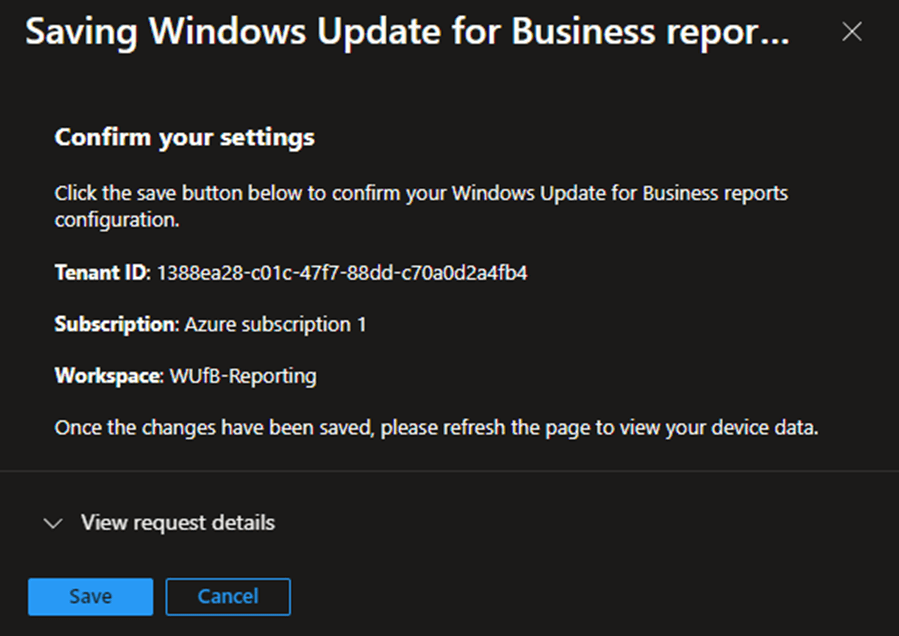
If you get a 403 error at this point, it’s because the account you used did not have the required permissions to enroll. Go back to the prerequisites section and ensure you have
Now you need to wait about 24 hours for the workspace to process its creation.
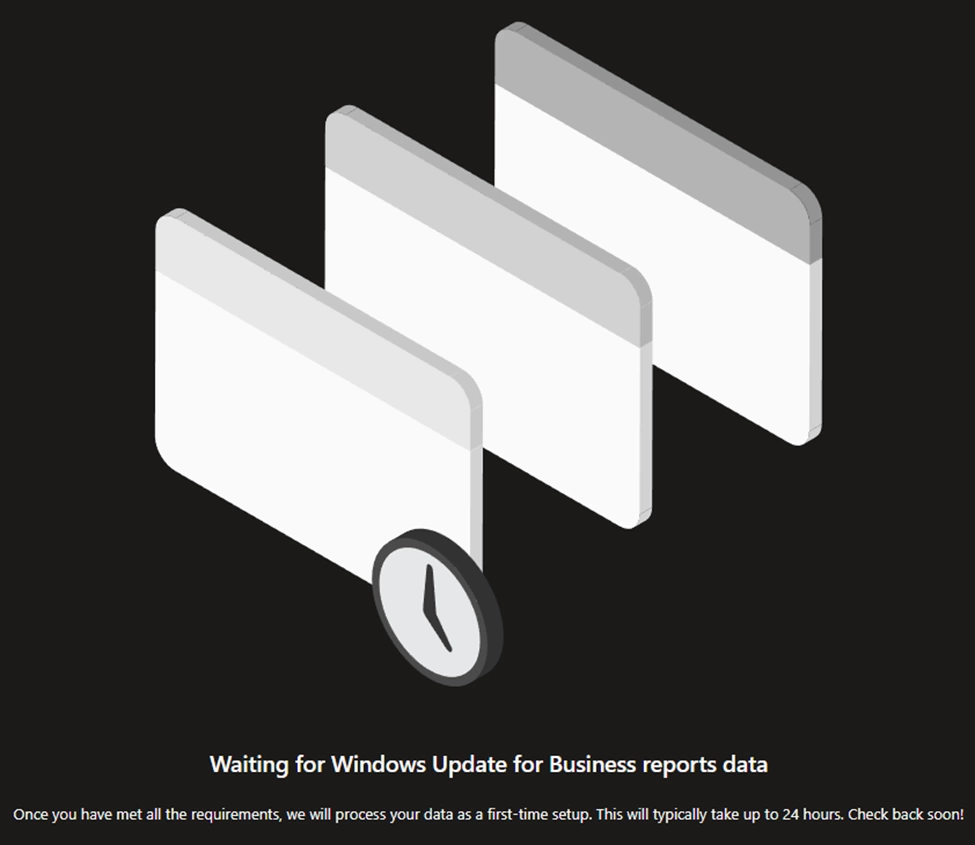
Important note on that: While the workbook can be available within 24 hours, the data that comes from the PCs may take from 72 hours up to 2 weeks according to Microsoft, depending on how frequently and for how long the PCs are online.
One detail: We haven’t configured the data gathering on the Workstations yet! Let’s get on that.
Configuring Telemetry settings for Windows Workstations
For this part, we need to go to the Intune portal and setup a Configuration Profile.
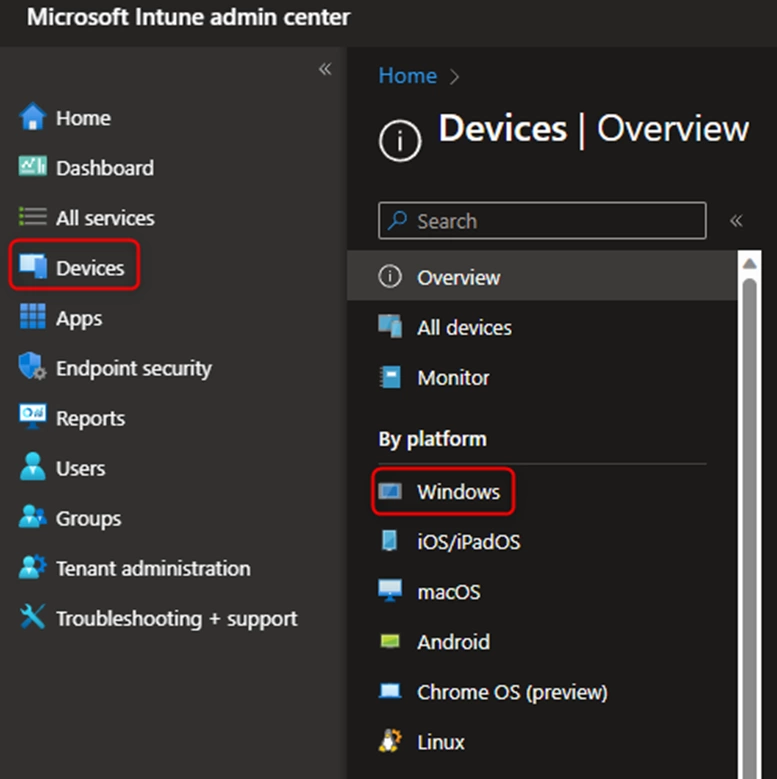
- Go to Endpoint.Microsoft.com to open the Intune portal
- Click on Devices->Windows
- Click on Configuration Profiles
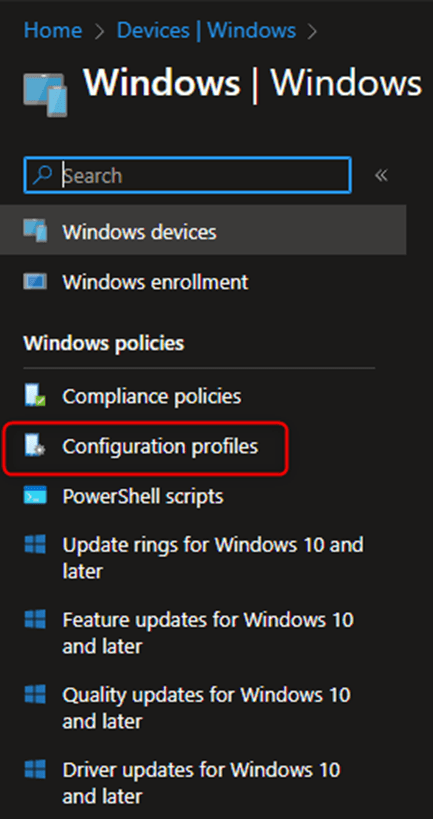
- Create (or edit) a profile for Windows Telemetry:
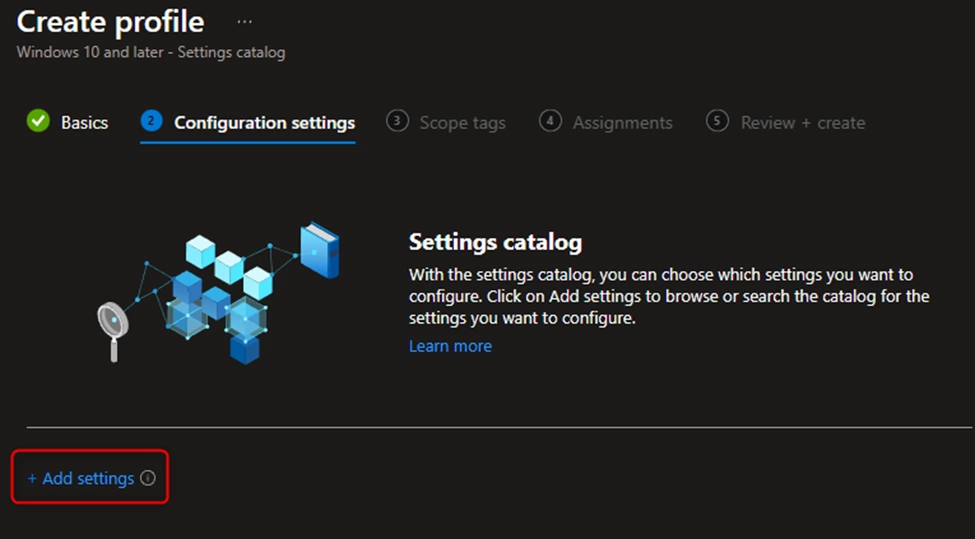
- Click on Create Profile
- Select Platform (Windows 10 and later)
- Select Profile type (Settings Catalog)

- Name your profile according to your naming convention, click next
- Click Add Settings
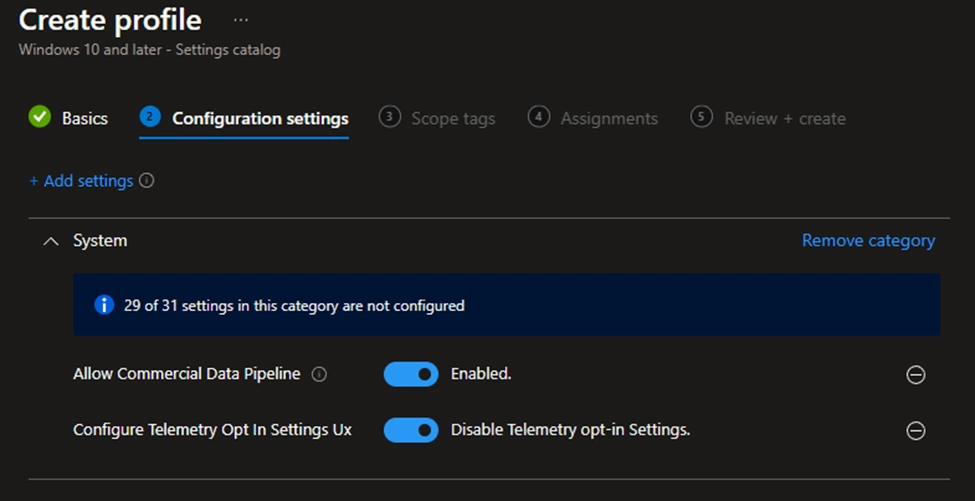
- in the search bar, look and add the following settings:
- Allow Telemetry
- Needs to be set to at least “Basic” for the report to work
- (Optional) Configure Telemetry Opt In Settings Ux
- Value = Disabled
- This prevents users from altering the telemetry settings in a way that could make the WUfB report unusable
- Value = Disabled
- (Optional) Configure Telemetry Opt In Change Notification
- Value = Disabled
- This disables the notifications to the users saying their telemetry settings have been changed
- Value = Disabled
- (Optional) Allow device name to be sent in Windows diagnostic data
- Value = Allowed
- If you want to have the PC names of devices with missing updates, this is a no-brainer. Microsoft makes this optional and disabled by default due to confidentiality concerns.
- Value = Allowed
- Allow Telemetry
- Click next, assign any relevant tags, Next again
- Assign the policy to all groups that have WUfB policies deployed to, Click Next
- Review settings and click Create
You’re done! If all goes well, PCs will start sending telemetry data to Azure into your LAW, and WUfB reporting will get moving!
24 hours later…
Well, technically it took 48 hours in my lab for the dashboard to appear, but it’s here! Let’s have a look at our WUfB report. We’ll go back to our WUfB Workbook that we initiated earlier:
- From the main menu bar to the left of the Azure portal, click on Monitor
- Click on Workbooks
- All the way down, under the Insights Category, you’ll find “Windows Update for Business”
If you click on the Quality Updates tab, you can have a breakdown of the installation status of every deployed KBs, and if you click on Device Status, you’ll have it broken down by PC.
Windows Update for Business Reporting Troubleshooting
If you seem to have issues collecting data from the endpoints or don’t see anything in log analytics after some time, Microsoft provided a script that you can use to enforce and diagnose the telemetry settings.
It basically sets all the registry values manually (which will then be overwritten by GPO or Intune Policy), tries to establish the connection to the different URLs for output, and will give you a return code based on the result as well as a verbose log. The script and all the details can be found here.
Note that the script used psexec to run tasks as local system, which could be blocked by some security tools in your environment.
Share
Get the latest insights and exclusive content delivered to your inbox


Only authorized users can leave comments
Log In