

Windows 10 Deployment | SCCM Task Sequence Upgrade Windows 7 to Windows 10
Founder of System Center Dudes. Based in Montreal, Canada, Senior Microsoft SCCM Consultant, 8 times Enterprise Mobility MVP. Working in the industry since 1999. His specialization is designing, deploying and configuring SCCM, mass deployment of Windows operating systems, Office 365 and Intune deployments.

Benoit Lecours
PresidentTable of Content
- When to use Windows 7 In-Place Upgrade Scenario ?
- Possible Upgrade Path when using SCCM Windows 7 Task Sequence Upgrade
- Requirements
- Understanding the In-Place Upgrade Process
- Create SCCM Task Sequence Upgrade Windows 7 to Windows 10
- Edit the SCCM Task Sequence Upgrade
- Deploy the SCCM Windows 7 Upgrade Task Sequence
- Launch the Upgrade Process


Get the latest insights and exclusive content delivered to your inbox
Share


In the fourth post of this blog series about Windows 10 Deployment using SCCM, we will show you how to upgrade a Windows 7 to Windows computer 10 using SCCM task sequence upgrade.
The goal of an upgrade task sequence is to upgrade an existing operating system to Windows 10 without loosing any data and installed software. This post assumes that you are running SCCM 1511 or SCCM 1602 and that you completed the preparation of your environment for Windows 10.
If you are running SCCM 2012 R2 SP1, the product team has release important information about SCCM task sequence upgrade that you can find in this blog post.
In the past, an in-place upgrade scenario was not a reliable and popular option to deploy the latest version of Windows. With Windows 10, it’s now reliable and features an automatic rollback in case something goes wrong. This scenario can also be considered faster than the wipe and reload deployment scenarios, since applications and drivers don’t need to be reinstalled.
When to use Windows 7 In-Place Upgrade Scenario ?
Consider using SCCM upgrade task sequence if :
- You need to keep all existing applications and settings on a device
- You need to migrate Windows 10 to a later Windows 10 release (ex: 1511 to 1607)
- You don’t need to change the system architecture (32 bits to 64 bits)
- You don’t need to change the operating system base language
- You don’t need to downgrade a SKU (Enterprise to Pro). The only supported path is Pro to Enterprise or Enterprise to Enterprise)
- You don’t need to change the BIOS architecture from legacy to UEFI
- You don’t have multi-boot configuration
Windows 10 is now managed as a service, this upgrade process can also be used to migrate Windows 10 to a later Windows 10 release or you can use the new Windows 10 servicing feature in SCCM 1602 and later.
Possible Upgrade Path when using SCCM Windows 7 Task Sequence Upgrade
- Windows 7, Windows 8 and Windows 8.1 can use this method to upgrade to Windows 10
- You can’t upgrade a Windows XP or Windows Vista computer to Windows 10
- Windows 10 is the only final destination OS (You can’t upgrade a Windows 7 to Windows 8.1 using this method)
Requirements
- As stated in the start of this blog post, you need at least SCCM 2012 R2 SP1 (or SCCM 2012 SP2) to support the upgrade task sequence
- You cannot use a custom image for this scenario, you must start from the original WIM from the Windows 10 media
[su_box title=”Device using disk encryption” style=”glass” title_color=”#F0F0F0″]Devices using Bitlocker can be upgraded to Windows 10 using this method. If you are using third-party disk encryption product, it can be done but you need far more effort.[/su_box]
Three major vendors have supported workarounds documented on their support sites :
Understanding the In-Place Upgrade Process
If you want to understand all the phases in the upgrade process, we strongly recommend watching the Upgrading to Windows 10: In Depth video from the last Microsoft Ignite event.
Create SCCM Task Sequence Upgrade Windows 7 to Windows 10
Enough writing, let’s create a SCCM task sequence upgrade for a Windows 7 deployment.
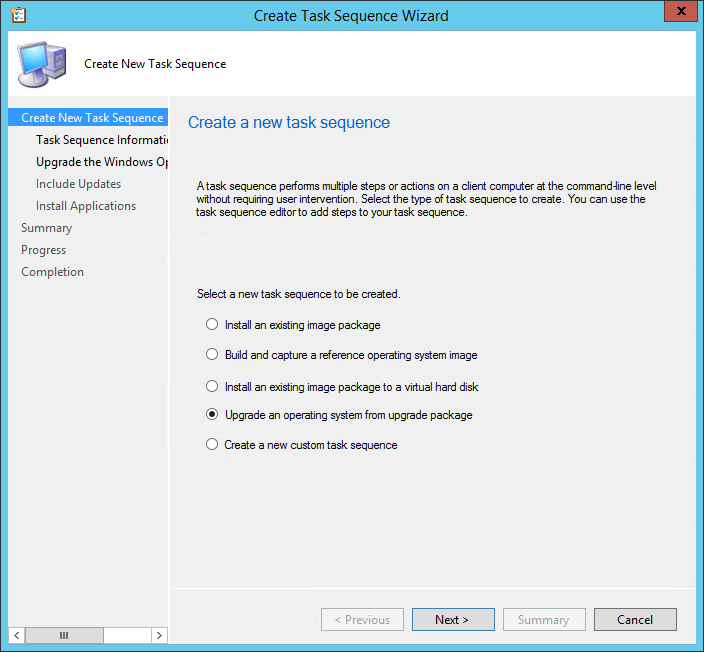
- Open the SCCM Console
- Go to Software Library \ Operating Systems \ Task Sequences
- Right-click Task Sequences and select Upgrade an operating system from upgrade package
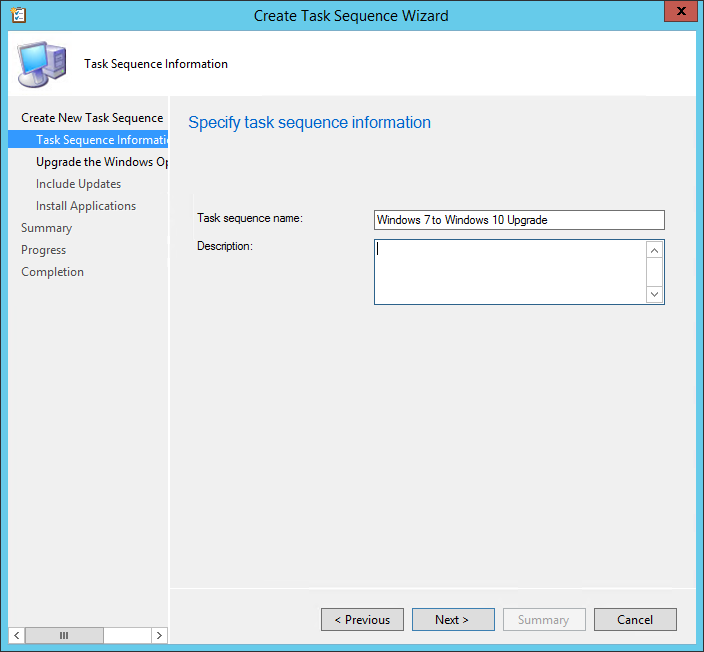
- In the Task Sequence Information tab, enter a Task Sequence Name and Description
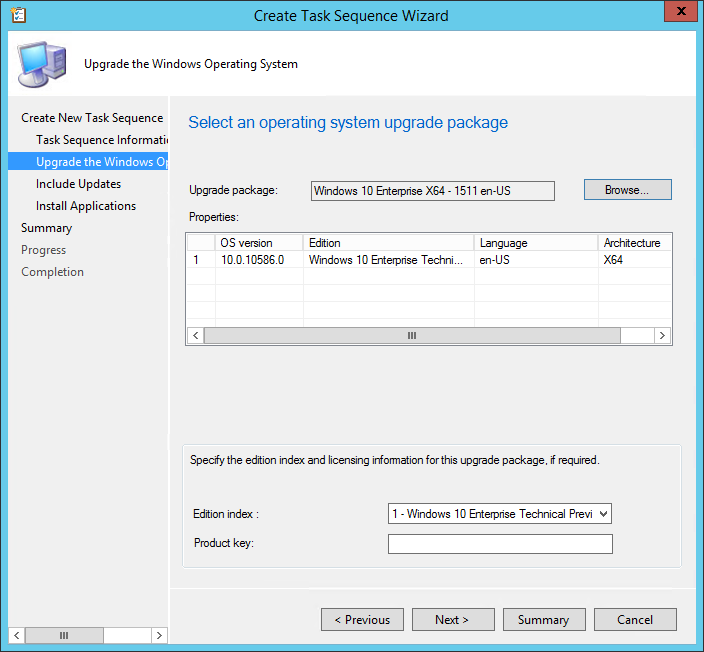
- On the Upgrade the Windows Operating System tab, select your upgrade package by using the Browse button. If you don’t have imported an upgrade package yet, use the step provided in our preparation blog post
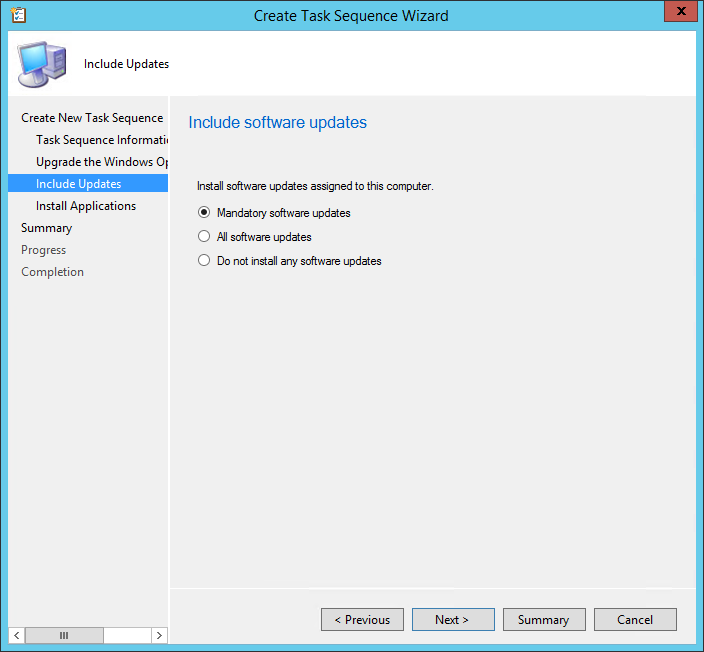
- On the Include Updates tab, select the desired Software Update task
- All Software Updates will install the updates regardless of whether there is a deadline set on the deployment (on your OSD collection)
- Mandatory Software Updates will only install updates from deployments that have a scheduled deadline (on your OSD collection)
- Do not install any software updates will not install any software update during the Task Sequence
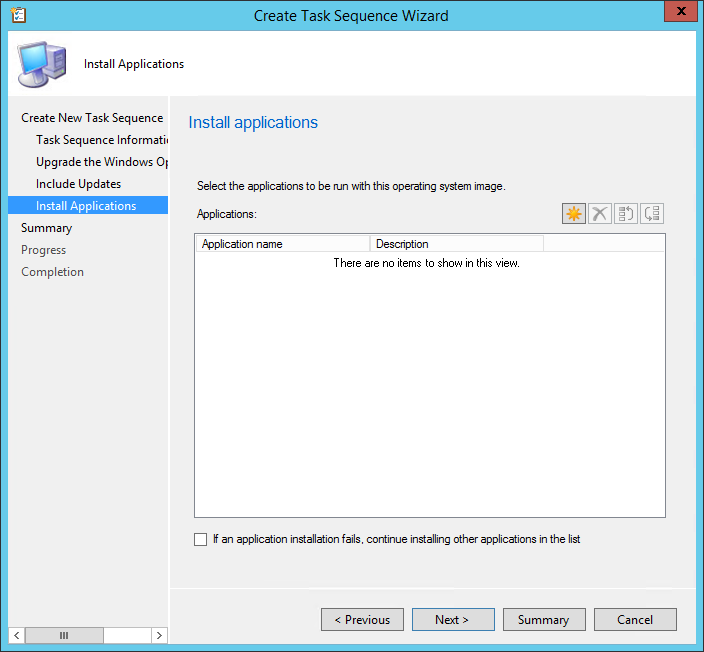
- On the Install Applications tab, select any application you want to add to your upgrade process
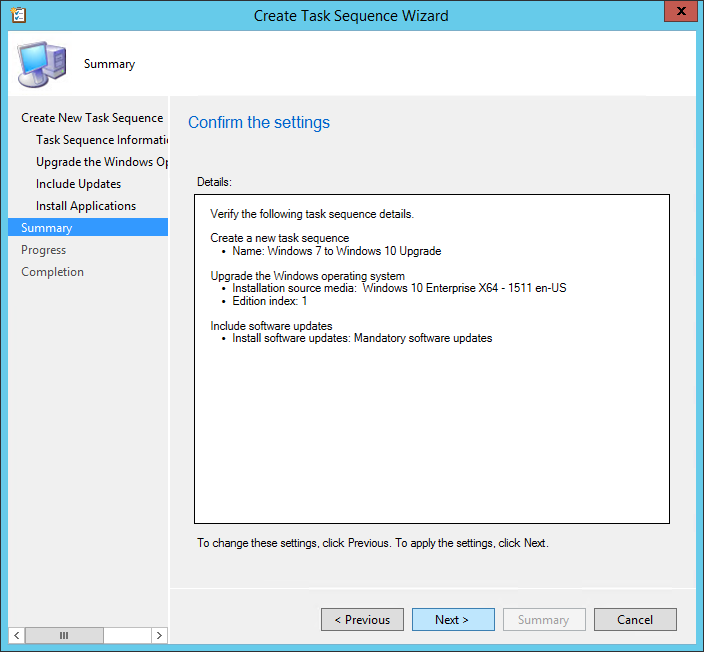
- On the Summary tab, review your choices and click Next
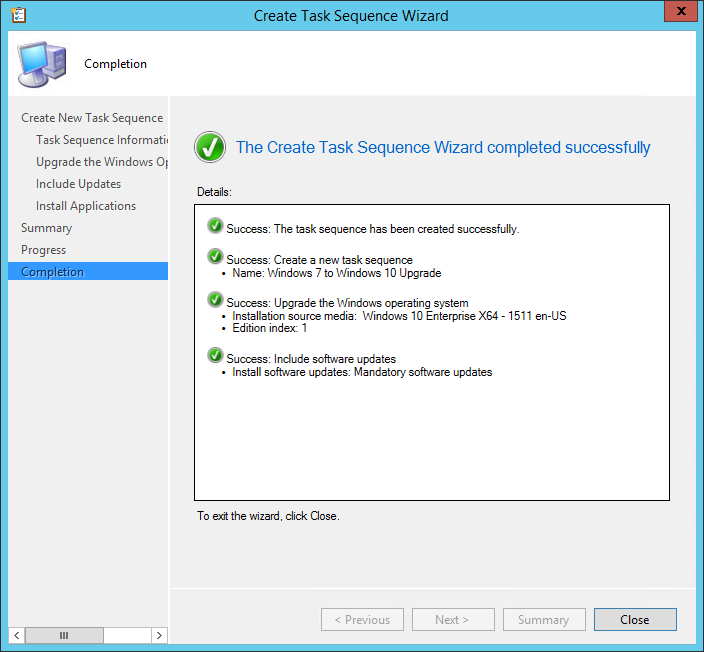
- On the Competition tab, click Close
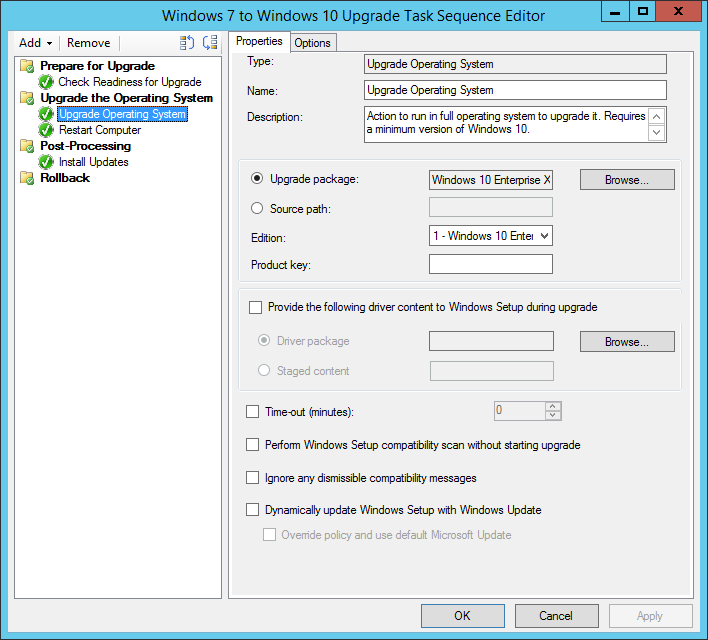
Edit the SCCM Task Sequence Upgrade
Now that we have created the task sequence, let’s see what it looks like under the hood:
- Open the SCCM Console
- Go to Software Library \ Operating Systems \ Task Sequences
- Right-click your upgrade task sequences and select Edit
As you can see, it’s fairly simple. SCCM will take care of everything in a couple of steps :
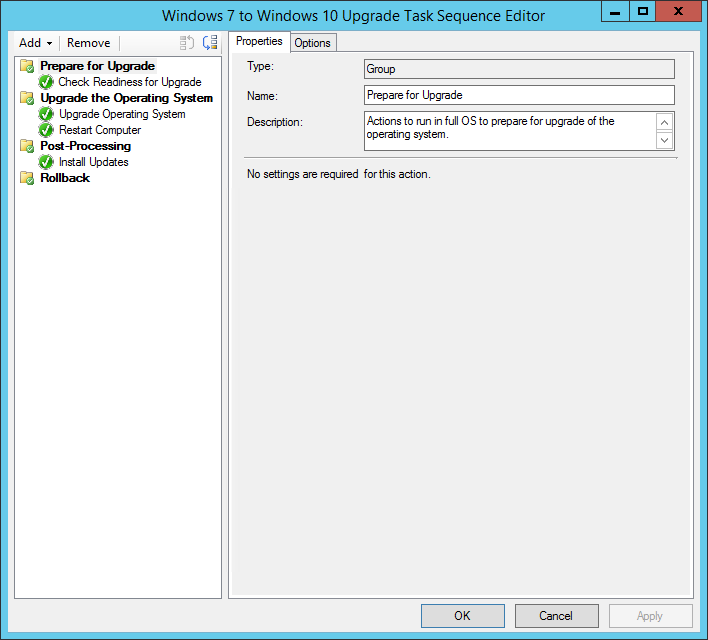
- The Upgrade Operating System step contains the important step of applying Windows 10
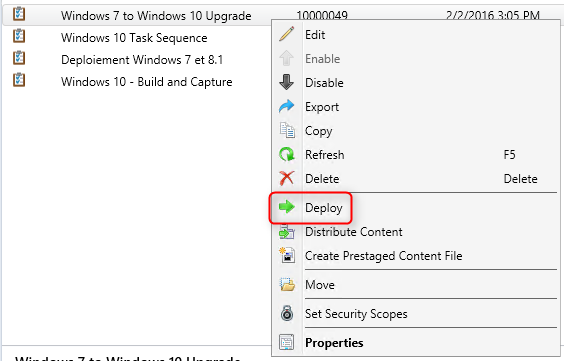
Deploy the SCCM Windows 7 Upgrade Task Sequence
We are now ready to deploy our task sequence to the computer we want to upgrade. In our case, we are targeting a Windows 7 computer.
- Go to Software Library \ Operating Systems \ Task Sequences
- Right-click Task Sequences and select Deploy
- On the General pane, select your collection. This is the collection that will receive the Windows 10 upgrade. For testing purposes, we recommend putting only 1 computer to start

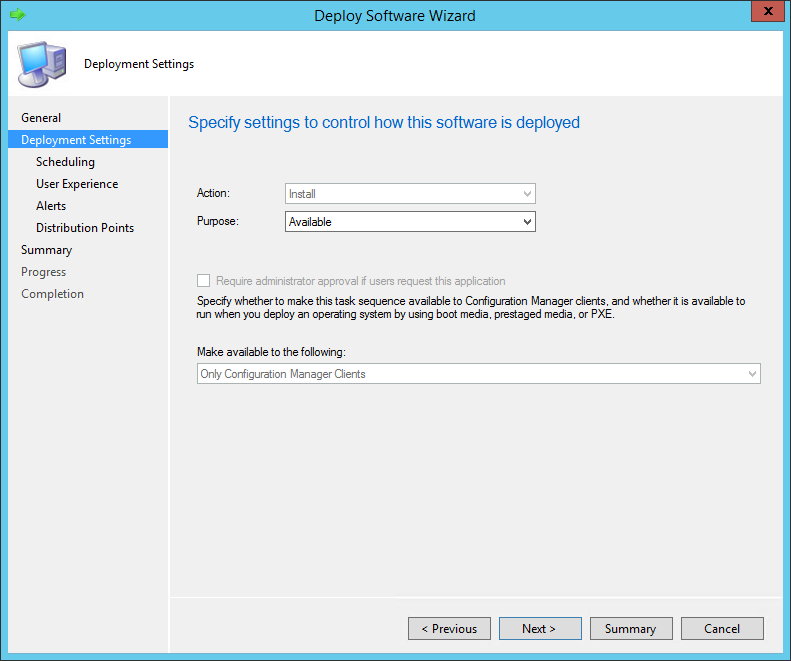
- On the Deployment Settings tab, select the Purpose of the deployment
- Available will prompt the user to install at the desired time
- Required will force the deployment at the deadline (see Scheduling)
- You cannot change the Make available to the following drop-down since upgrade packages are available to client only
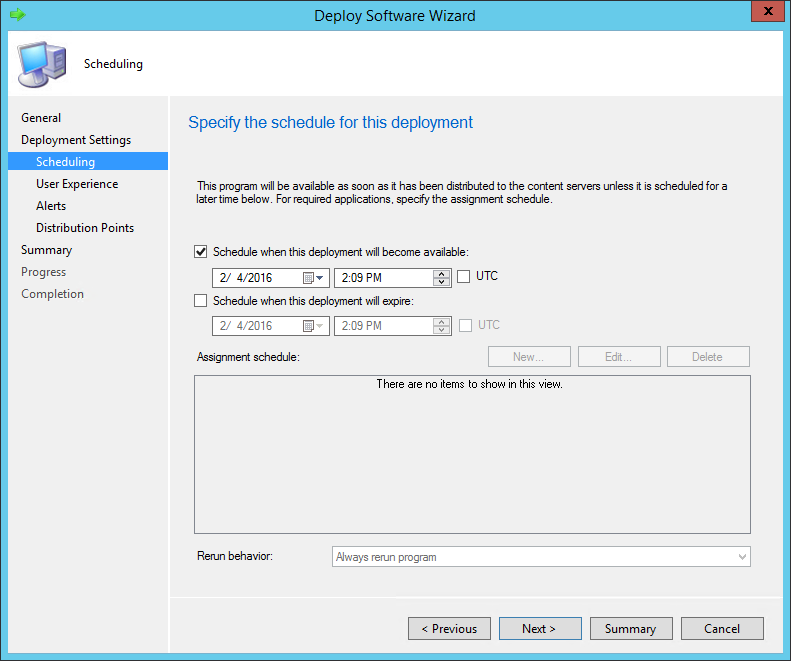
- On the Scheduling tab, enter the desired available date and time. On the screenshot, we can’t create an Assignment schedule because we select Available in the previous screen
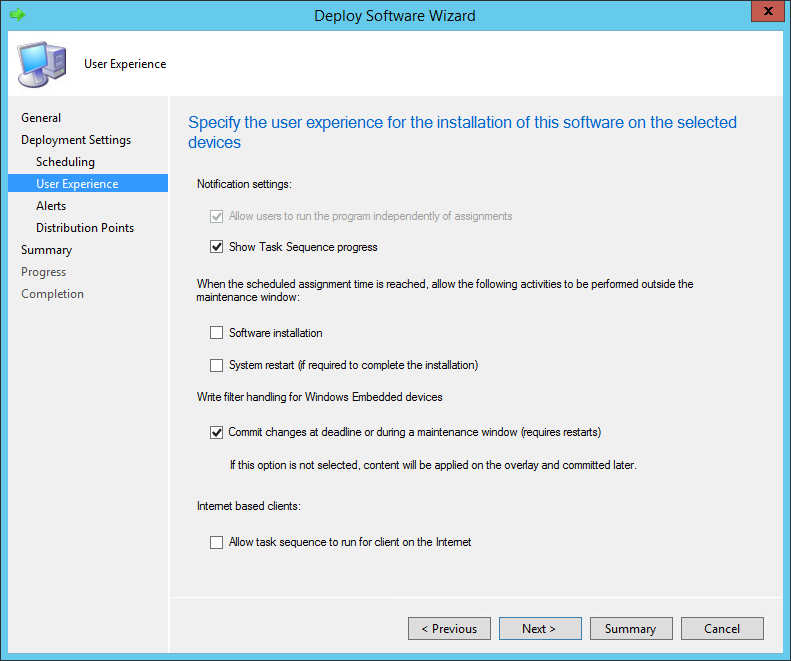
- In the User Experience pane, select the desired options
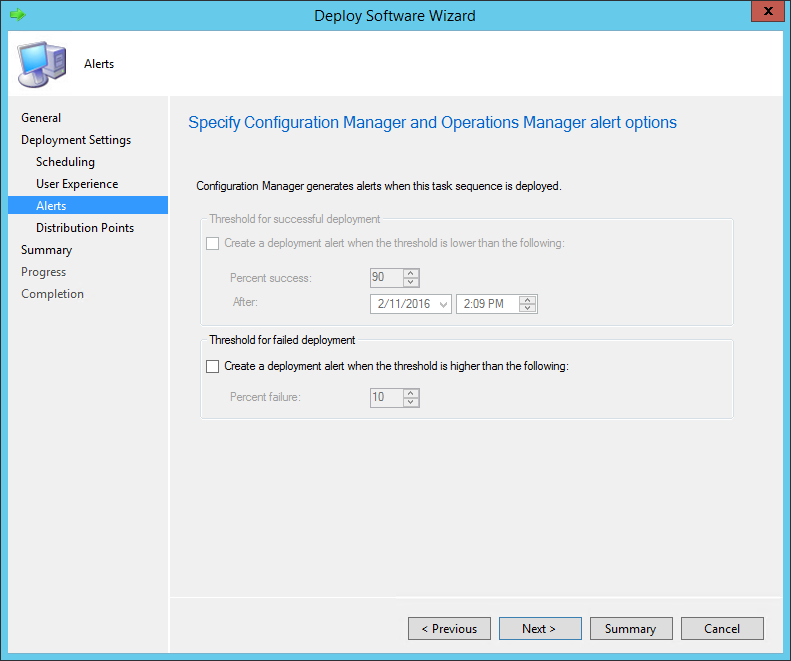
- In the Alerts tab, check Create a deployment alert when the threshold is higher than the following check-box if you want to create an alert on the failures
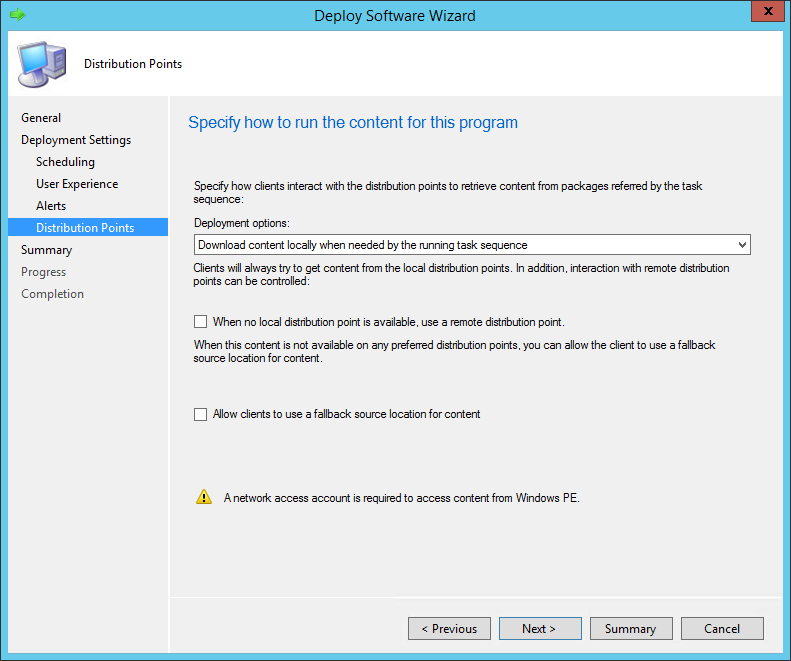
- On the Distribution Point pane, select the desired Deployment options. We will leave the default options
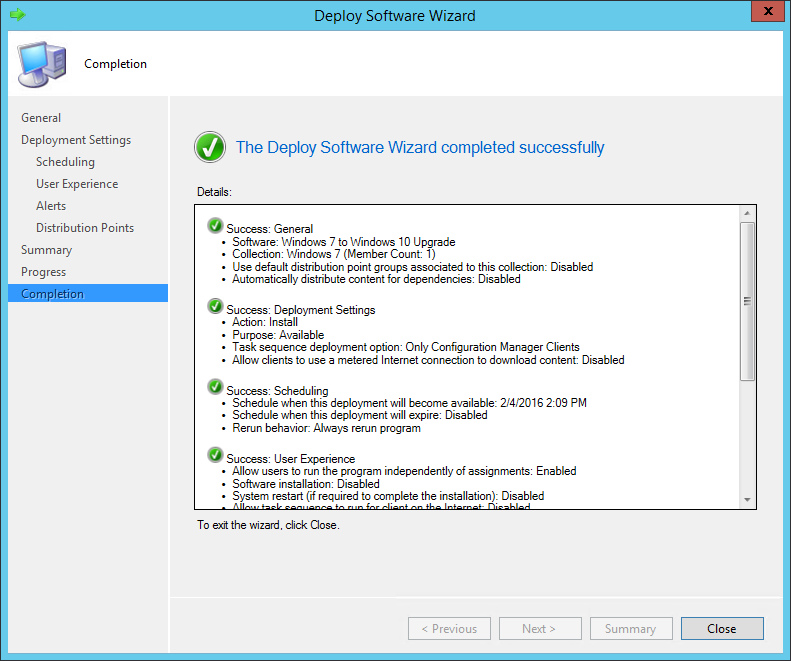
- Review the selected options and complete the wizard
Launch the Upgrade Process
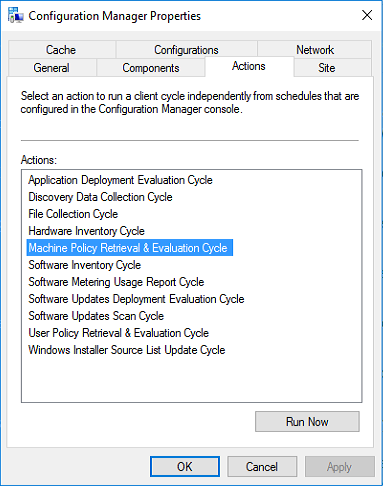
Now that our upgrade task sequence is deployed to our clients, we will log on our Windows 7 computer and launch a Machine Policy Retrieval & Evaluation Cycle from Control Panel / Configration Manager Icon
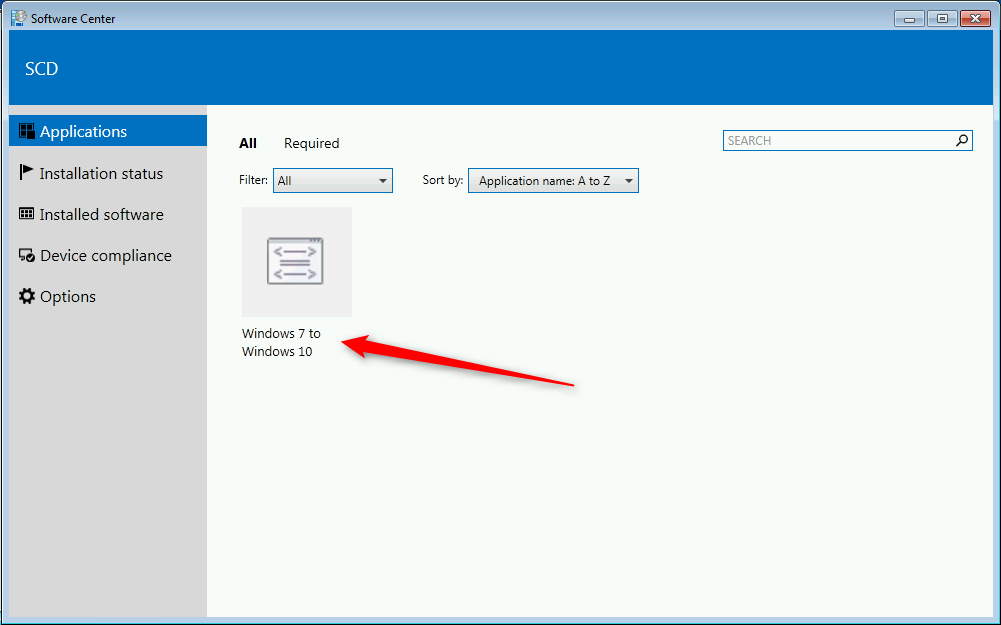
- Open the new Software Center from the Windows 7 Start Menu
- You’ll see the SCCM upgrade task sequence as available. We could have selected the Required option in our deployment schedule, to launch automatically without user interaction at a specific time
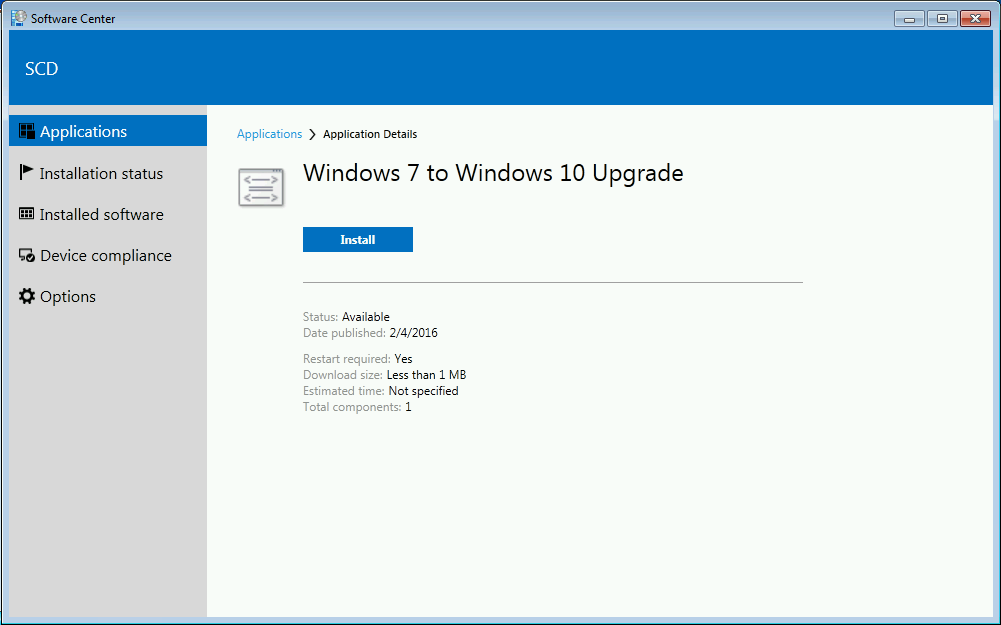
- When ready, click on Install
- The following warning appears
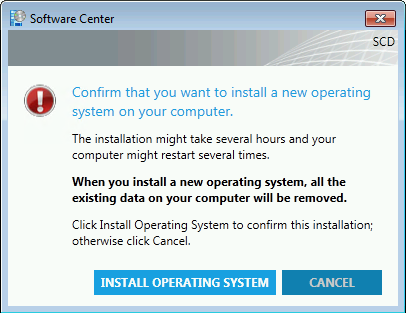
[su_box title=”Warning” style=”glass” title_color=”#F0F0F0″]The When you install a new operating system, all the existing data on your computer will be removed warning is not true. This issue will be resolved in future release.[/su_box]
- Click on Install Operating System
- The update is starting, the task sequence Installation Progress screen shows the different steps
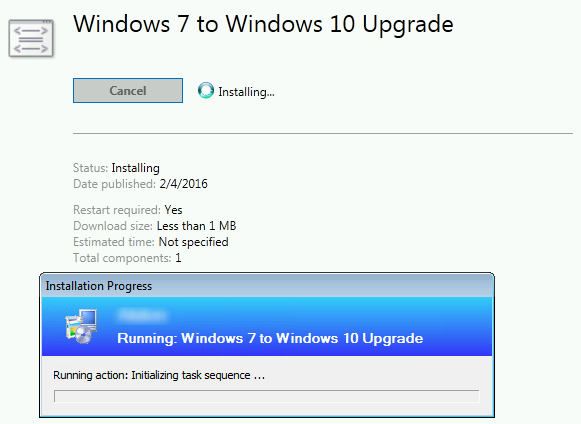
- The WIM is downloading on the computer and saved in C:\_SMSTaskSequence
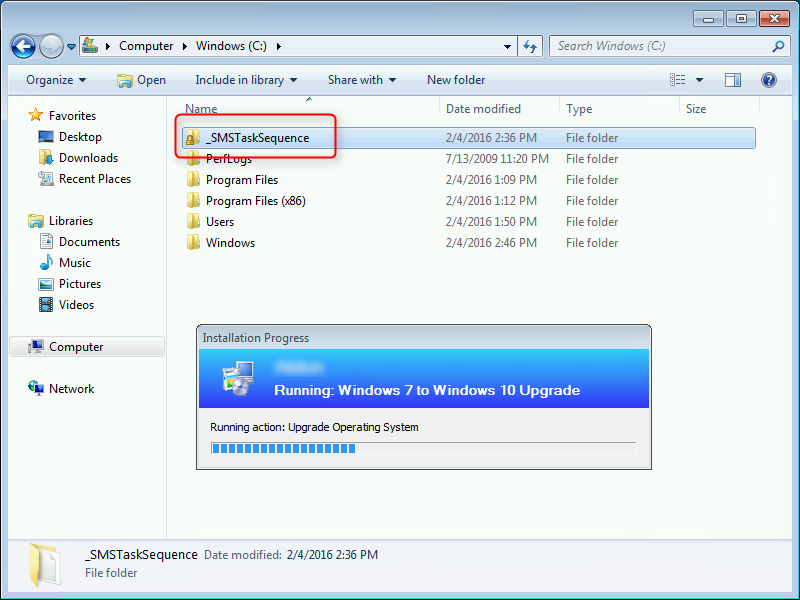
- You can follow task sequence progress in C:\Windows\CCM\Logs\SMSTSLog\SMSTS.log

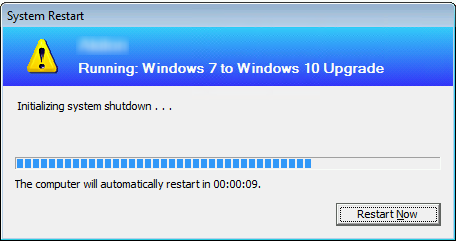
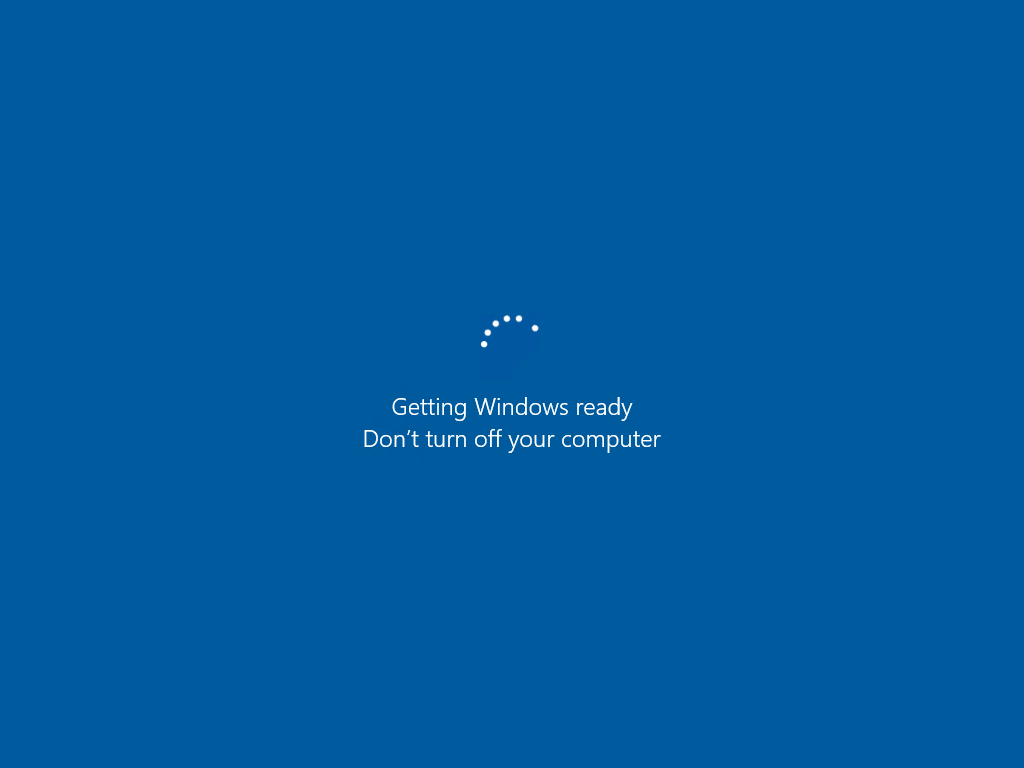
- After downloading, the system will reboot
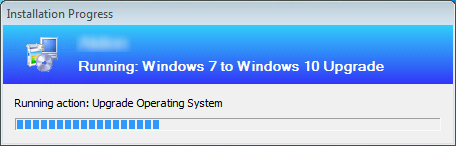
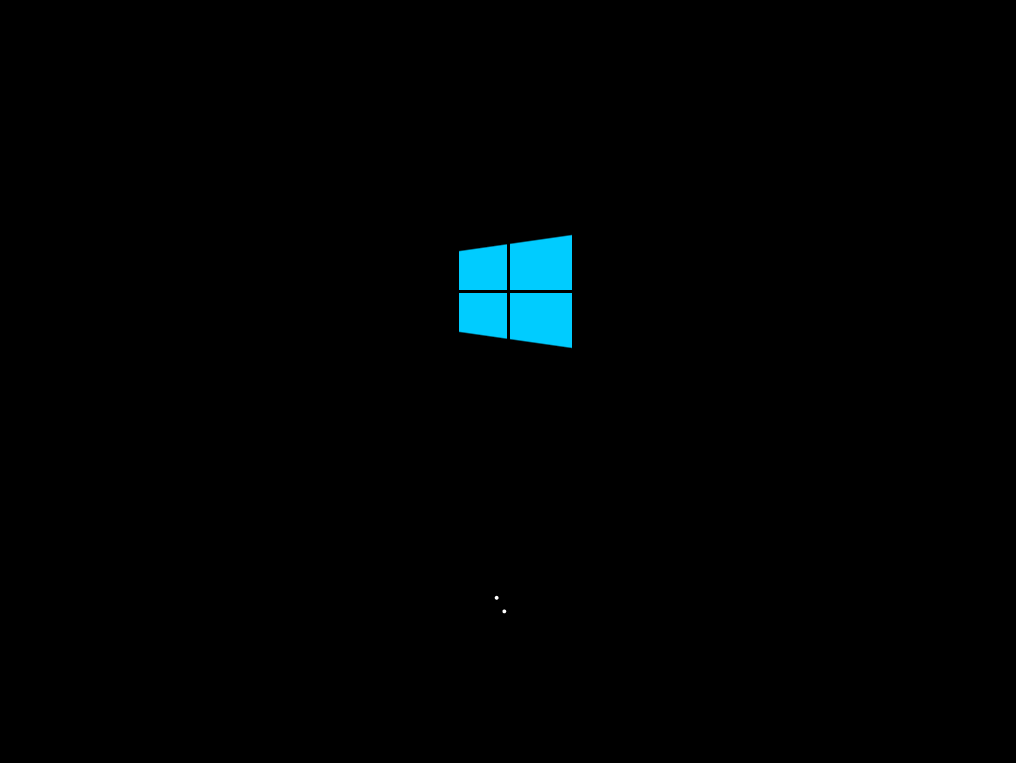
- The computer restart and is loading the files in preparation of the Windows 10 upgrade

- WinPE is loading
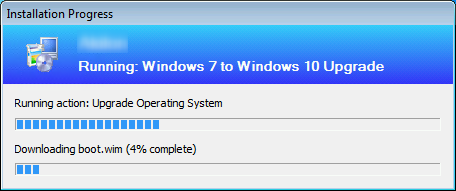
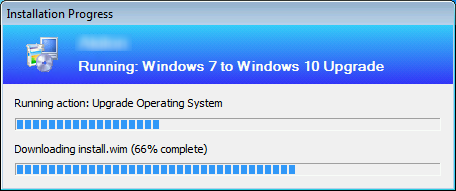
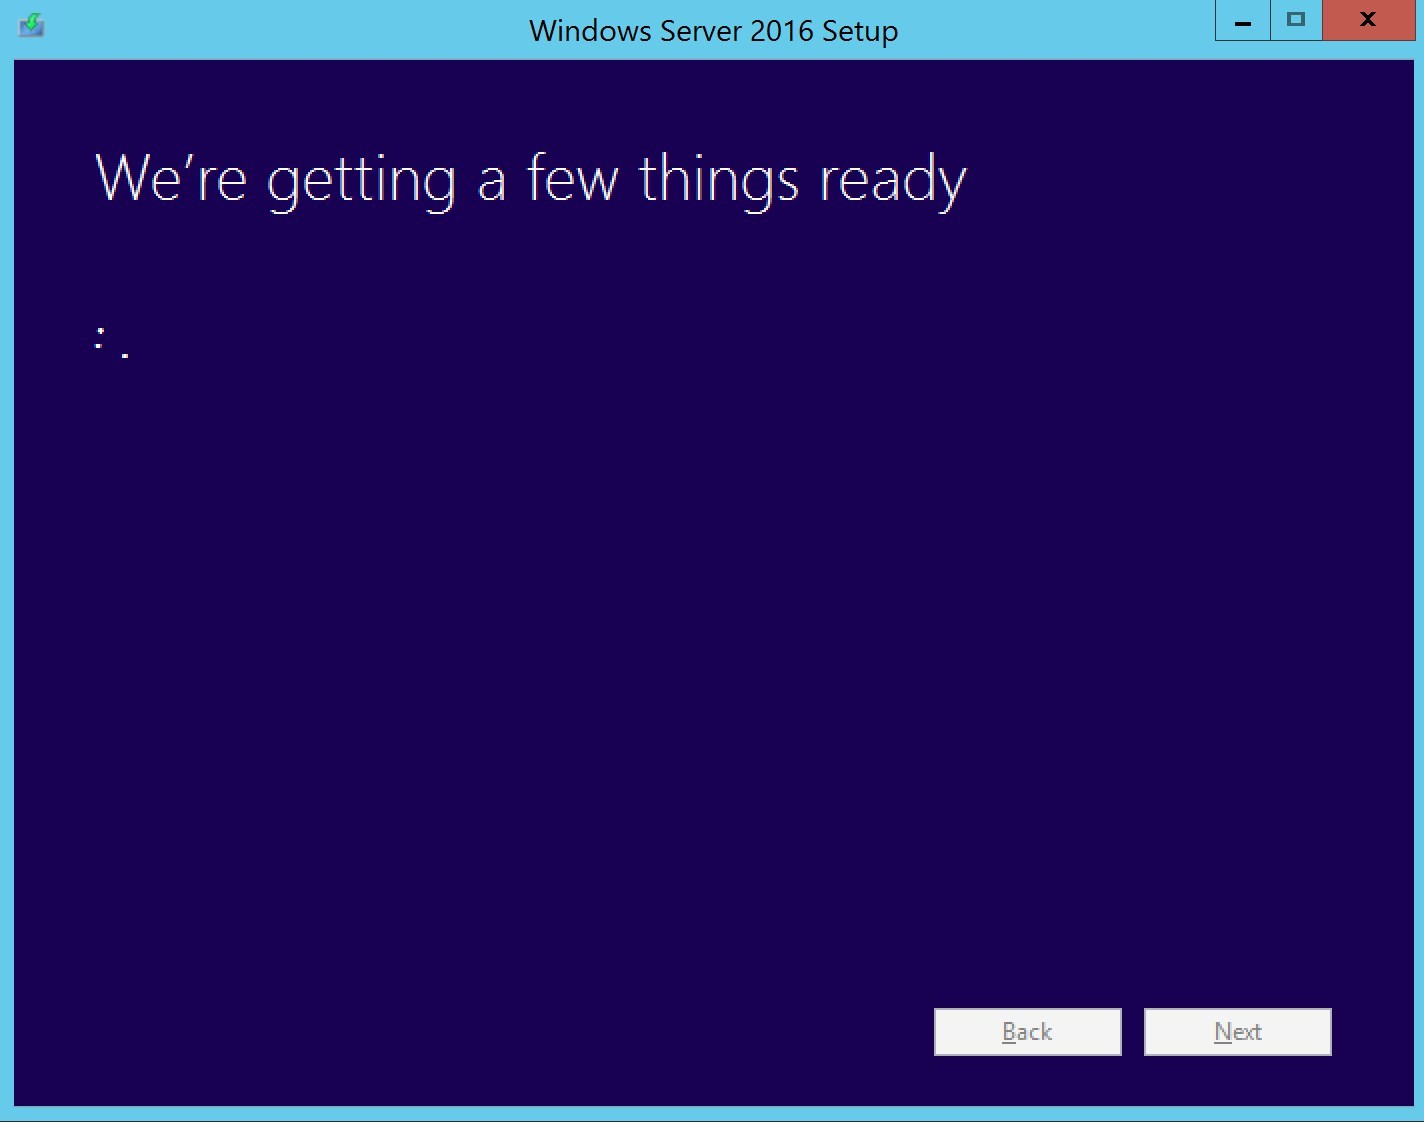
- The upgrade process starts. This step should take about 15 to 30 minutes depending of the device hardware
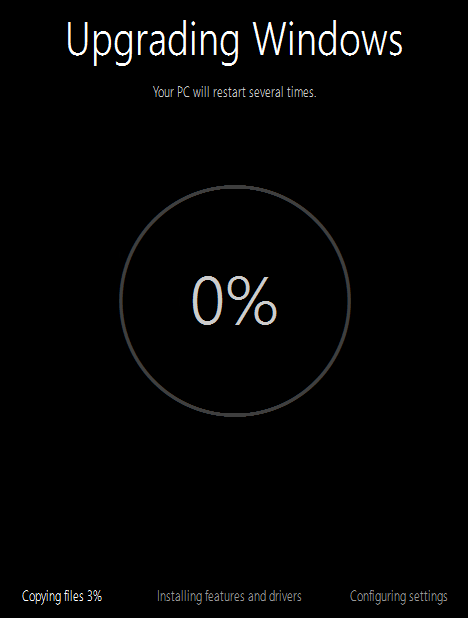
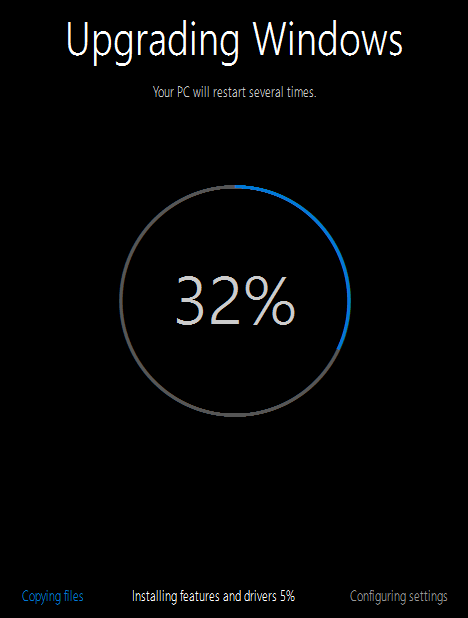
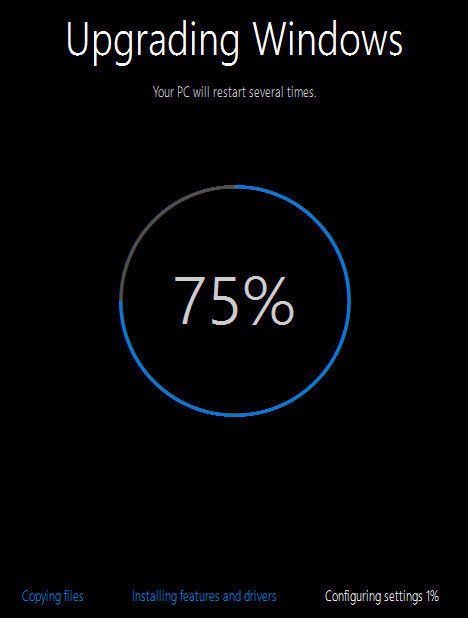
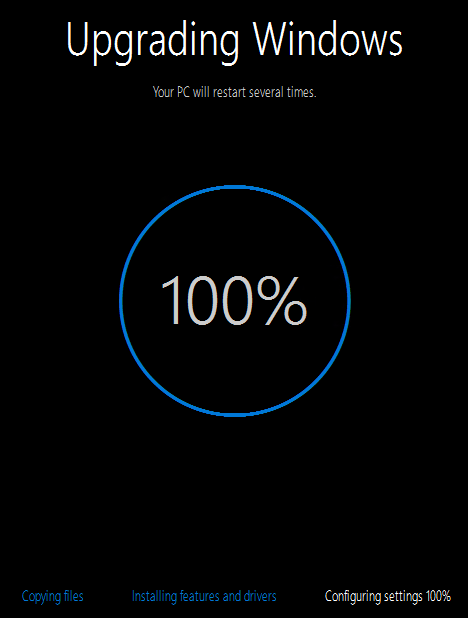
- Windows 10 is getting ready, 2-3 more minutes and the upgrade will be completed
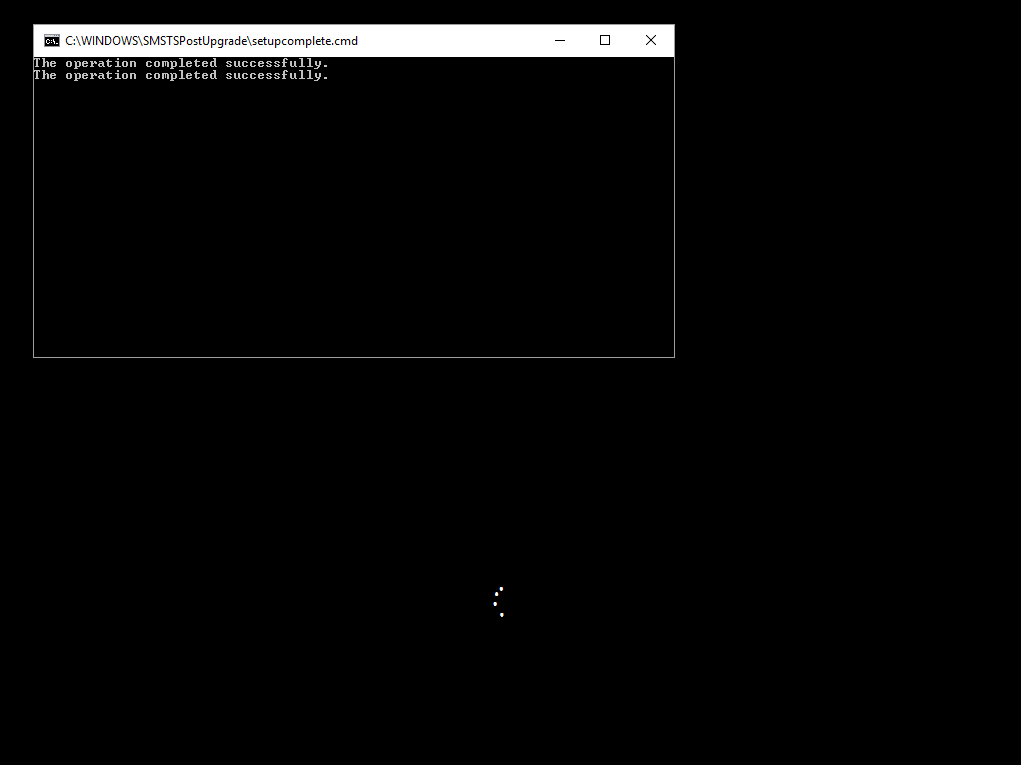
- Once completed the SetupComplete.cmd script runs. This step is important to set the task sequence service to the correct state
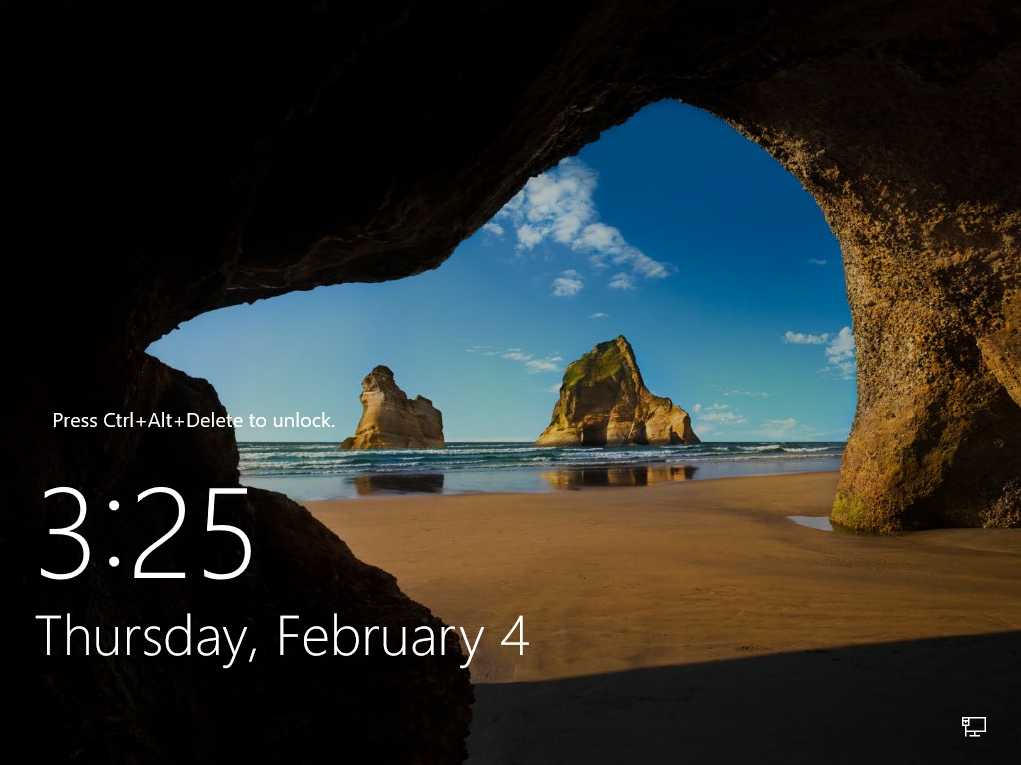
- Windows is now ready, all software and settings are preserved
Share
Get the latest insights and exclusive content delivered to your inbox


Paul
09.30.2016 AT 02:06 PMTaylor
09.21.2017 AT 11:42 AMAmbar
09.26.2016 AT 08:13 PMFlavio Soares
08.30.2016 AT 10:41 AMCody
06.06.2016 AT 10:38 PMBen
06.28.2016 AT 10:06 AMRyan
05.18.2016 AT 08:58 AMTrevor Stuart
04.22.2016 AT 04:00 PMTaylor
09.21.2017 AT 11:47 AMJerky
04.20.2016 AT 03:46 PM