
How to Setup Microsoft Intune tenant
Founder of System Center Dudes. Based in Montreal, Canada, Senior Microsoft SCCM Consultant, 8 times Enterprise Mobility MVP. Working in the industry since 1999. His specialization is designing, deploying and configuring SCCM, mass deployment of Windows operating systems, Office 365 and Intune deployments.

Benoit Lecours
PresidentTable of Content
- Table of Content – Setup Microsoft Intune
- Setup Microsoft Intune Tenant
- Endpoint Manager portal
- Set the MDM Authority
- Create Users And Assign Licences
- Intune License Assignment
- Customize the Intune Company Portal
- Create a Compliance Policy
- Enroll Devices
- Intune Application Deployment – CREATE THE MICROSOFT AUTHENTICATOR APP
- Setup Microsoft Intune – Review and Test App Deployment
- Device Configuration Profile
- Dashboard
- Setup Microsoft Intune – What’s next


Share


Get the latest insights and exclusive content delivered to your inbox
In this post, we’ll guide you through the process of setup Microsoft Intune and then using it through the new Endpoint Manager Portal.
But first, let’s start this post by clarifying the various services we’ll talk about in our post.
- Microsoft Azure is a set of cloud services to help your organization meet your business challenges. This is where you build, manage, and deploy applications on a massive, global network using your favorite tools and frameworks.
- Microsoft Intune was and is still one of Azure services to manage your devices. The “old” Intune Portal you were accessing in Azure has moved to the new Microsoft Endpoint Manager admin center.
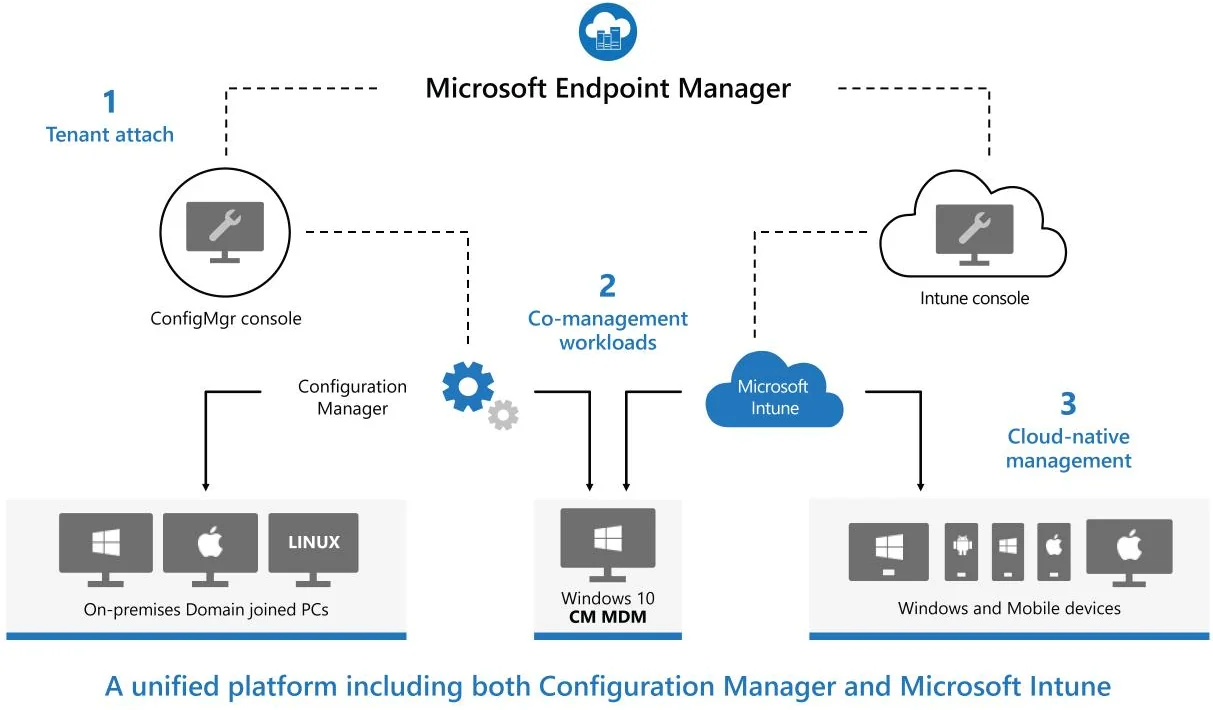
- Endpoint Manager is a unified management platform for Microsoft Intune and Configuration Manager. (Endpoint security, device management, and intelligent cloud actions)
This graph from Microsoft makes a good job explaining it:

So to wrap up… before you were accessing the Microsoft Intune portal through Azure, now Microsoft wants you to use the new Endpoint Manager Portal. This makes sense since Co-Management and Tenant Attach features from Configuration Manager (SCCM) also synchronize to Microsoft Endpoint Manager.
This will also be the portal to configure Auto-Pilot, Endpoint Analytics and Defender ATP.
If you’re wondering if you can use Intune with your current licensing, Microsoft Intune is included in the following licenses:
- Microsoft 365 E5
- Microsoft 365 E3
- Enterprise Mobility + Security E5
- Enterprise Mobility + Security E3
- Microsoft 365 Business Premium
- Microsoft 365 F1
- Microsoft 365 F3
- Microsoft 365 Government G5
- Microsoft 365 Government G3
So now that you’re familiar with the concept, you’re ready to manage some devices in Microsoft Intune.
Table of Content – Setup Microsoft Intune
- Setup Microsoft Intune Tenant
- Set the MDM Authority
- Create Users
- Intune License Assignment
- Customize the Intune Company Portal
- Create a Compliance Policy
- Enroll Devices
- Application Deployment
- Device Configuration Profile
- Dashboard
- What’s next
Setup Microsoft Intune Tenant
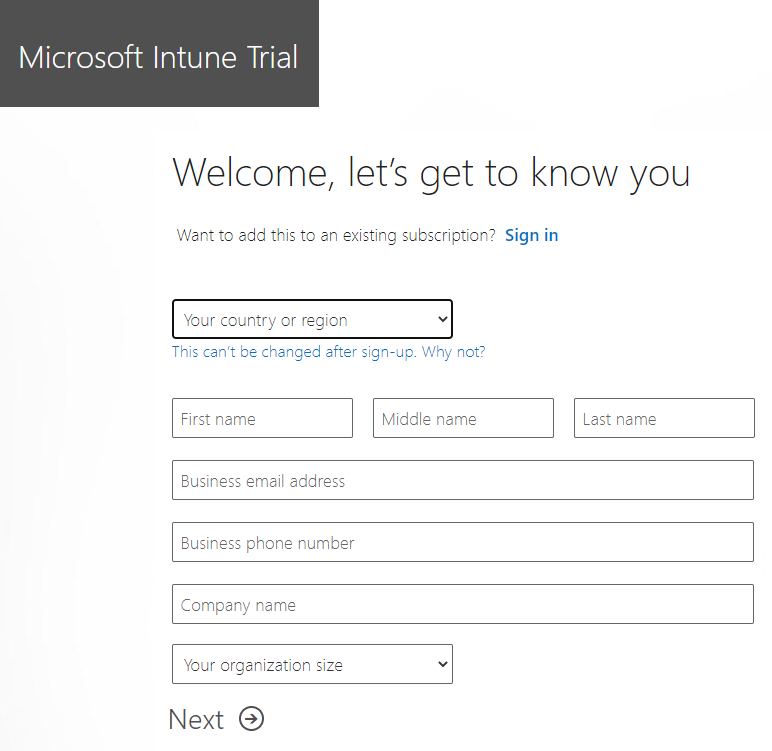
The first step before going into the Endpoint Manager Portal is to setup Microsoft Intune Tenant. If you don’t have an Intune portal yet, you can sign in for a 30-day trial.
If you already have a Microsoft work or school account, sign in with that account and add Intune to your subscription. If not, you can sign up for a new account to use Intune for your organization.
- Once subscribed, check your email and verify your account using the provided link
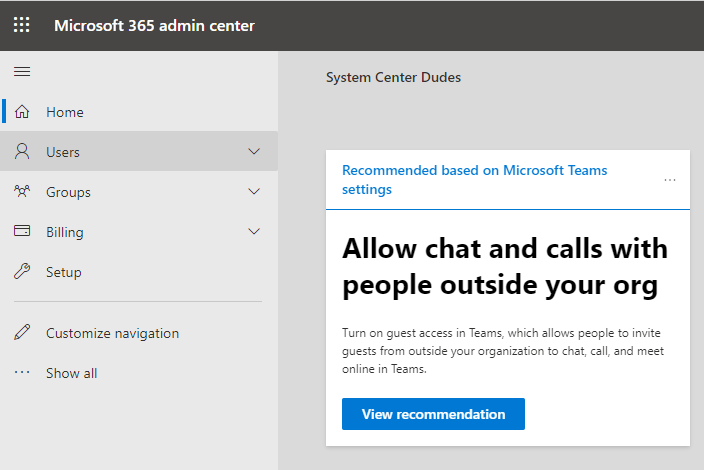
- You’ll be directed to the Microsoft 365 admin center. If you have only cloud-based accounts go ahead and assign licenses to your accounts in the 365 portal.
- If you’ll be using your organization’s custom domain name or synchronizing user account information from the on-premises Active Directory, we’ll need to add your organization domain.
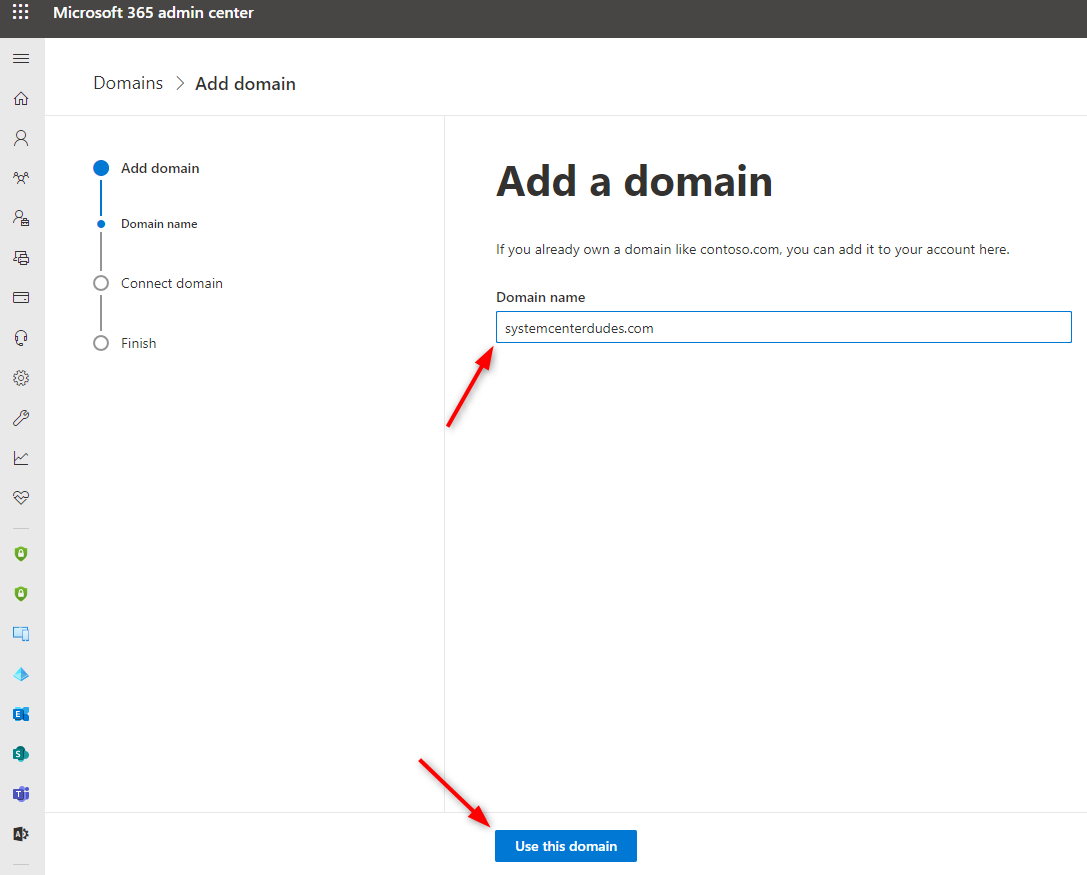
- Go to Setup / Domains. Choose Add domain, and type your custom domain name. Select Use this domain at the bottom
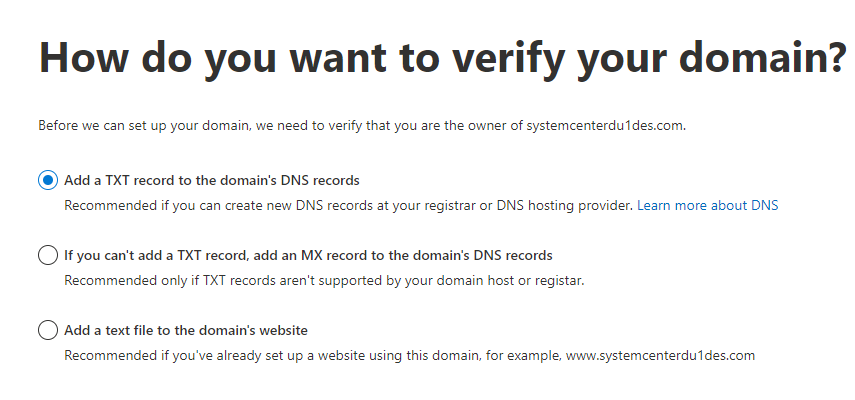
- In the Verify domain dialog box select the option to create the TXT record in your DNS hosting provider.
- Select the desired option and Click Continue
- On the Verify page, enter your DNS Provider at the top
- Once the TXT information has been updated on your DNS Provider, click Verify
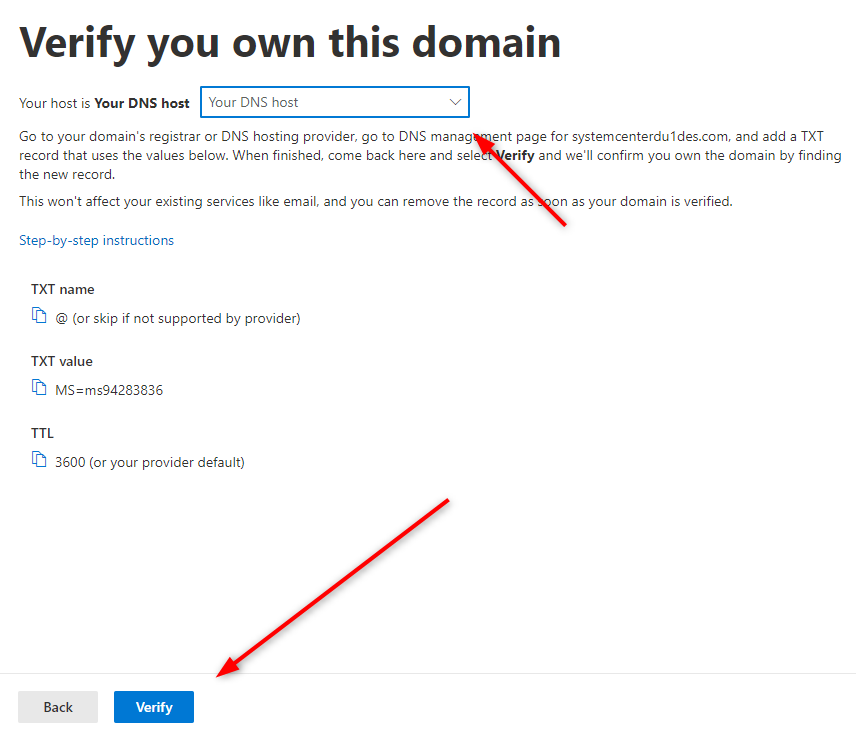
- There may be a delay, it may take up to 15 minutes for DNS changes to take effect.
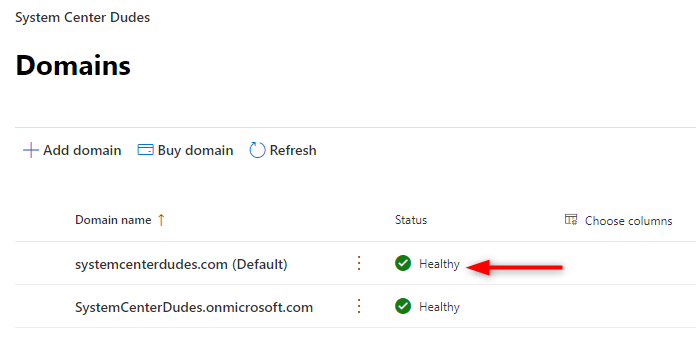
- Once completed your domain will be listed as Healthy. The OnMicrosoft domain cannot be removed.
Endpoint Manager portal
Once your initial Microsoft Intune setup is completed, you can close the Office portal and open the Endpoint Manager Admin Center.
Set the MDM Authority
For tenants using the 1911 service release and later, the MDM authority is automatically set to Intune.
The MDM authority determines how you manage your devices. Before choosing the MDM Authority, read the Microsoft Documentation to understand the key concept.
In our post, the MDM Authority will be set to Intune.
- Go to Devices. The Add MDM Authority blade will popup
- To switch the MDM authority from Office 365 to Intune and enables coexistence, select Intune MDM Authority / Add

Create Users And Assign Licences
Before enrolling devices, we need to create users. Users will use these credentials to connect to Intune. For our test, we will create users manually in our Azure Active Directory domain but you could use Azure AD Connect to sync your existing accounts.
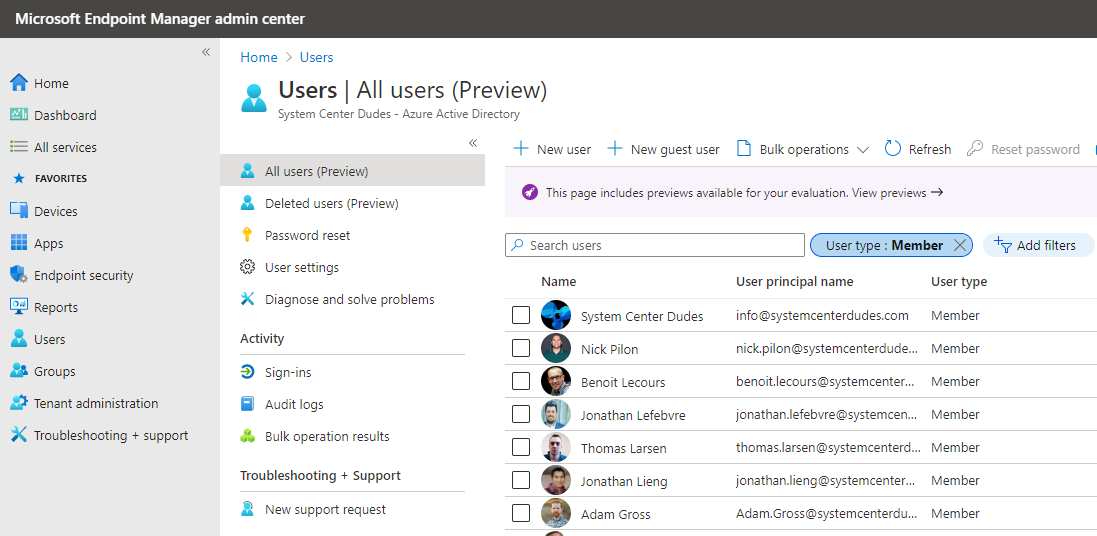
- In the Endpoint Manager Admin Center
- Select Users
- On the All Users page, click New user at the top
- Enter information for the user, such as Name and User name
- Go ahead and create your accounts
- Under Profile, complete user information
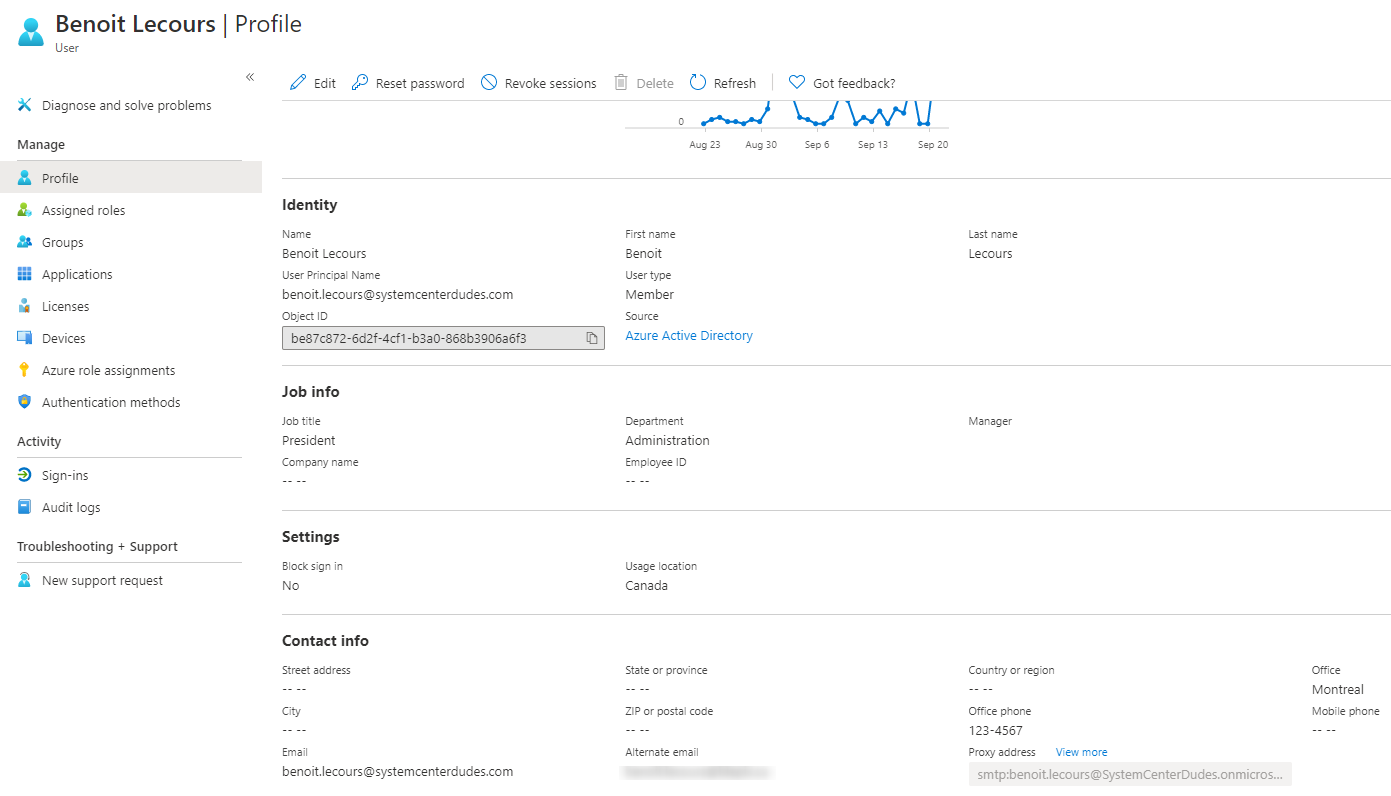
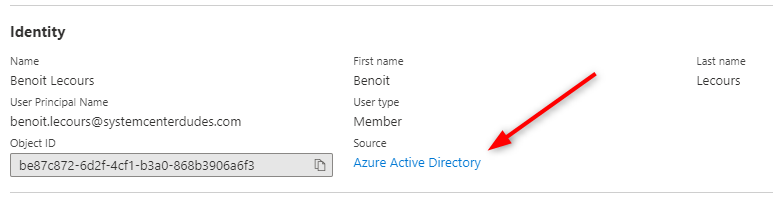
- Under Identity, you can see that the source of authority is Azure AD
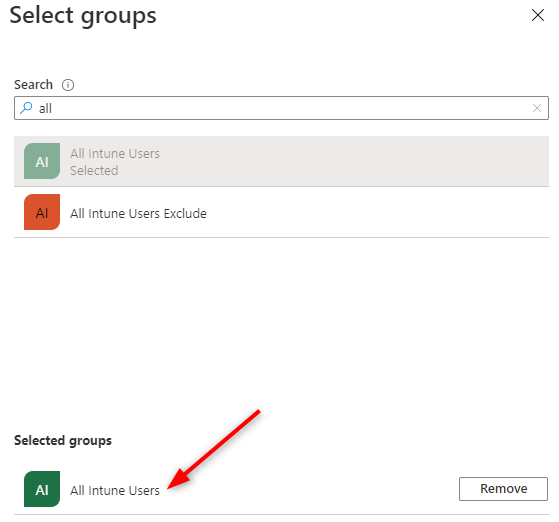
- Under Groups, choose a group to add the user to. If you don’t have any group, skip this step and do not add the user to a group. In our example, we are adding it to the All Intune Users group
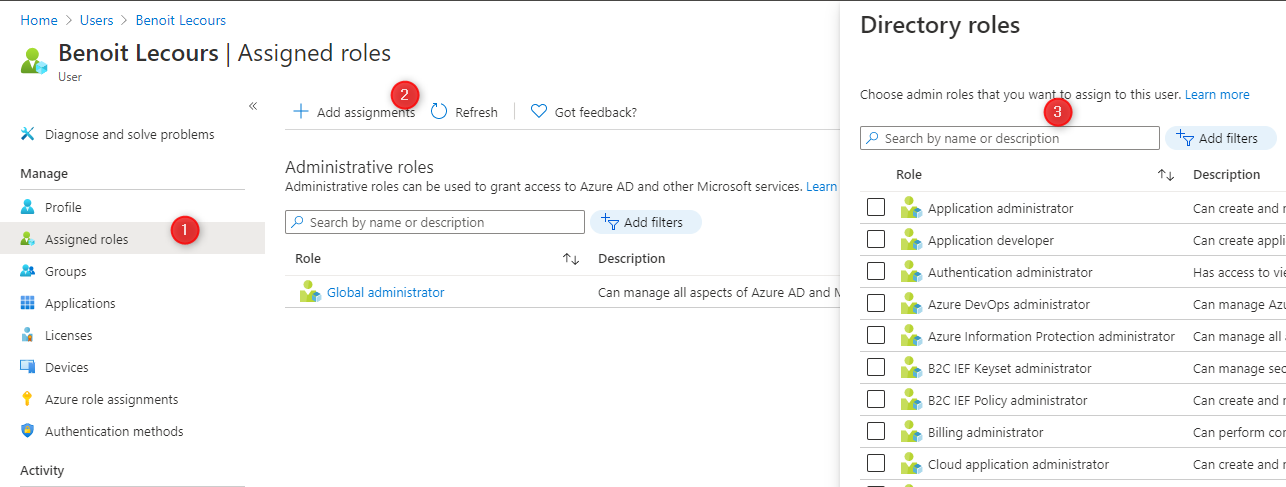
- Under Assigned Role, assigned a Directory Role to your user
Intune License Assignment
We now need to assign the user a license that includes Intune before enrollment. If you don’t assign an Intune license to your user, you won’t be able to enroll their devices.
You can assign a license by users or you can use groups to assign your license more effectively. Repeat the step for all your users or groups.
- Click on the user that you just created
- Click on Licenses on the left and then Assignment on the top
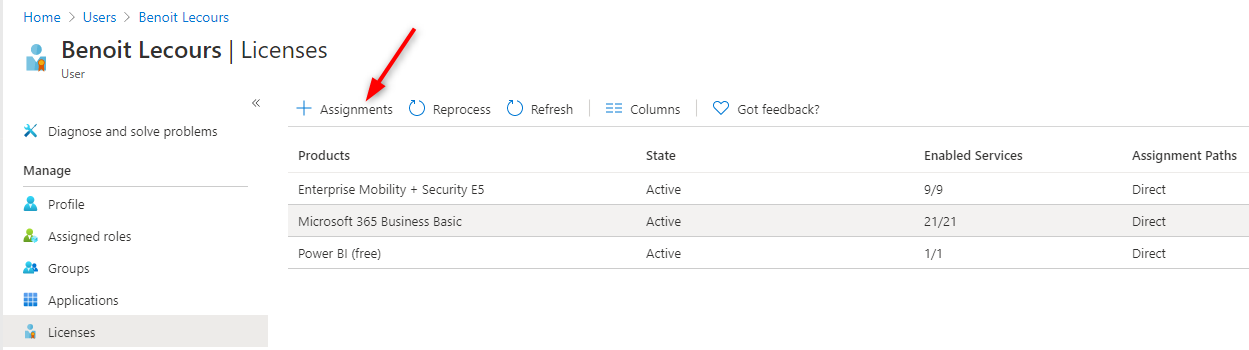
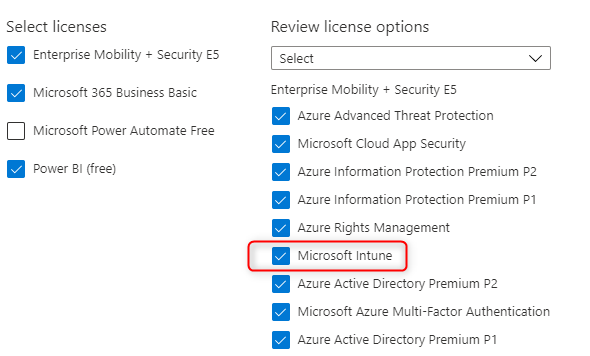
- Select the desired license for your user and click Save at the bottom
- Also, ensure that Microsoft Intune is selected
Customize the Intune Company Portal
The Intune company portal is for users to enroll devices and install apps. The portal will be on your user devices. You’ll want to customize it to increase your user trust before doing any actions in the portal.
So we’ll customize it to reflect our company branding.
- In the Microsoft Endpoint Manger Admin Center
- Click on Tenant administration / Customization
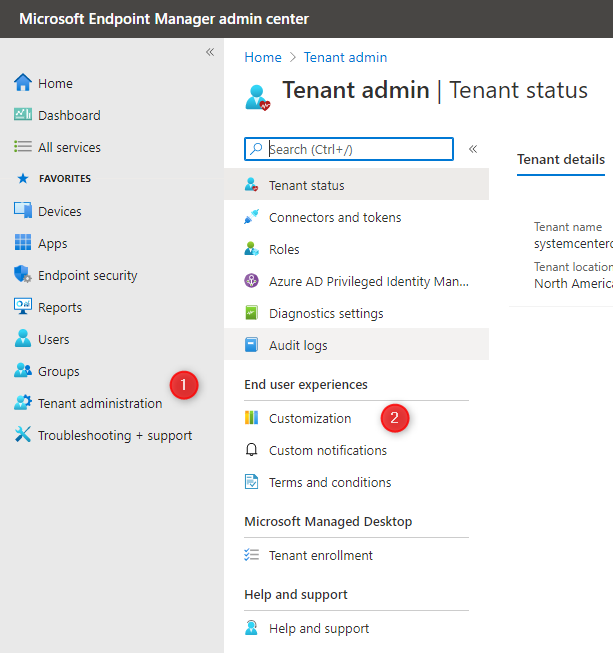
- In the Edit Customization Policy window, we enter our Organization Name, color and Logo
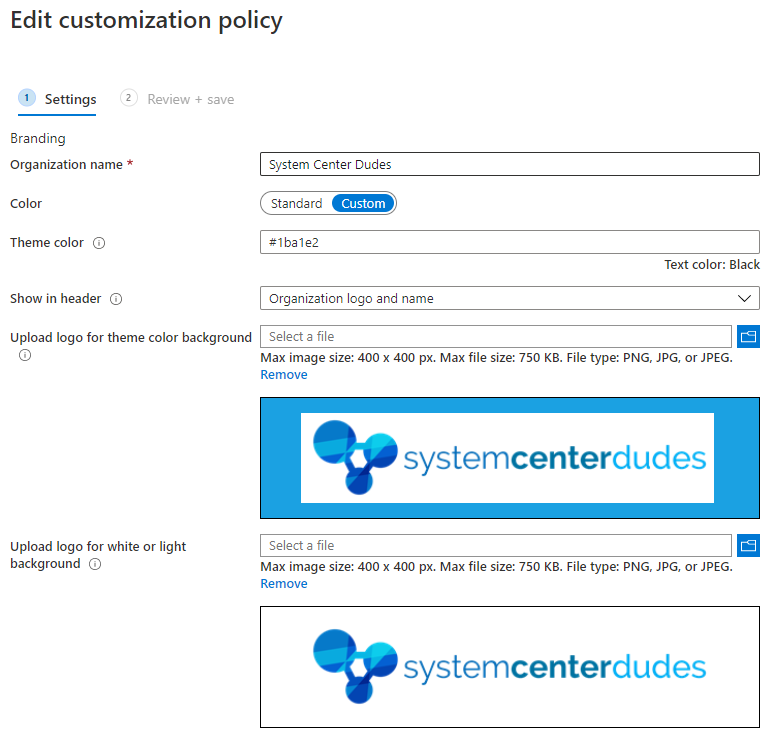
There’s plenty of other options to customize, go ahead and customize what you need. When completed, click the Review + Save button at the bottom
Create a Compliance Policy
Before enrolling a device using this user, it’s best practice to create a basic compliance policy.
In our example, we will create a basic security setting that will allow monitoring iOS device compliance. We will check Jailbroken devices, check for an OS version and require a password policy.
- In the Microsoft Endpoint Manager Admin Center
- Select Devices / Device compliance / Policies / Create Policy
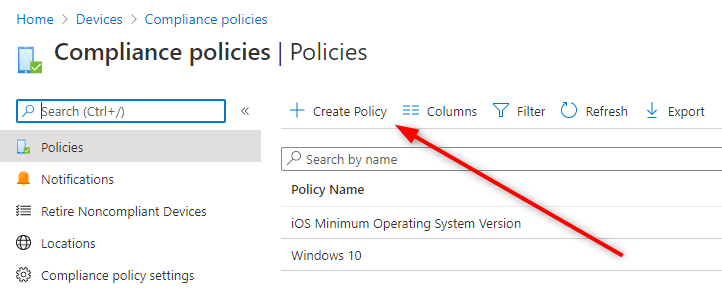
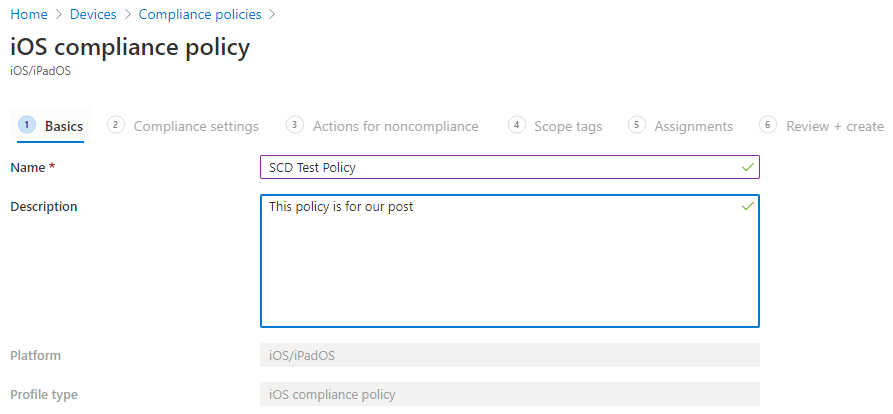
- For the Platform, select iOS/iPadOS, click Create
- Enter a Policy Name and a Description, click Next
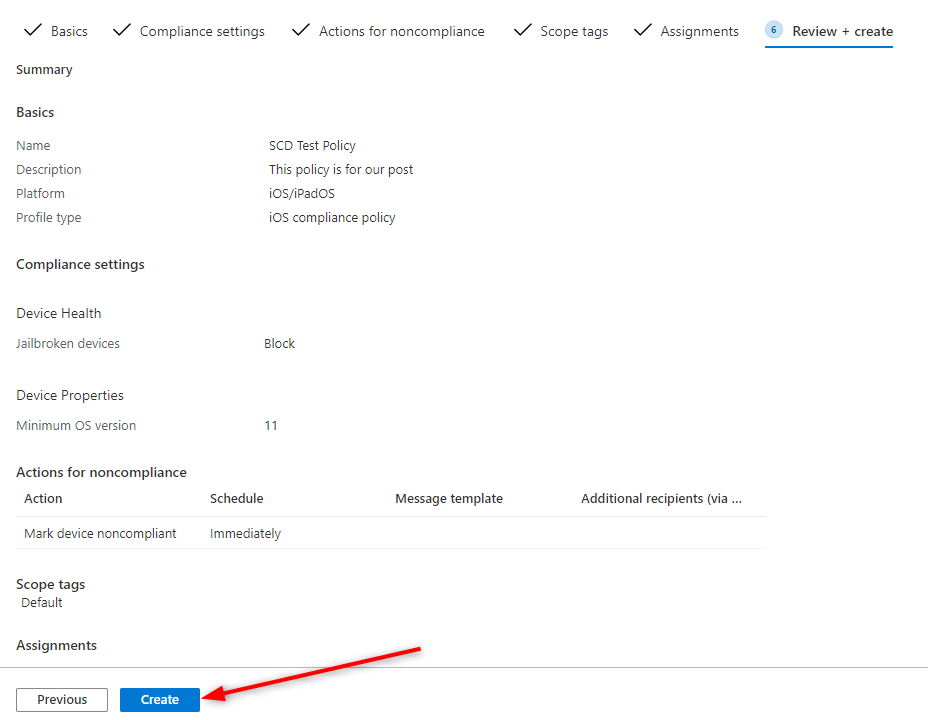
- In Settings, select Device Health, under Jailbroken devices, select Block
- Under Device Properties, in Minimim OS version, enter 11
- Click Next

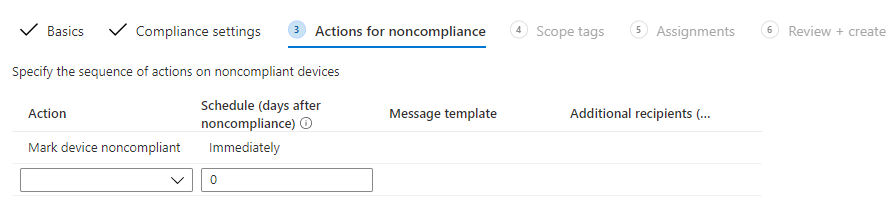
- In the Action for compliance screen, leave default options. Meaning that all non-compliant device will be marked as “Non-Compliant” immediately
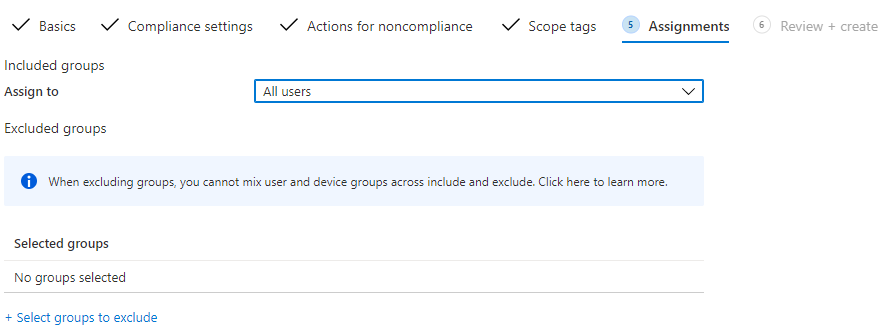
- Once created, the policy must be assigned to a group
- Select groups to include
- Click Next
- On the review screen, review your choice and click Create
- You can also repeat the steps to create a policy for Android and Windows devices if needed
Enroll Devices
We are now ready to enroll devices into Microsoft Intune. With the various OS: Android, Windows and iOS and specific scenarios with BYOD and corporate device, there are so many ways to enroll devices.
We’ll show you one way to enroll a personal iOS device (BYOD) but you can refer to Microsoft Documentation which covers every possible scenario.
To enroll and manage iOS/MAC devices into Endpoint Manager, you first need to create an Apple MDM Push Certificate. These certificates expire 365 days after you create them and must be renewed manually in the Endpoint Manager portal.
- In the Endpoint Manager Portal
- Click Devices / iOS/iPadOS Enrollment and select Apple MDM Push Certificate

- Check the agreement in #1
- In the second step (#2), click on Download your CSR. A file will download in your browser. Keep this file for the next step
- On the third step (#3), click on Create your MDM Push Certificate

- You’ll be redirected on the Apple Push Certificate Portal
- Login using your Apple ID or create one

- In the Get Started section, click Create a Certificate

- Check the I have read and agree to these terms and conditions check box and click Accept

- Click Browse and select the .CSR file you created previously, click Upload

- Your certificate is now created and available for download. The certificate is valid for 1 year. You will need to repeat the process of creating a new certificate each year to continue managing iOS devices.
- Click on Download
- Ensure that the file is a .PEM and save it to a location on your server.


- Back in the Endpoint Manager Portal
- Complete step 4 by entering your Apple ID
- Complete step 5 by entering the MDM_ Microsoft Corporation_Certificate.pem that you just downloaded
- Click Upload at the bottom

- Once the certificate is created, you can now enroll an iOS device using a user which has an Intune licence.
- To enroll an iOS device, you must install the Microsoft Intune Company Portal App. It can be installed on any iOS device having iOS 6 and later. (iPhone and Ipad)
The Intune Company Portal app will allows to perform the following actions:
- Monitor mobile devices with Microsoft Intune
- Enable access to company resources with Microsoft Intune
- Deploy software to mobile devices in Microsoft Intune
- Configure security policy for mobile devices in Microsoft Intune
- Help protect your data with remote wipe, remote lock, or passcode reset using Microsoft Intune
To download the App :
- Open the App Store on your device and search for Intune Company Portal. (Or use this direct link)
- Install the App and open it
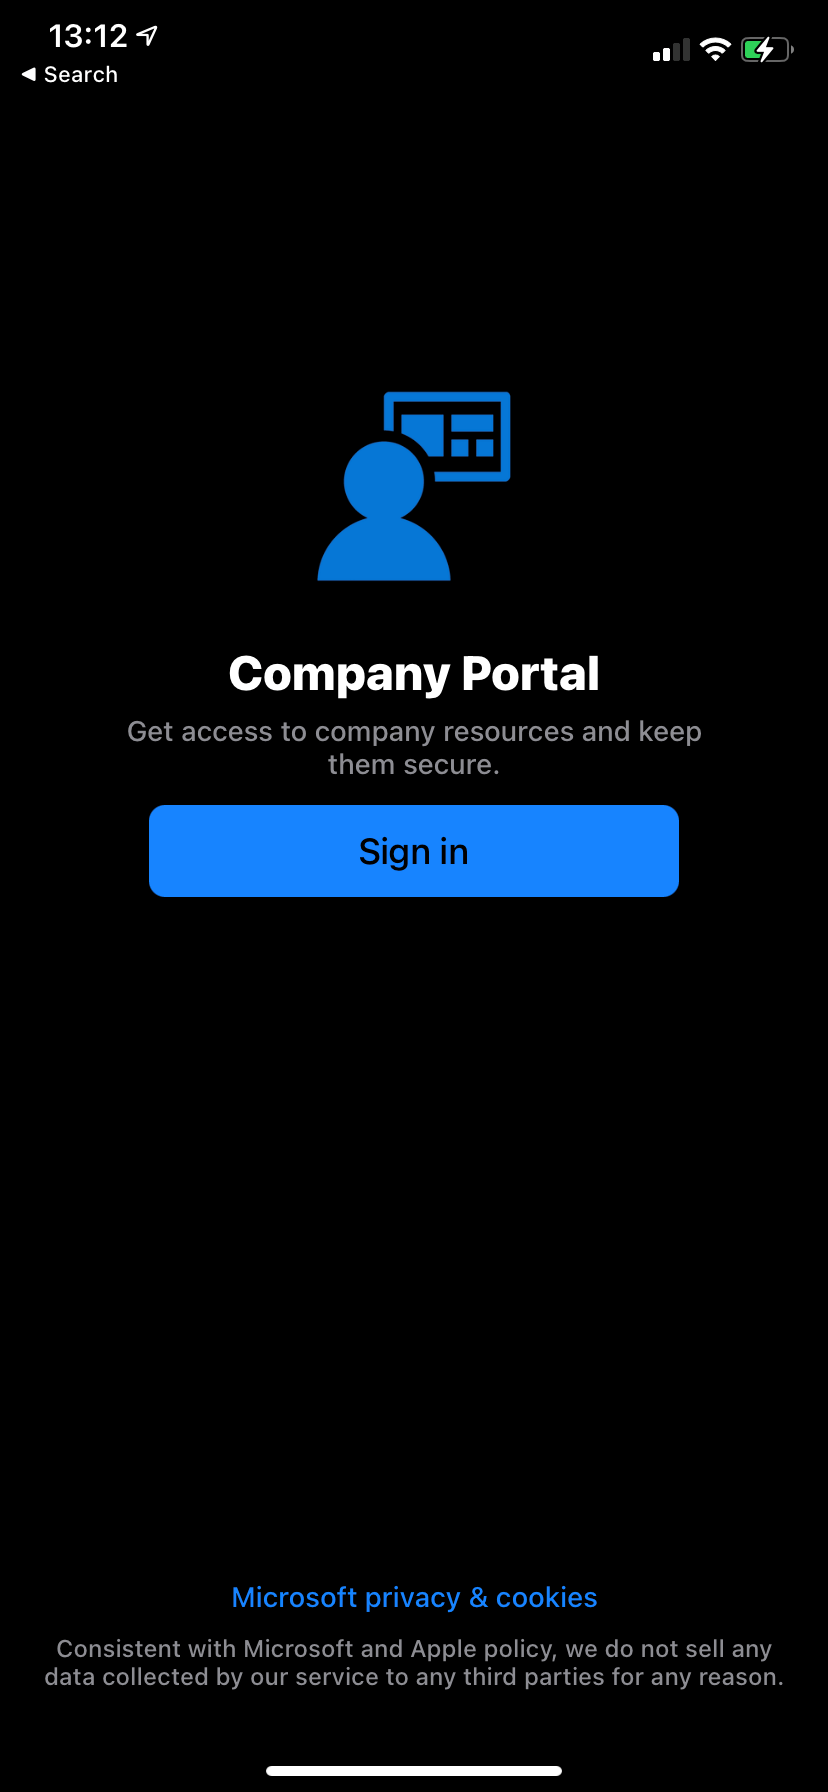
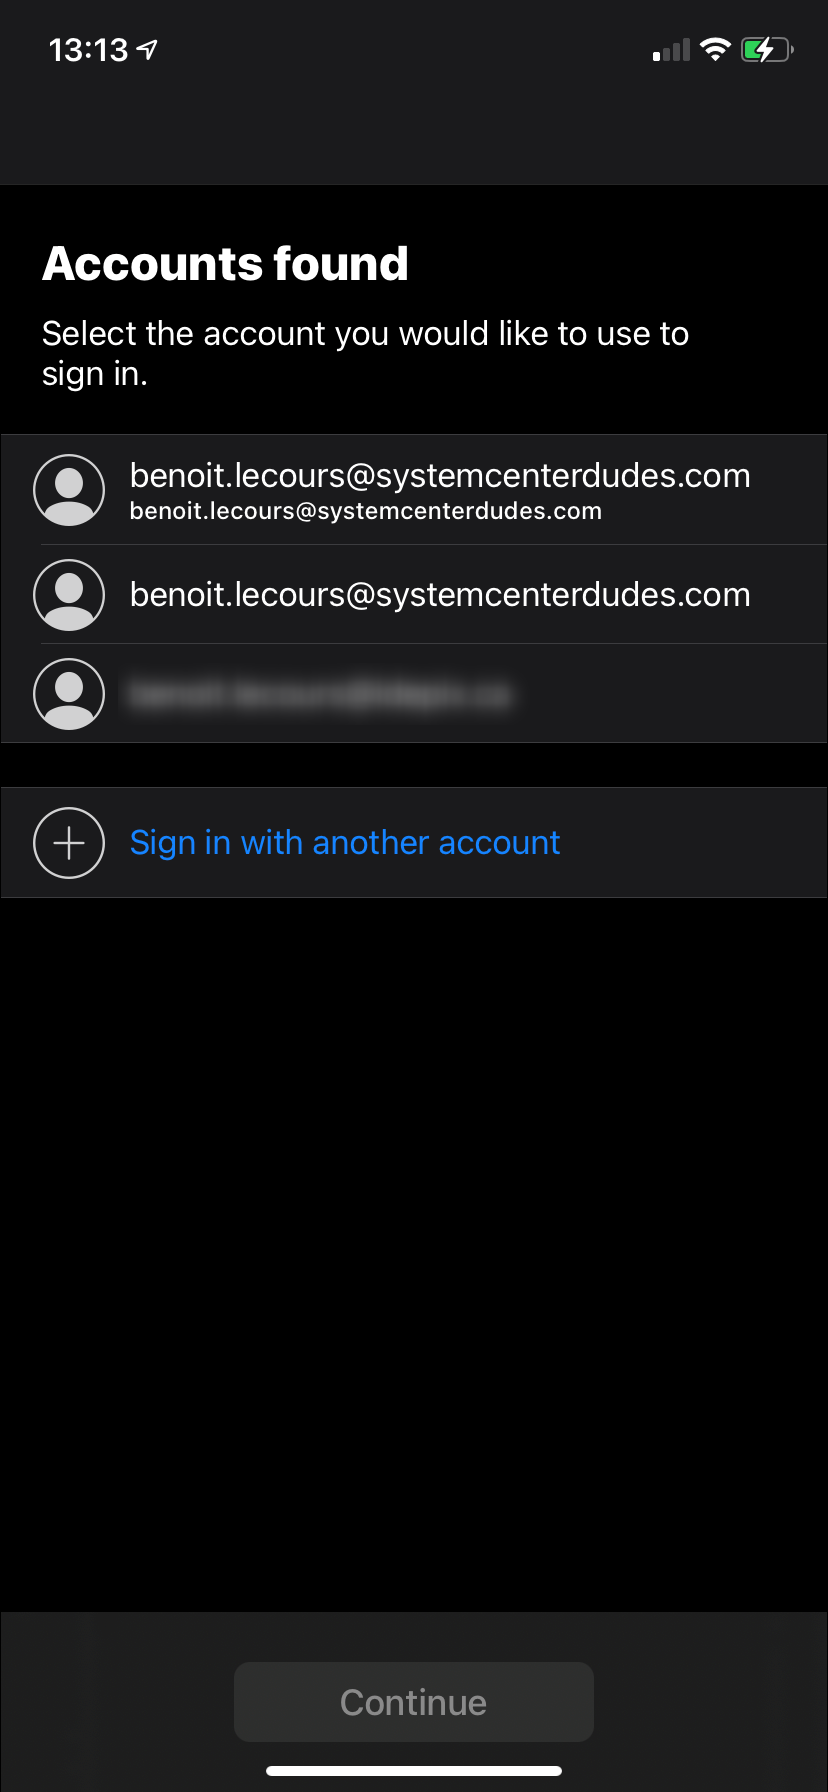
- Enter your credentials
- select Begin at the bottom
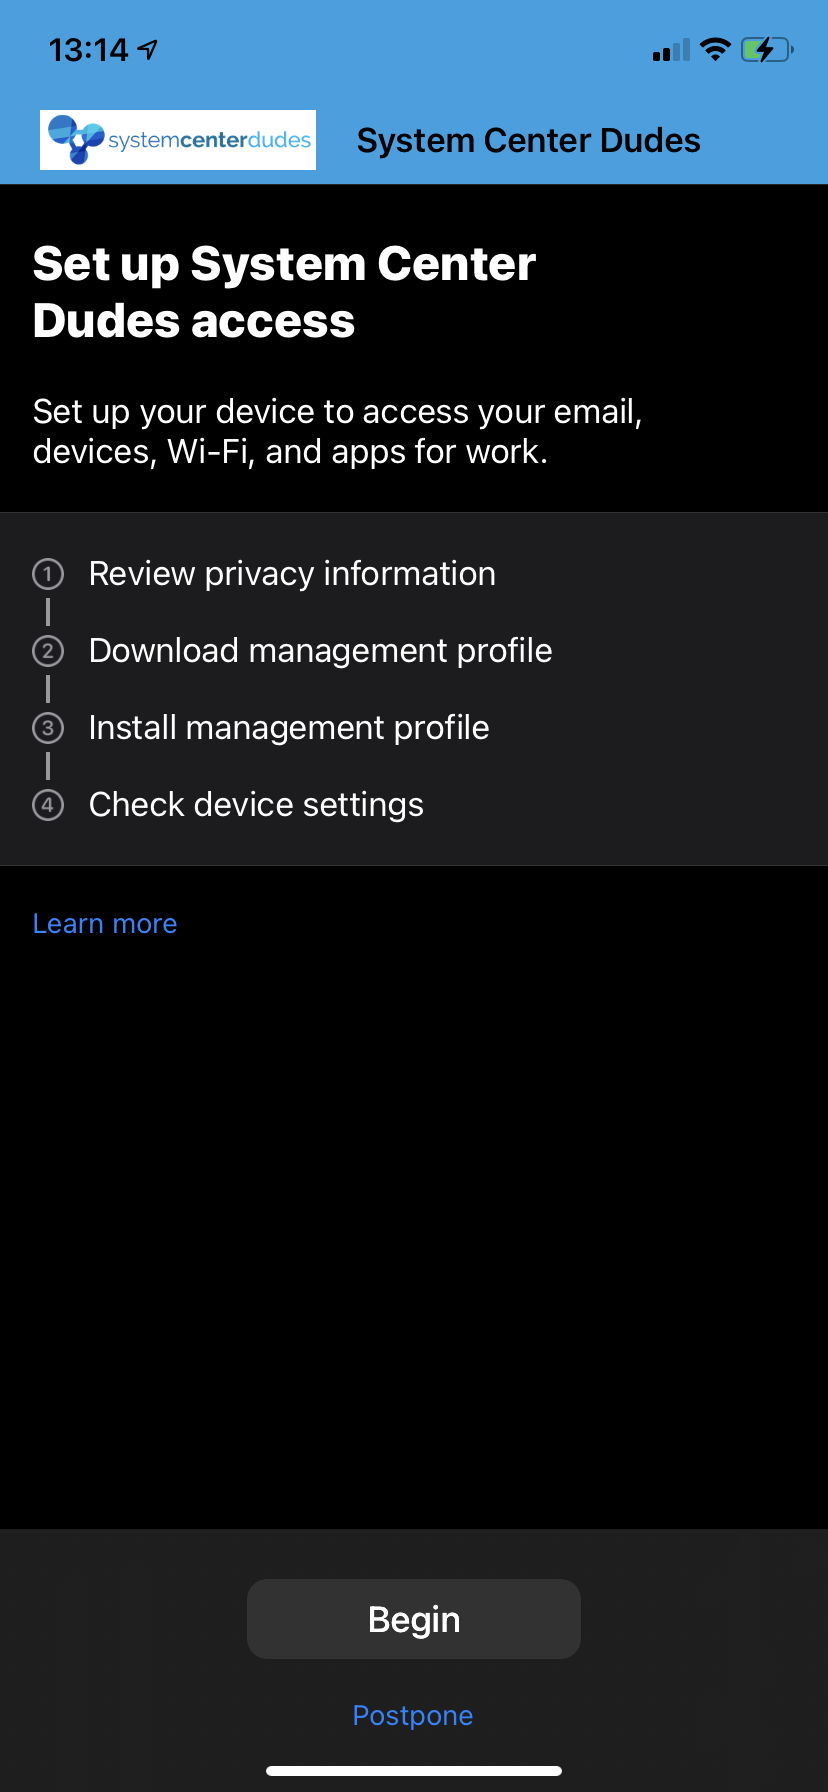
- Review and click Continue
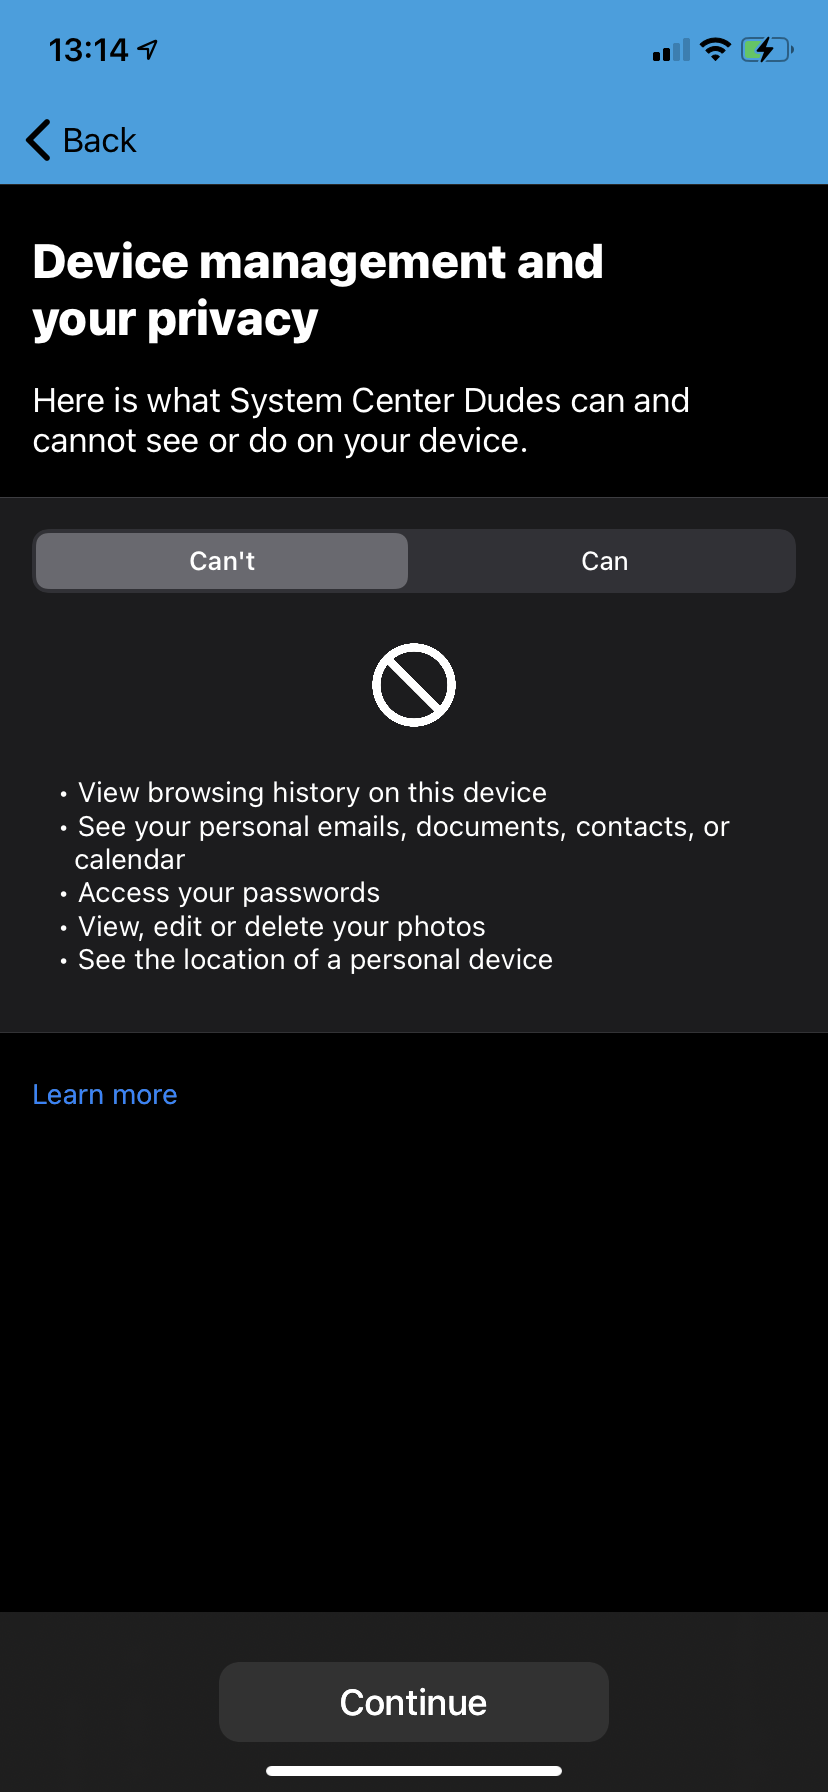
- Review and click Continue
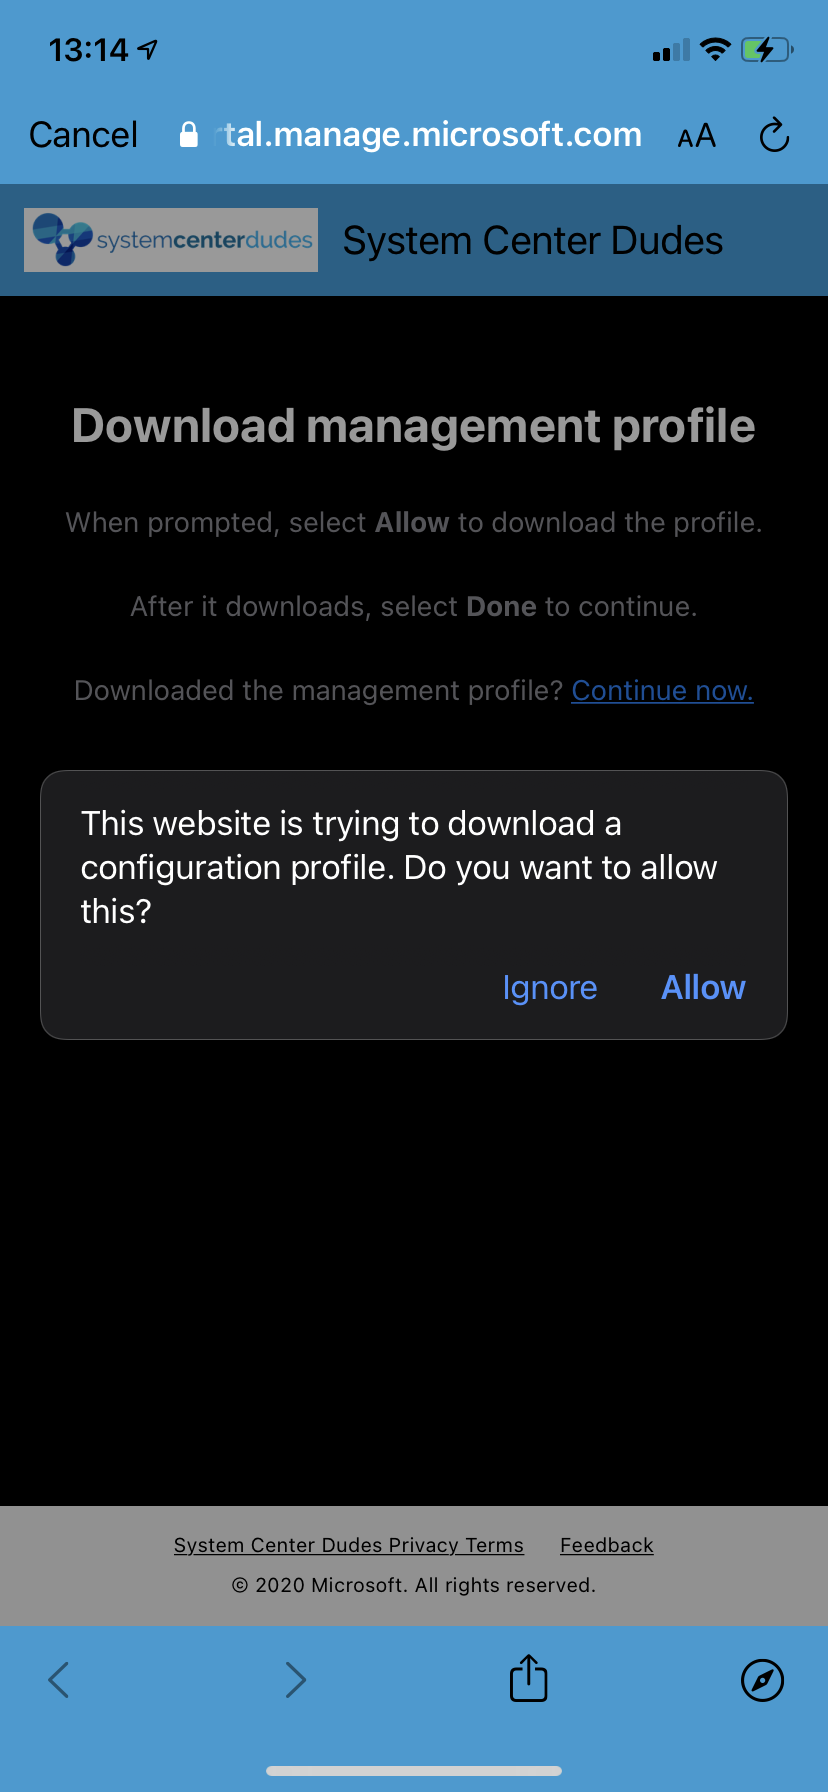
- You’ll get prompted to install the Management Profile, click on Allow. You will be prompt to enter your Iphone passcode
- Open Settings and select Pofile Downloaded
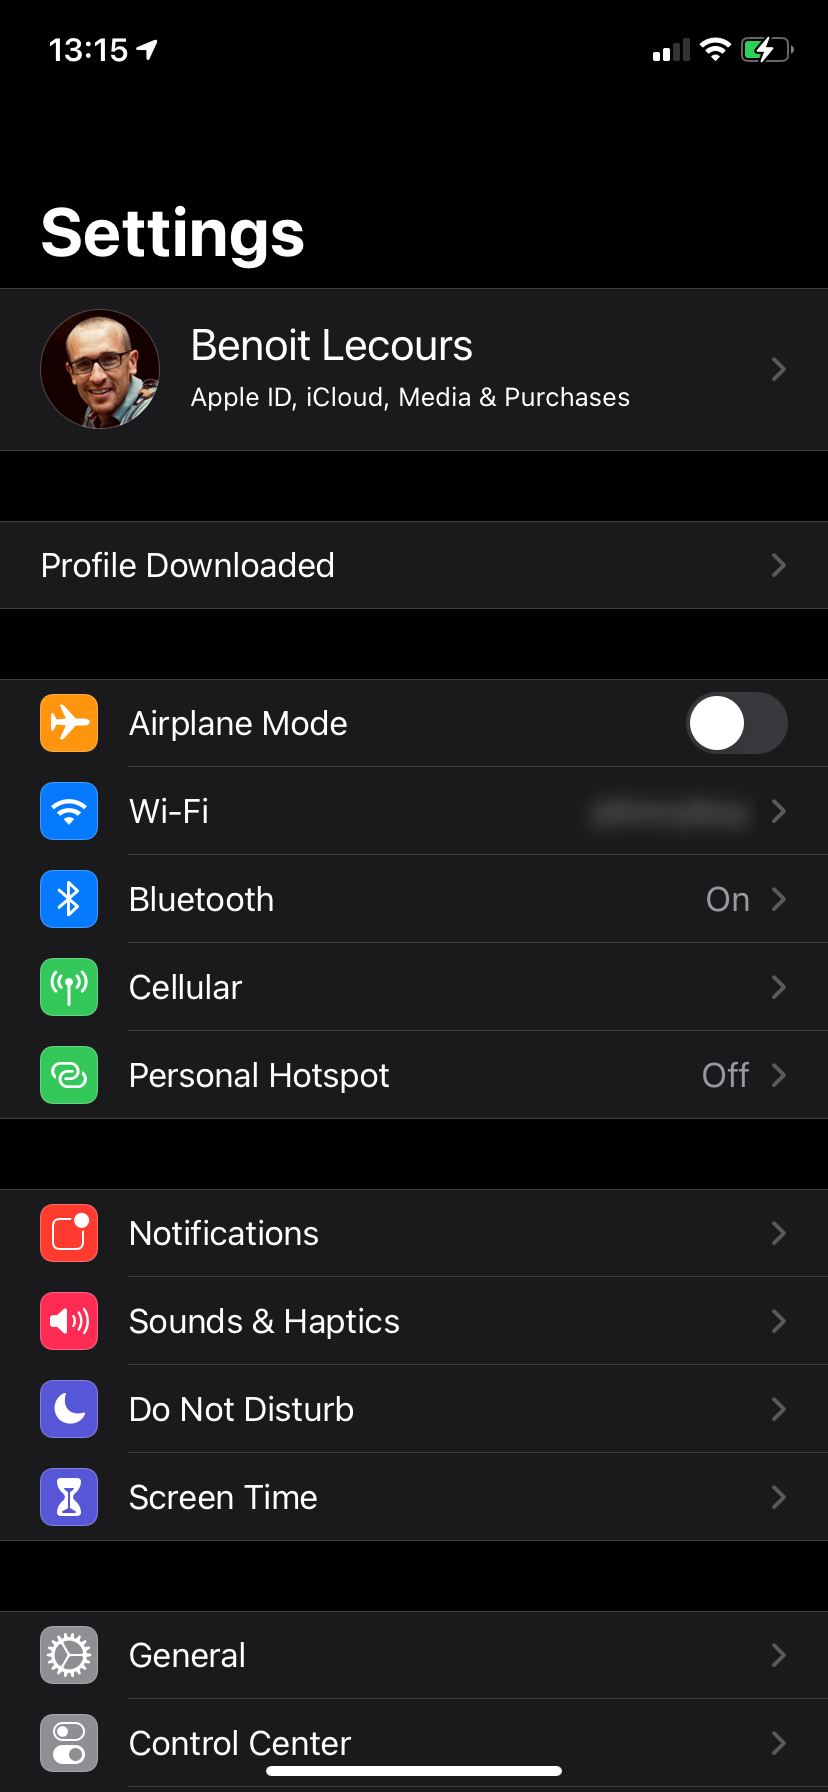
- Select Install at the top
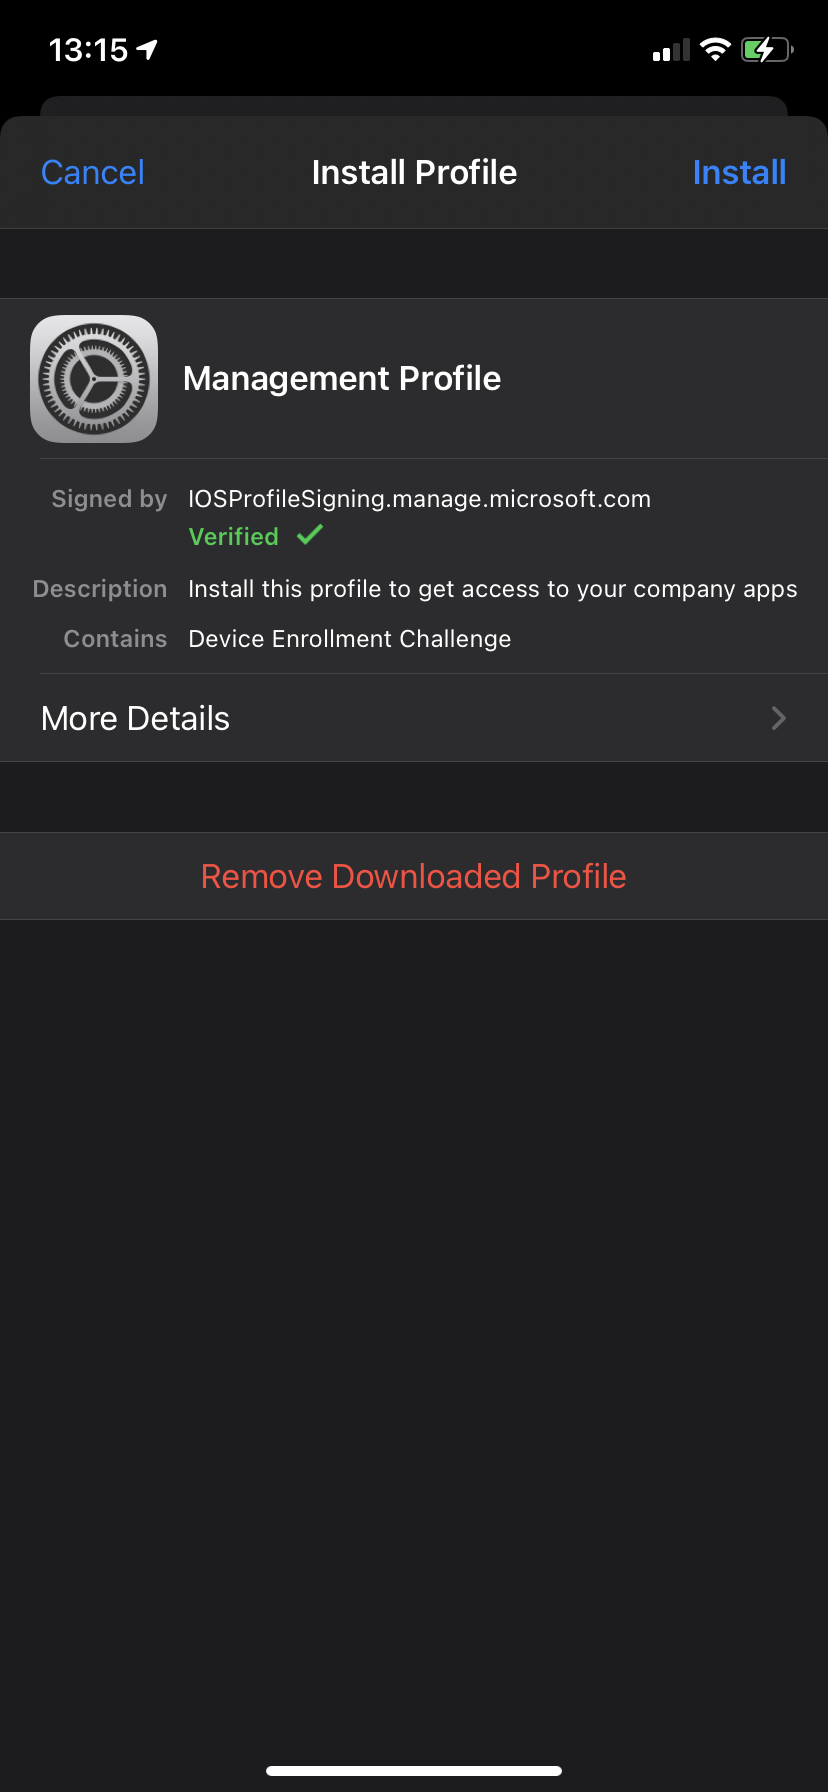
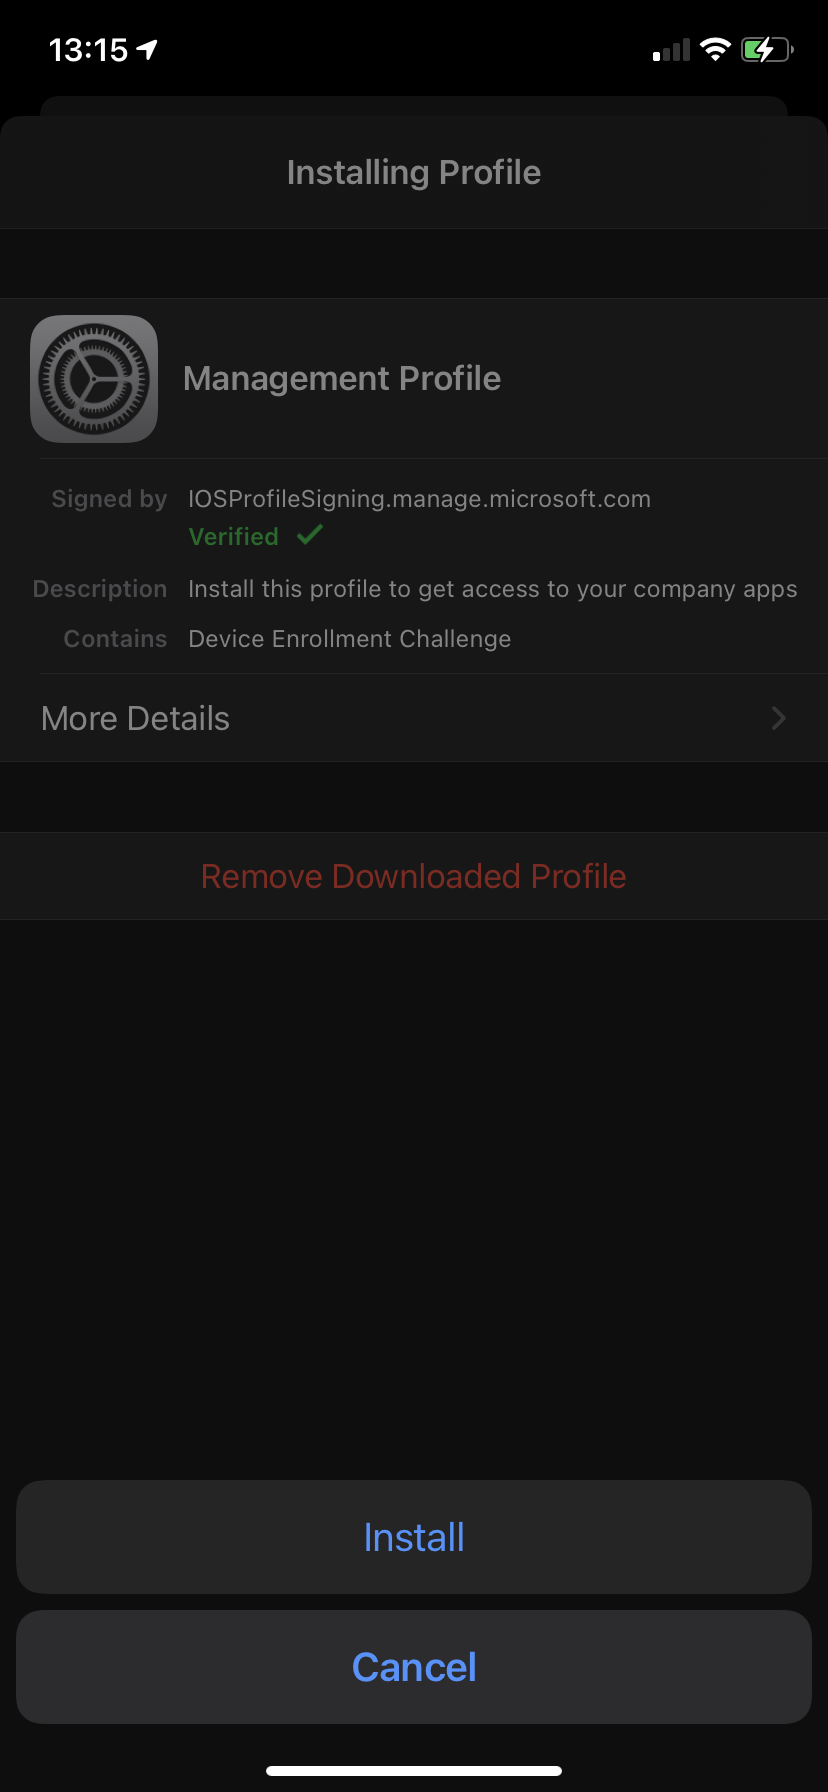
- Click Install at the bottom
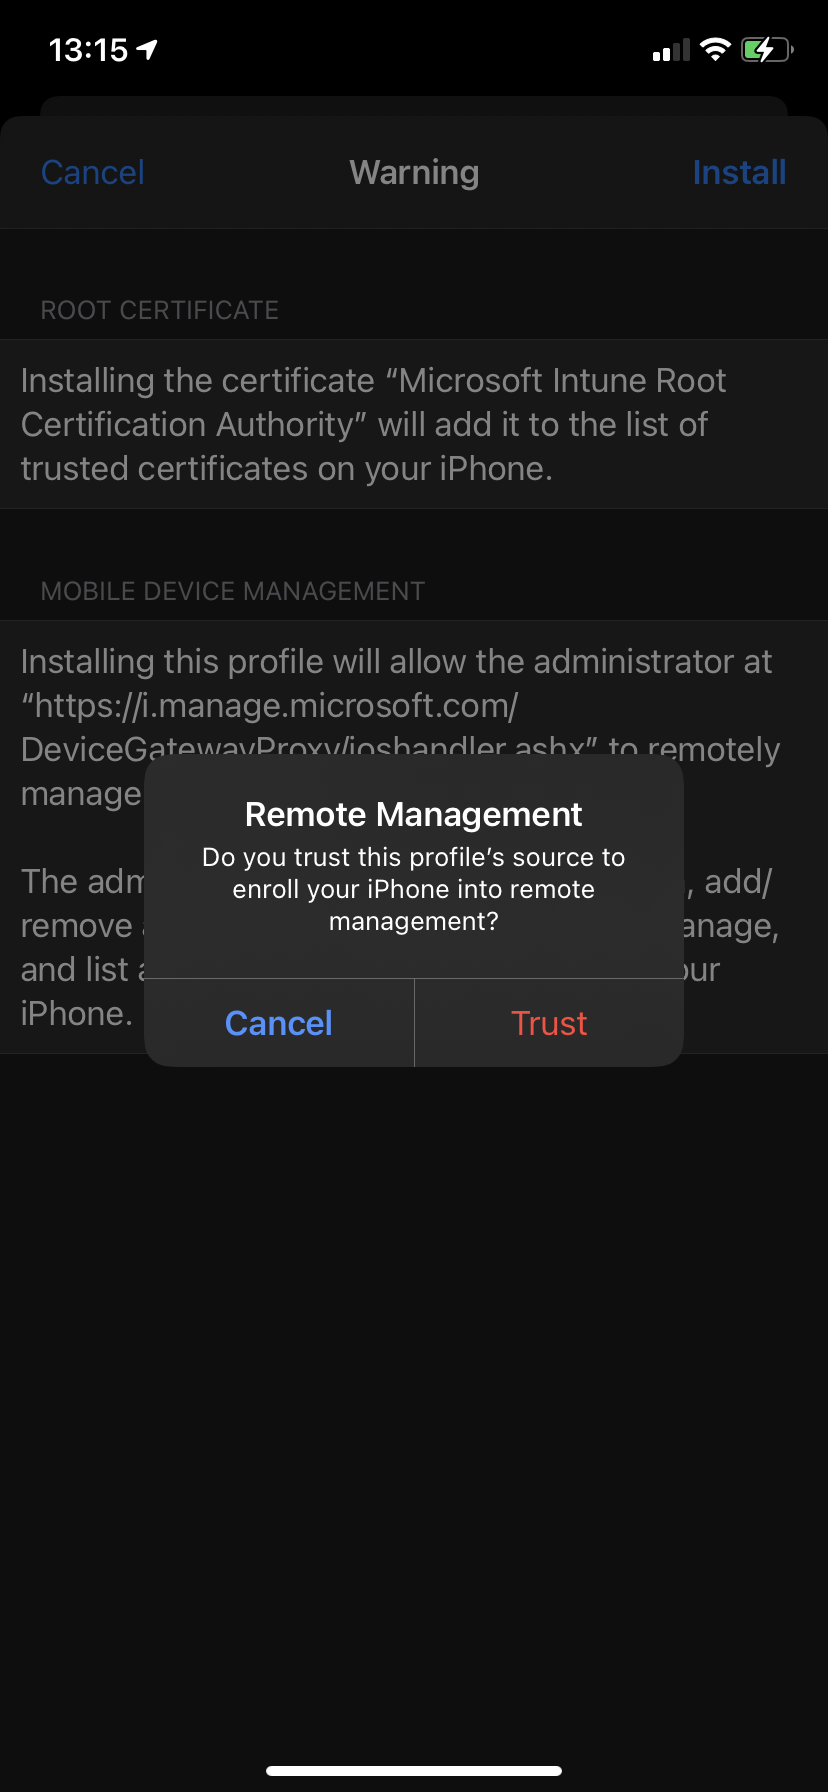
- On the Warning page, select Install
- On the Remote Management warning, select Trust
- Select Done at the top
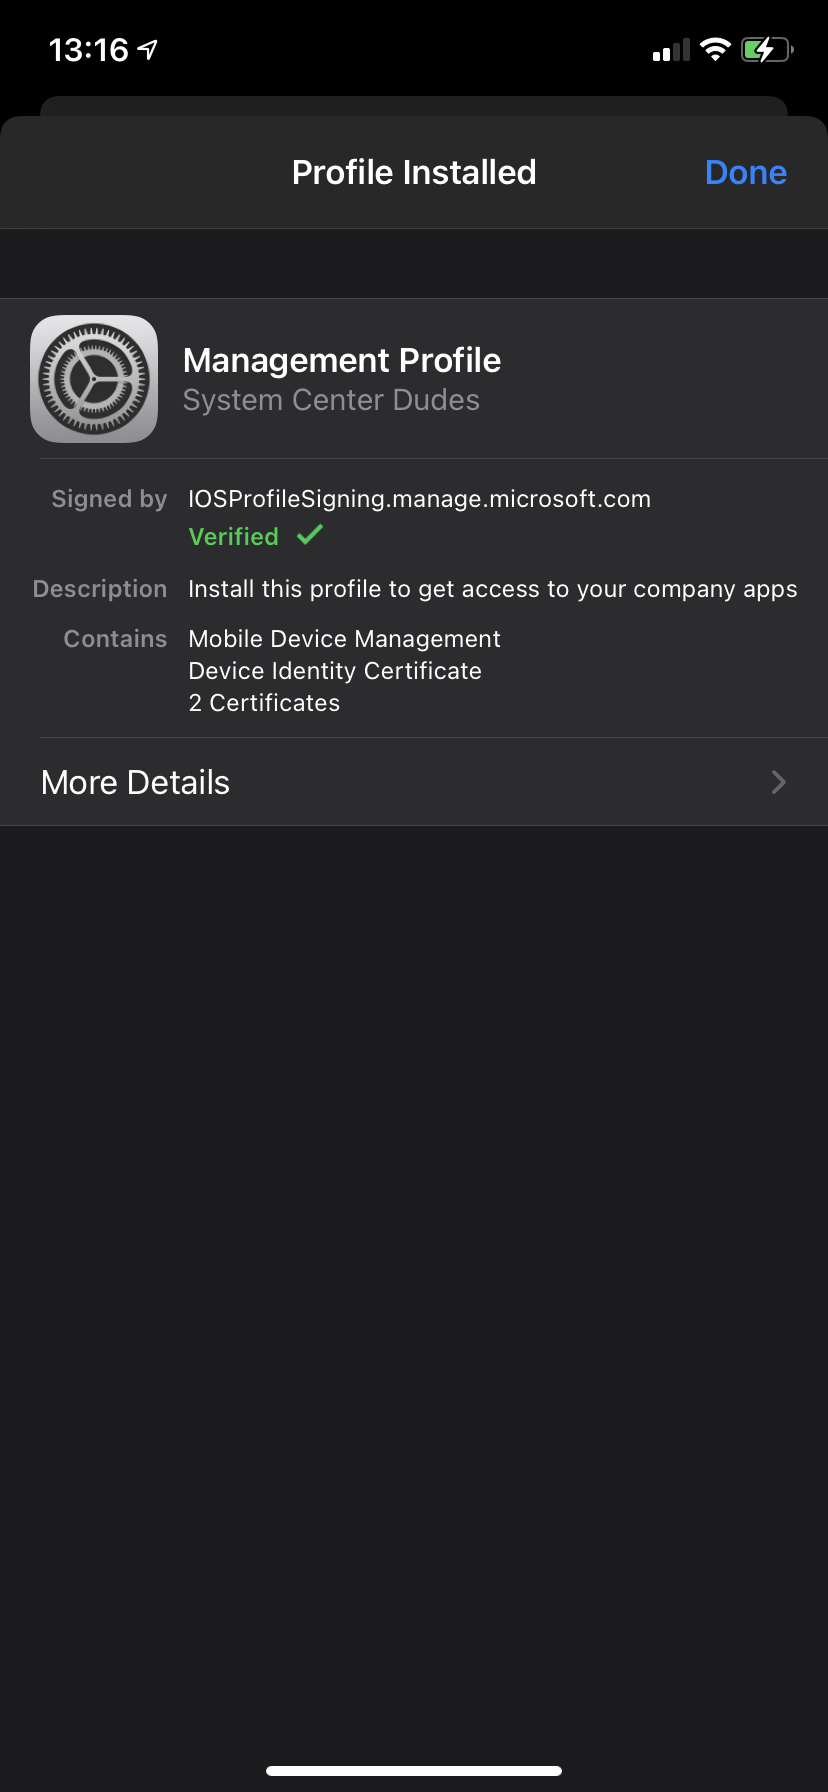
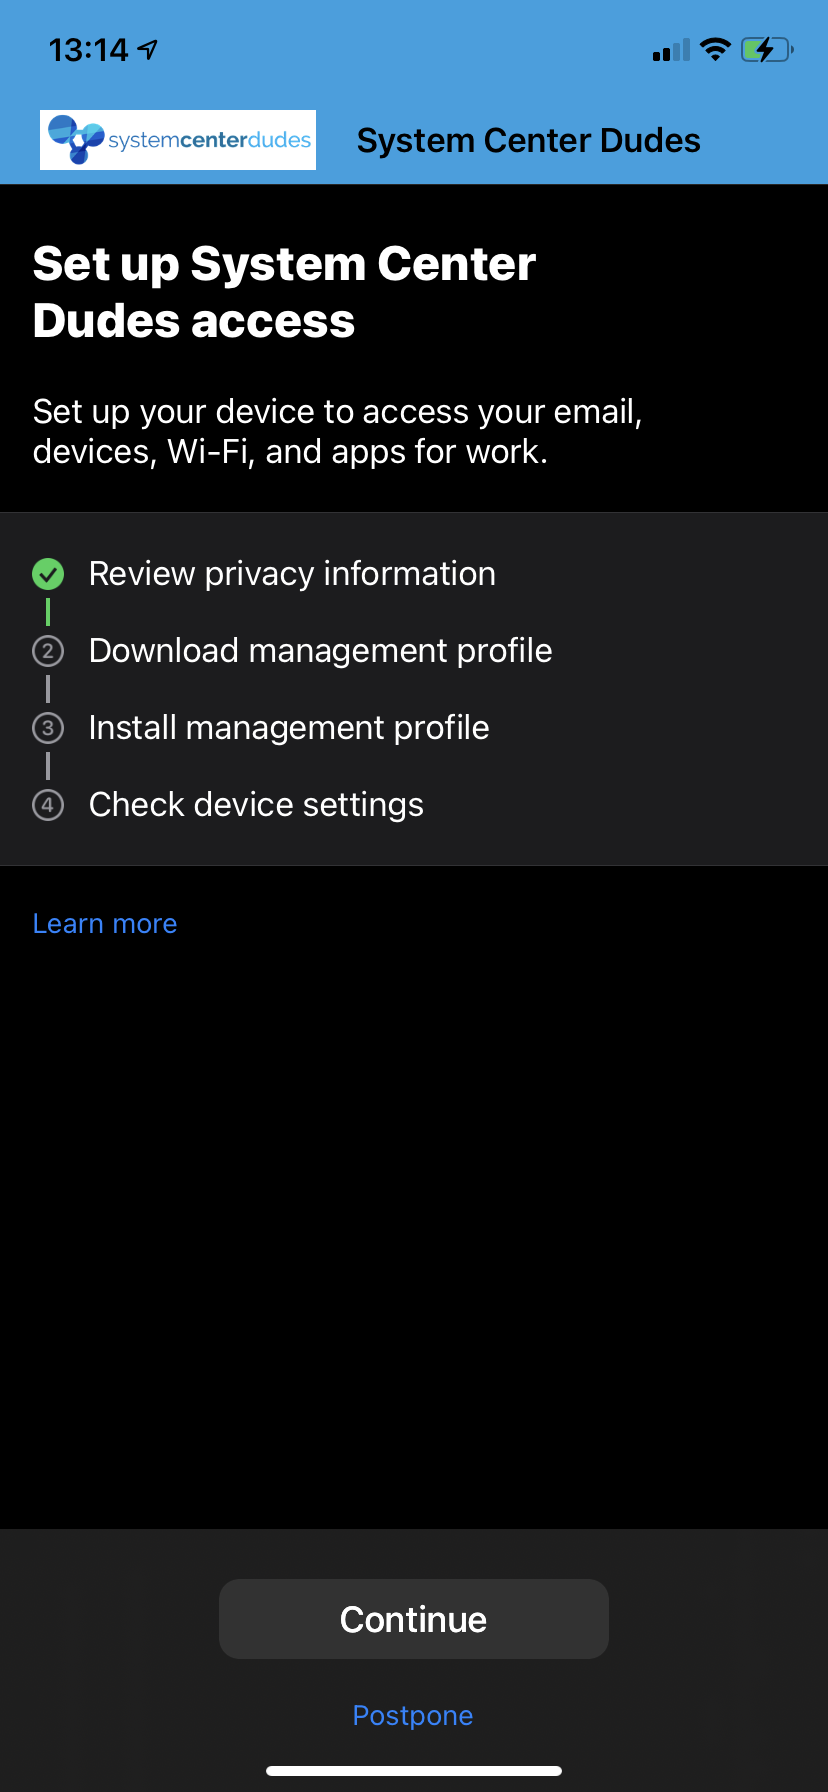
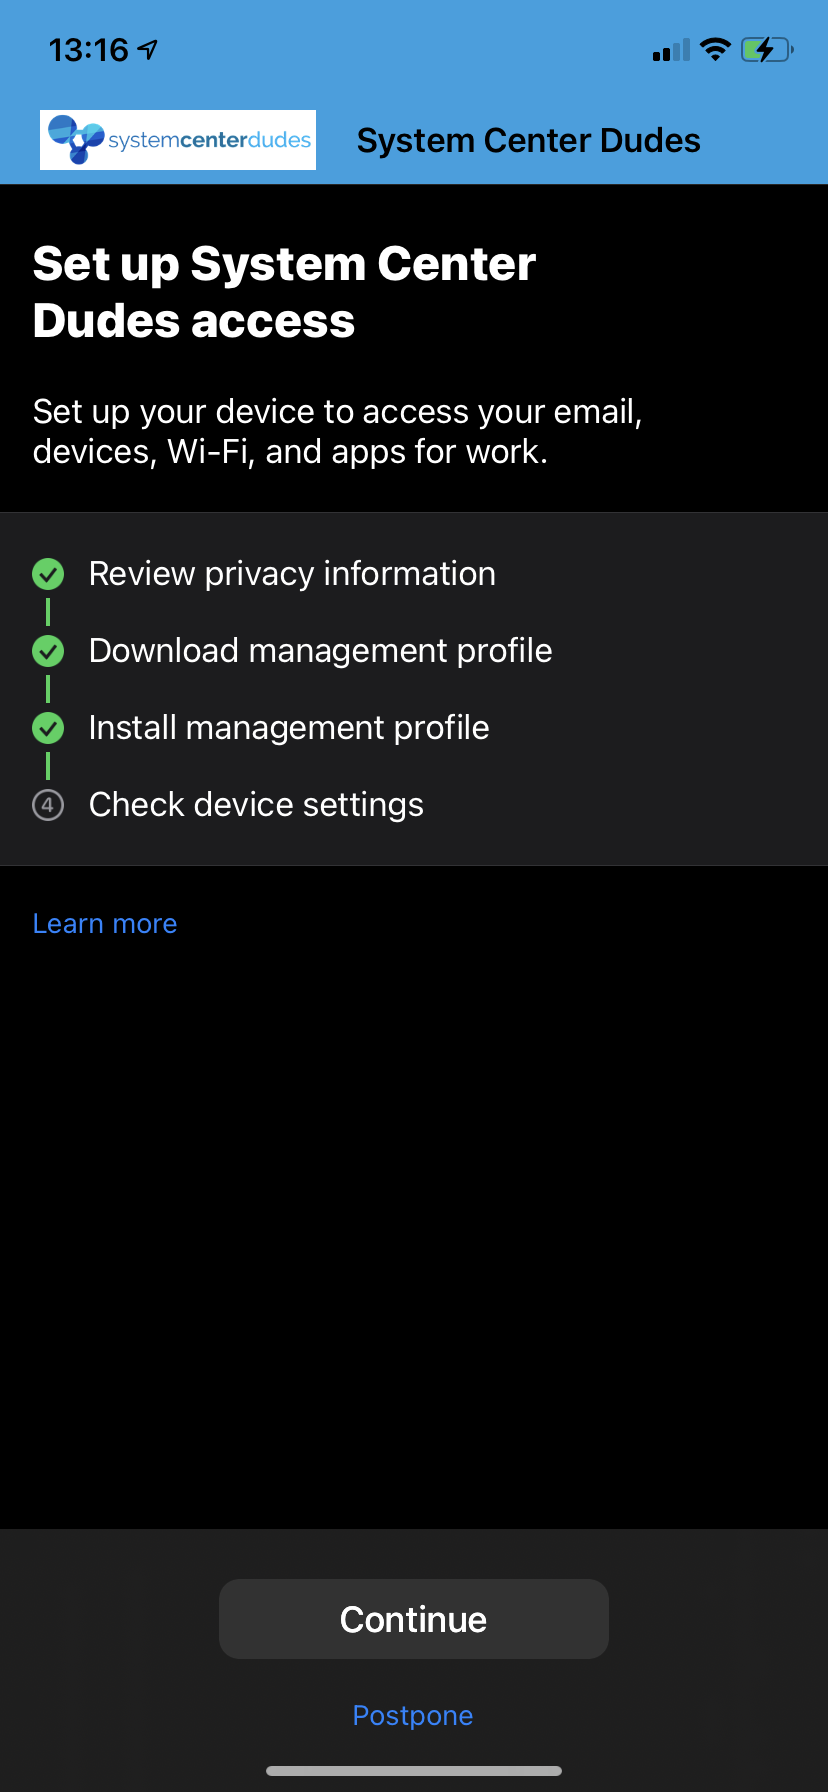
- Back in the company Portal, select Continue Now

- If everything was setup correctly, you should have all 3 green check mark. Click Continue
The device will make its initial compliance check. If you have any app assignments, you’ll also receive an installation notification at this point. Since your tenant is brand new, you shouldn’t have any. Let’s create an app to install on our devices.
For our example, we’ll install the Microsoft Authenticator App
Intune Application Deployment – CREATE THE MICROSOFT AUTHENTICATOR APP
We will now add the Microsoft Authenticator app to our Intune portal. We will begin with the iOS version. This can be used for any other application if needed.
iOS
- Login to your Endpoint Manager Admin Center
- Select App / All Apps
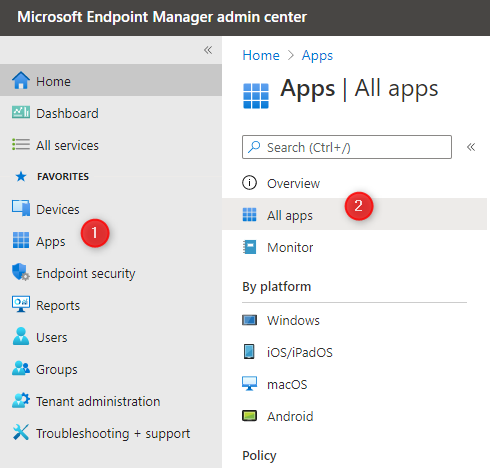
- Select App (1), Add (2), iOS Store App (3) and Select (4) at the bottom

- Click on Search the App Store, on the search box, enter Microsoft, select Microsoft Authenticator and click Select

- Enter the App information and click Next at the bottom

- In the Scope screen, click Next

- On the Assignment tab, this is where you enter the group you want to deploy the app. Add your group to the desired deployment option.

- On the Review + Create tab, review all your choices and click on Create at the bottom

- You’ll see a confirmation at the top right

- After creation, you’ll be sent to the Microsoft Authenticator app screen. Go to the Properties tab if you need to modify anything like Assignments. You can also see Deployment statistics on this screen

Android Devices
We will now do the same step for the Android version of Microsoft Authenticator app.
- Login to your Endpoint Manager Admin Center
- Select App / All Apps

- Select App (1), Add (2), Android store app (3) and Select (4) at the bottom

- Click on Search the App Store, on the search box, enter Microsoft, select Microsoft Authenticator and click Select
- Enter the App information like the Name and Description
- In the Appstore URL enter: https://play.google.com/store/apps/details?id=com.azure.authenticator
- This ID is found by searching the App on the Google Play Store
- Search for Microsoft Authenticator App and select it
- Copy and paste the URL from your browser
- Click Next at the bottom after all information has been entered

- In the Scope screen, click Next
- On the Assignment tab, this is where you enter the group you want to deploy the app. Add your group to the desired deployment option

- On the Review + Create tab, review all your choices and click on Create at the bottom

- You’ll see a confirmation at the top right
- After creation, you’ll be sent to the Microsoft Authenticator app screen. Go to the Properties tab if you need to modify anything like Assignments. You can also see Deployment statistics on this screen

Setup Microsoft Intune – Review and Test App Deployment
Both Applications have now been added to our Intune tenant and is ready to test on an iOS or Android device

- On an iOS device, open the Company Portal and if you configured everything correctly, you’ll see the Microsoft Authenticator app

Device Configuration Profile
Using Microsoft Intune, you can enable or disable different settings and features as you would do using Group Policy on your Windows computers.
You can create various types of configuration profiles. Some to configure devices, others to restrict features, and even some to configure your email or wifi settings.
For our post, let’s create a Wifi connection profile for our users so they get access to your Wi-Fi network without configuring it. This is just an example, you can create a configuration profile for many other different settings.
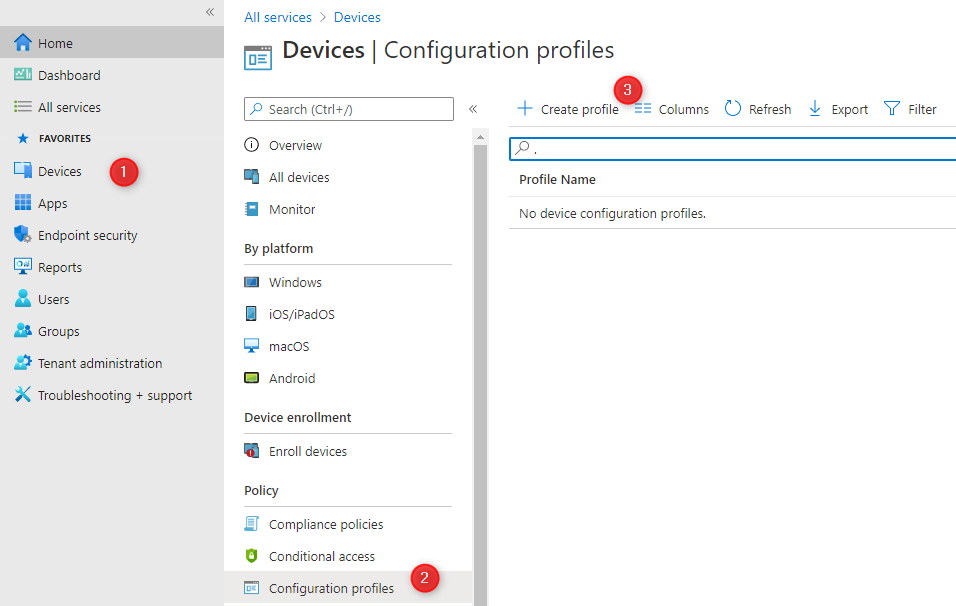
- Login to your Endpoint Manager Admin Center
- Go to Devices / Configuration profiles / Create profile
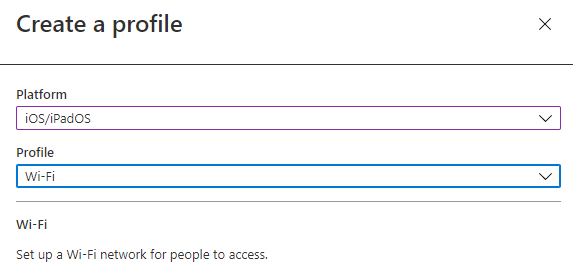
- In Platform, select iOS/iPadOS and in Profile, select Wi-Fi, click Create at the bottom
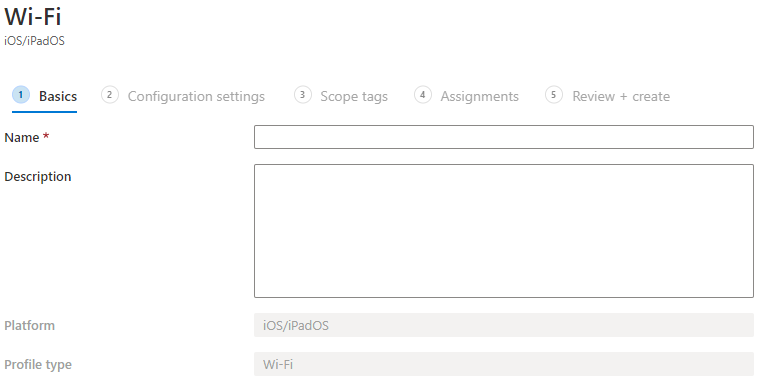
- Give a Name and Description to your newly created profile, click Next
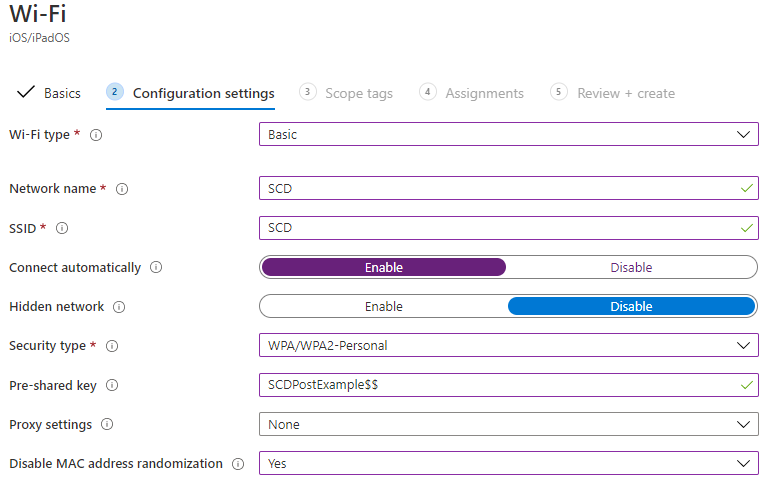
- In Configuration Settings, enter your Wifi settings, for our post we create a basic WPA2 profile but the WPA2-Enterprise is also supported, click Next
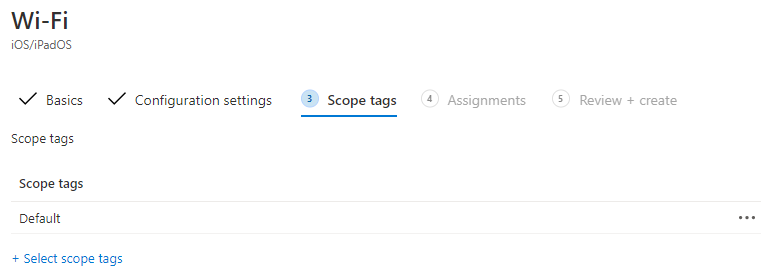
- Assign the desired scope tag, click Next
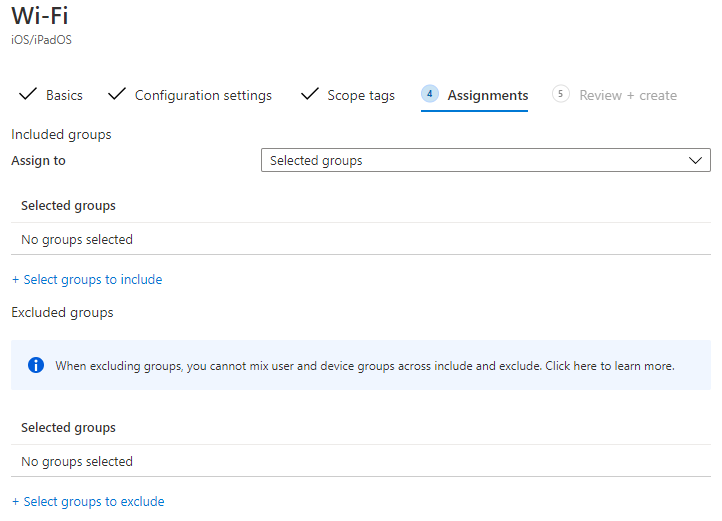
- Assign the profile to the desired user/groups, click Next
- Review your settings and click Create
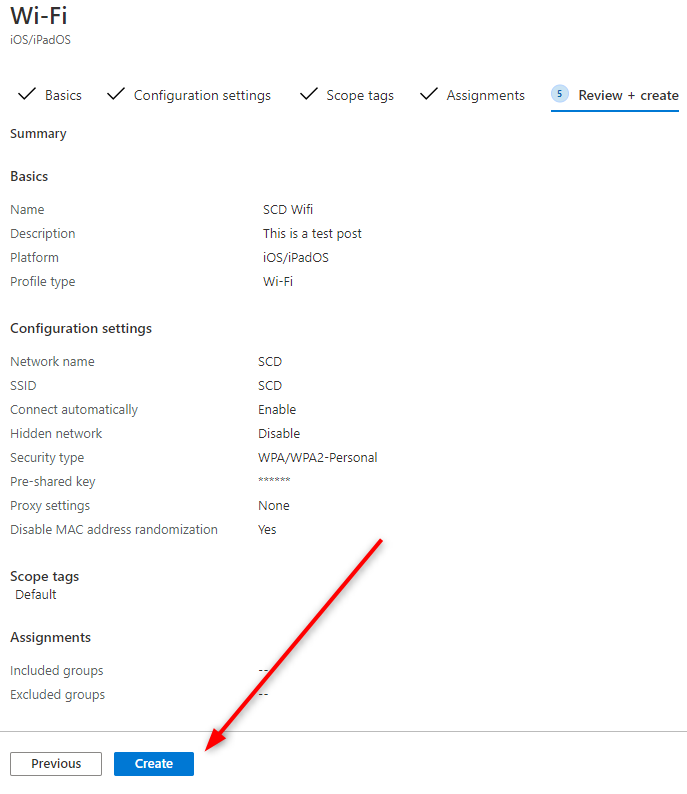
You’ve just created your first configuration profile. You can now check the available options and create different configurations for different OS.
Dashboard
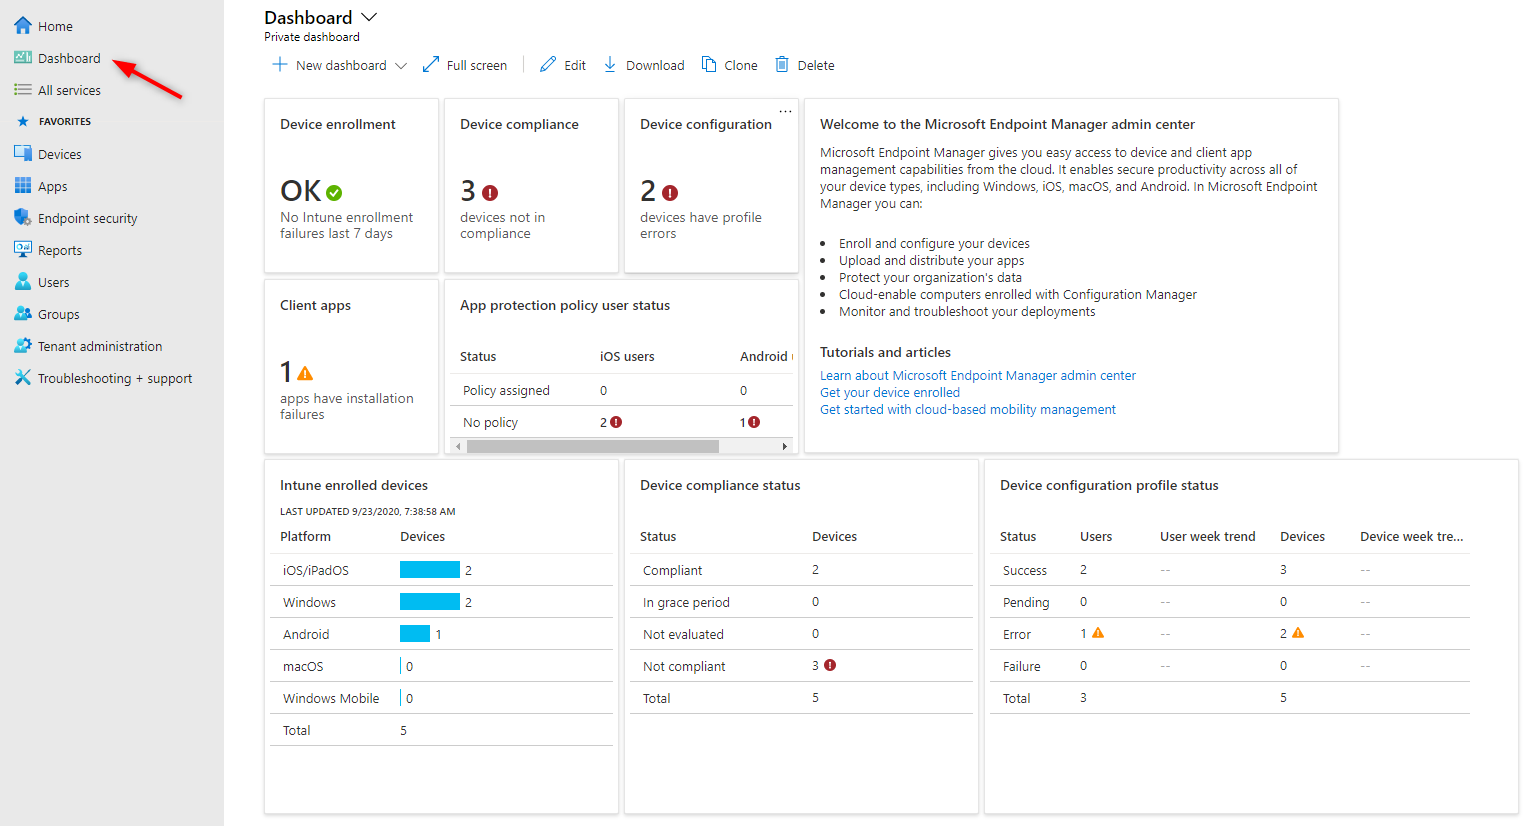
There’s still one last thing that you should start looking at. The Microsoft Intune Dashboard displays overall details about the devices and client apps in your Intune tenant. If you have a device, just take a look at what’s displayed there. it gives a good overview of your progress.
To access the Dashboard, simply select Dashboard on the left pane.
For our example, we can quickly see the action point we should focus on.
Setup Microsoft Intune – What’s next
So to wrap up, we’ve setup Microsoft Intune Tenant, configure it for your company’s needs, enroll some devices, configure a basic compliance policy, create a configuration profile and deploy your first app.
So what’s next? There’s still so much to cover. We suggested that you start looking at :
- Enroll Windows devices
- Enroll Android Devices
- App Protection Policy and Mobile application management (MAM)
- Device Profiles (One example: Enable And Manage Windows Defender Firewall Using Intune)
- Device Restrictions policy
- Conditional Access (One example: Block Tiktok Using Intune Device Compliance Policy And Conditional Access)
- Windows 10 Software Update in Intune
- Setup CoManagement (if using Configuration Manager)
- Setup Windows 10 Auto Enrollment
- Configure Windows 10 AutoPilot
Enroll on more devices, play with different options and most importantly test, test and test ! We’ll be doing a more in-depth post in the following week to cover more Microsoft Intune configuration options.
Share
Get the latest insights and exclusive content delivered to your inbox


ldavila@tsgcompany.com
03.30.2021 AT 11:51 AM