
Since the release of the ADK for Windows 11 22H2 (September 2023 Update), Many realized that UI++ VBScripts not working during Operating System Deployment Task Sequences. Looking at the UI++ log file, we notice the error “Loading VBScript environment: Error. Class not registered”

Microsoft has acknowledged this as a known issue in the ADK. They do provide a fix, but it’s not as easy as updating the ADK. It involves mounting the WinPE.wim from the ADK, injecting the Winpe-scripting module in the image, injecting the latest cumulative update for server 23h3, Committing the wim and then re-generating the boot image from SCCM.
Now that I’ve been through all the leg work, here’s an article on how to do this step by step without breaking a leg 🙂
Fix UI++ VBScripts not working
First, here’s what you need to gather:
- Local Admin and Remote Control rights on the SCCM/MECM Server
- These steps need to be followed from the Primary Server, where the ADK is installed
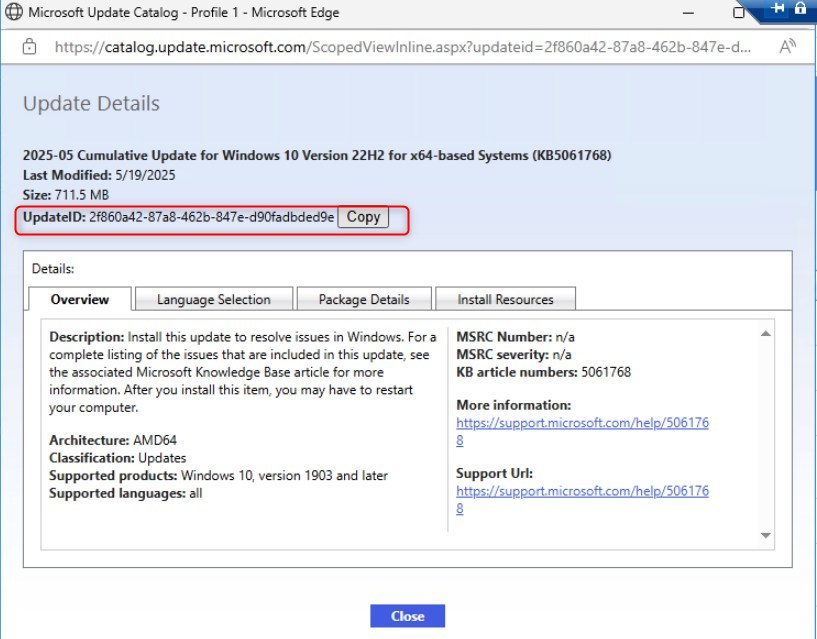
- Latest Cumulative Update for Windows Server 23H2 x64
- while I suggest getting the latest CU available, here’s a link to the November 2023 update for your convenience: Microsoft Update Catalog
- ADK for Windows 11 22H2 (September 2023 Update)
- This is the version that is known to have the issue
- To confirm this, in SCCM/MECM your boot image OS Version should be 10.0.25398.1

Step-by-step procedure. UI++ VBScripts not working
If you’d rather use a script that does the procedure for you, scroll down to the next section
- Make sure you have the Cumulative Update.msu on the server, and note the path where it’s located as we’ll need to call it from command line.
- Open CMD or Powershell as Administrator
- Navigate to the folder where the ADK is installed
- CD “%ADKDrive%:\Program Files (x86)\Windows Kits\10\Assessment and Deployment Kit\Windows Preinstallation Environment\amd64”
- Note: If using CMD and the ADK path is not in the same drive as your current working directory, you’ll need to enter the drive letter and press enter before you can ‘CD’ in the path. Example:

- We are creating a temporary folder where to mount the WinPE Image
- mkdir Staging
- Mount the image in the staging directory. Note that the EN-US Directory may be different for you if you are in another region. Ensure to change it accordingly.
- Dism /Mount-Image /ImageFile:”EN-US\Winpe.wim” /index:1 /MountDir:”Staging”
- The first part is to inject the WinPE-Scripting module into the WIM *Before* injecting the cumulative update. This is usually done by SCCM while generating the boot image, but since it happens after the Update, it doesn’t fix the issue. So we must do it manually with the following command:
- Dism /Add-Package /Image:”Staging” /PackagePath:”WinPE_OCs\WinPE-Scripting.cab”
- Now we’re ready to inject the Cumulative update:
- Dism /Add-Package /Image:”Staging” /PackagePath:”PATH_TO_MSU\Windows11.0-KB5032202-x64.msu”
- It’s now time to do a little cleanup of the image before closing it:
- Dism /Cleanup-Image /Image:Staging /Startcomponentcleanup /Resetbase
- We can now commit the image
- Dism /Unmount-Image /MountDir:”Staging” /commit
- Finally, we can delete our temporary Staging directory
- rmdir Staging
Cheat Code: Run a script that does it all for you!
In this day and age where everything turns around AI and Automation, who wants to be typing command lines one by one, right? Here’s the code a batch file that you can create to do all of this for you.
@ECHO OFF
set /p ADKDrive="Please input the letter of the drive where the ADK is installed: "
%ADKDrive%:
cd "%ADKDrive%:\Program Files (x86)\Windows Kits\10\Assessment and Deployment Kit\Windows Preinstallation Environment\amd64"
mkdir Staging
@Echo On
Dism /Mount-Image /ImageFile:"EN-US\Winpe.wim" /index:1 /MountDir:"Staging"
Dism /Add-Package /Image:"Staging" /PackagePath:"WinPE_OCs\WinPE-Scripting.cab"
Dism /Add-Package /Image:"Staging" /PackagePath:"%~DP0Update.msu"
Dism /Cleanup-Image /Image:Staging /Startcomponentcleanup /Resetbase
Dism /Unmount-Image /MountDir:"Staging" /commit
rmdir Staging
Before running the script as-is, know that this batch file assumes the following:
- The ADK is installed in the default directory proposed by the setup
- Only the drive letter may have been changed from the default path
- The script will always ask you for the drive letter, it doesn’t assume the ADK is on the C:\ Drive.
- When asked, input only the letter without col. Example: ‘E’. The column and backslash are added to the code
- You renamed the downloaded Cumulative Update file name to Update.msu
- The Update.msu is located in the same folder as this batch file
Updating your Boot Image in SCCM/MECM
Now that we have an updated WinPE in the ADK, we must reload our boot images from the ADK.
- In Configuration Manager, navigate to Software Library-> Operating Systems-> Boot Images
- Right-click on the boot image you wish to update
- Select “Update Distribution Points”

- Make sure to hit the checkbox on “Reload this boot image with the current Windows PE version from the Windows ADK”

- Click Next Twice and let Configuration Manager do its magic.
- Once the boot image is generated, the OS Version should reflect the current build number

- If you have USB Bootable Media, make sure to re-generate your USBs with the latest version of the boot image. There are no additional steps needed if you are booting using PXE.
Once this is done, you should have fix the UI++ VBScripts not working.


shad0w96
12.13.2023 AT 02:04 PM