
Remote Server Administration Tools (RSAT) is a Windows Server component for remote management of other devices. RSAT allows administrators to run snap-ins and tools on a remote device to manage features, roles and role services. The software includes tools like Bitlocker Password Recovery, Group Policy management, NIC Teaming and many more.
A lot of IT guys use this tool in their day to day basis. Microsoft has released RSAT for Windows 10 so if you are an SCCM admin, instead of manually install via the link, you can create an application in SCCM 2012 and make it available to every Windows 10 computer or to users who have the right to use RSAT.
This post will show you how to create this application in SCCM 2012.
Step 1 | Create RSAT Application
Click on this link, download and save the source files needed in your content directory. These files will be used as the source of the application.
** Update 2015-11-20 ** The link has been updated by Microsoft. You will download the latest version for Windows 10 TH2.
** Update 2015-09-28 ** Remote Server Administration Tools for Windows 10 is available only in English (United States) for current release.
From the SCCM console, navigate to Software Library / Overview / Application Management / Applications
- Right click on Applications and select Create Application
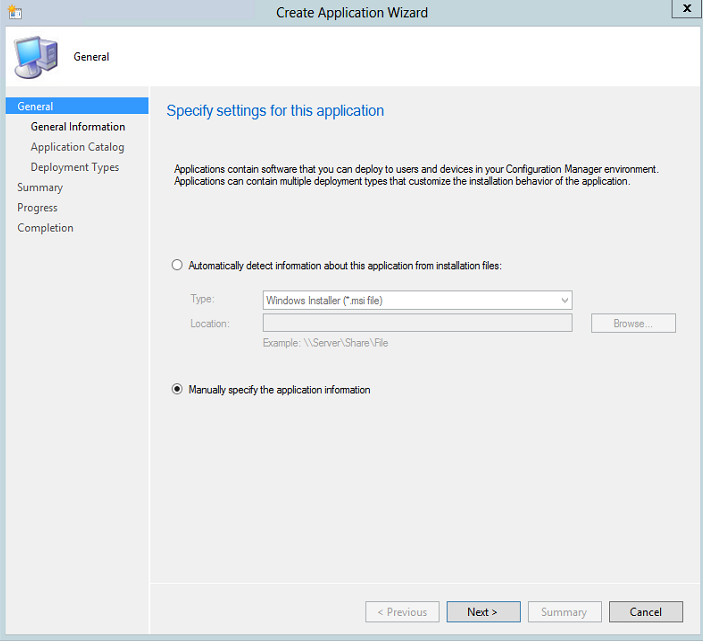
- The Create Application Wizard window will appear, on General tab, select Manually specify the application information and click Next
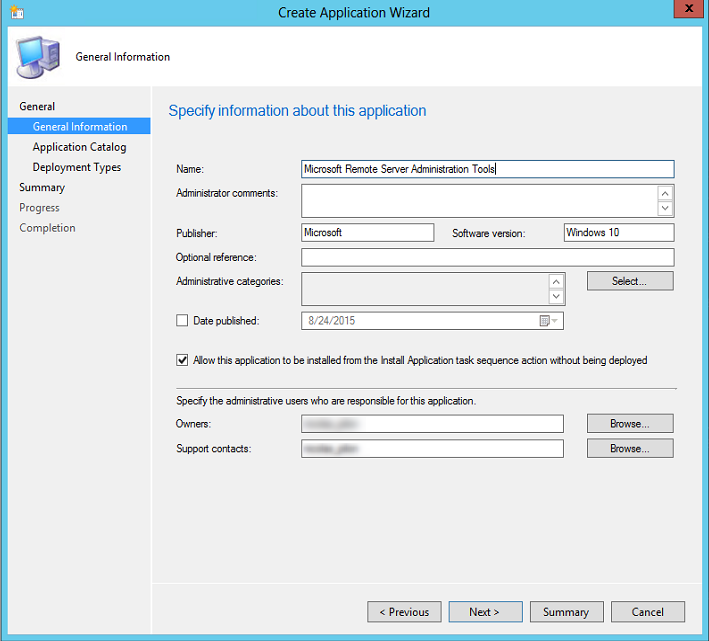
- In General Information tab, enter an application name like Microsoft Remote Server Administration Tools
- In the Publisher field enter Microsoft
- In Software Version enter Windows 10 and click Next
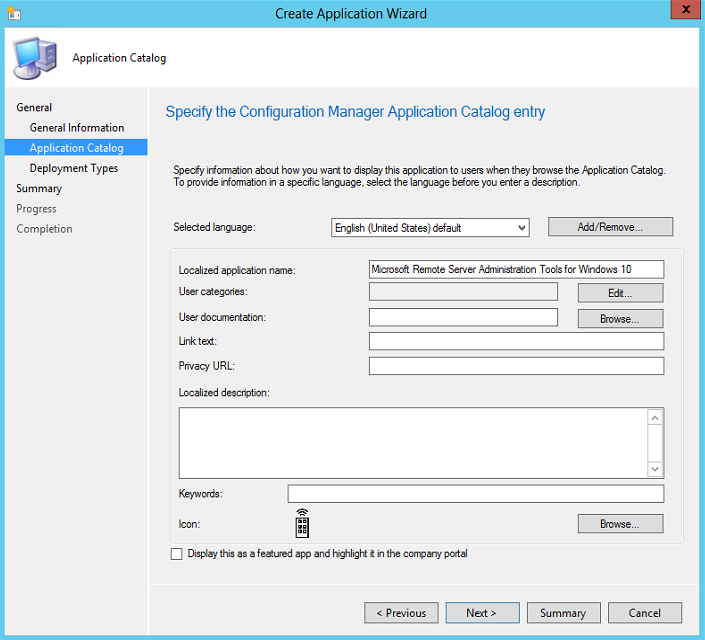
- In the Application Catalog tab, fill required information to customize the user experience
- In this example, we will only fill Localized application name with Microsoft Remote Server Administration Tools for Windows 10 and click Next
- In the Deployment Types tab, click on Add
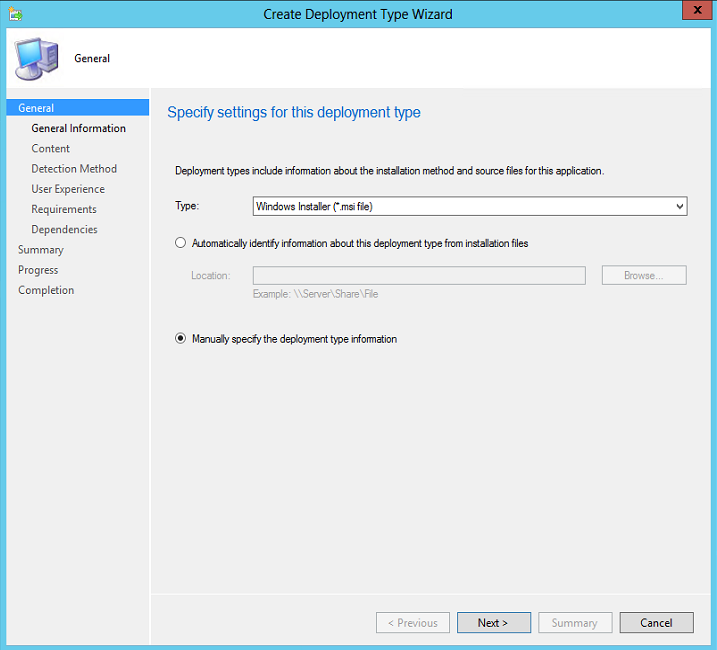
- In the Create Deployment Type Wizard, select Manually specify the deployment type information as your deployment type and click Next
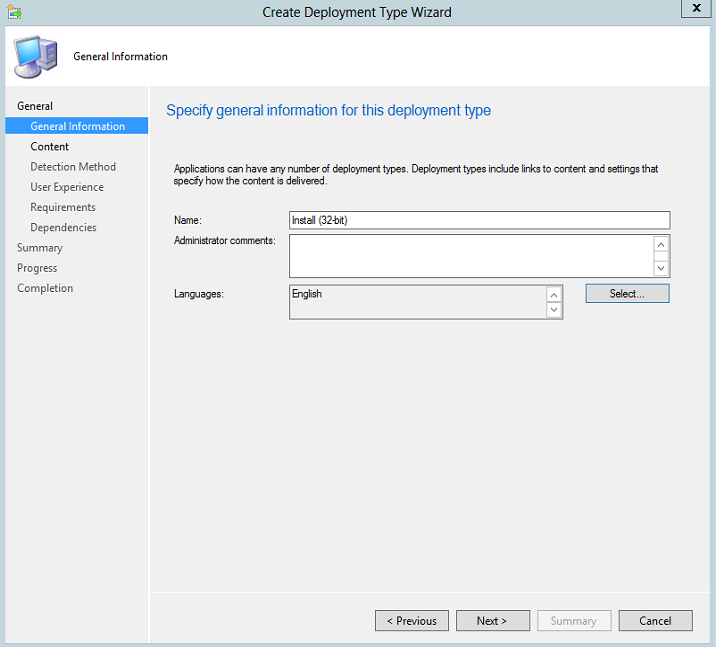
- In General Information tab, enter Install (32-bit) or Install (64-bit) for whatever you configure as the name of the deployment type and click Next
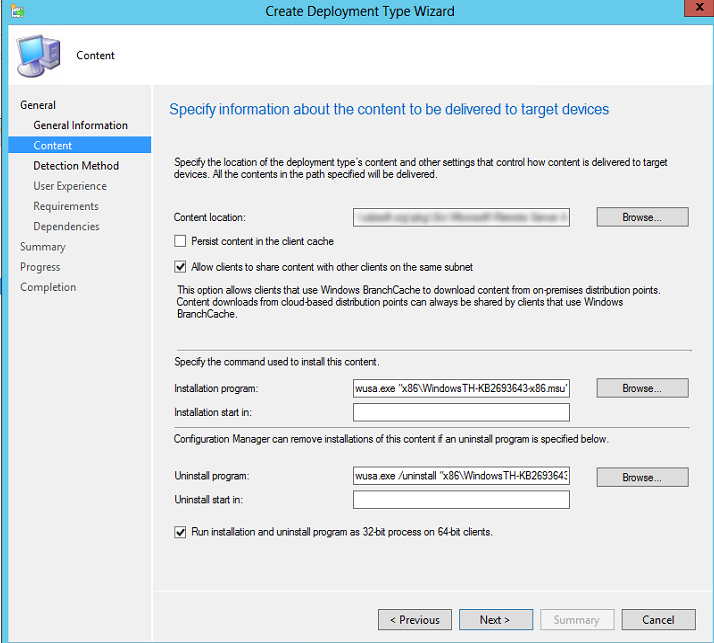
- In the Content tab, enter the Content Location where you copied both files at the beginning
- At the Installation Program field, enter this program command
- For Install (32-bit): wusa.exe WindowsTH-KB2693643-x86.msu /quiet /norestart
- For Install (64-bit): wusa.exe WindowsTH-KB2693643-x64.msu /quiet /norestart
- At the Uninstall Program field, enter this program command
- For Install (32-bit): wusa.exe /uninstall WindowsTH-KB2693643-x86.msu /quiet /norestart
- For Install (64-bit): wusa.exe /uninstall WindowsTH-KB2693643-x64.msu /quiet /norestart
- Check box Run installation and uninstall program as 32-bit process on 64-bit for Install (32-bit) only and click Next
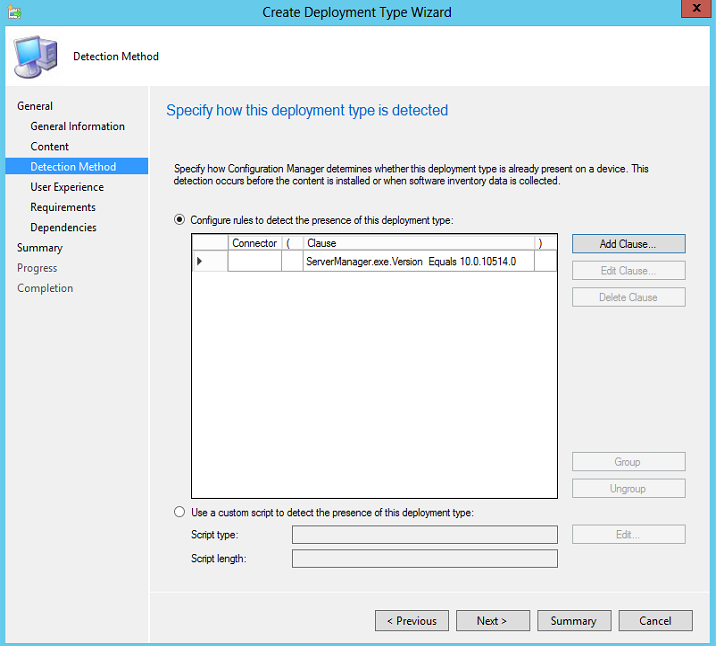
- In the Detection Method tab, click Add Clause
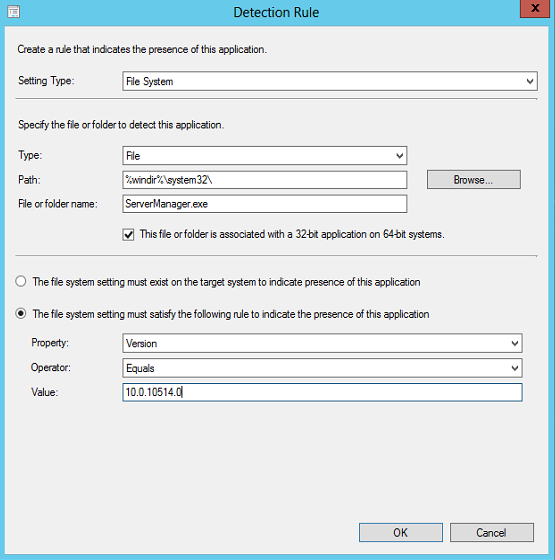
- In the Detection Rule window, select File System as the setting type
- At the Type field, select File option
- At the Path textbox, enter %windir%\system32\
- At File or folder name, enter ServerManager.exe
- Check the option This file or folder is associated with a 32-bit application on a 64-bit systems if you are configuring the detection rule for Install (32-bit)
- Select the option This file setting must satisfy the following rule to indicate the presence of the application.
- Select Version as the property, Equals as the operator and 10.0.10514.0 as the value
The detection method is designed to evaluate whether application is already installed or not. If it turns out that the application is already present, the application will not be installed.
- You will come back to the Detection Method tab, click Next
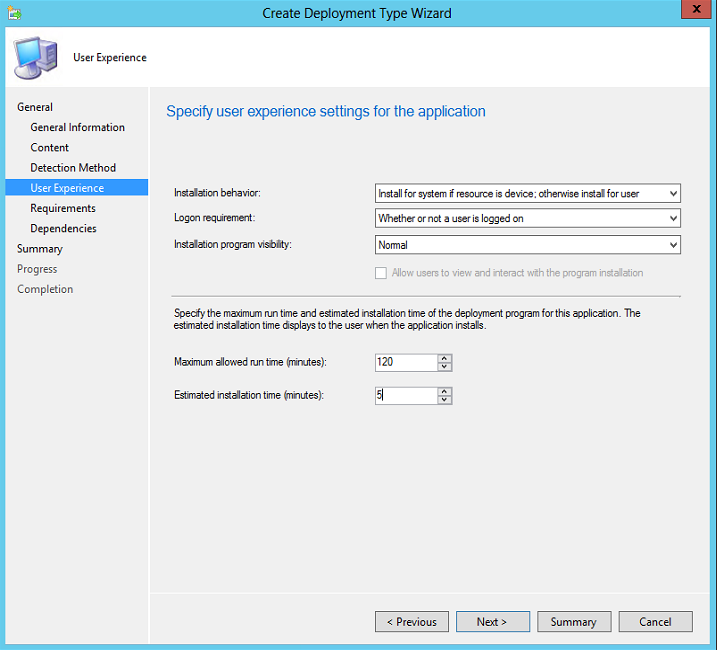
- In the User Experience tab, at the Installation behavior settings, choose Install for system if resource is device; otherwise install for user if you use both type of collections
- At Login requirement, choose Whether or not a user is logged on
- At Estimated installation time (minutes), enter 5 minutes
- Click Next to finalize the process, then Close
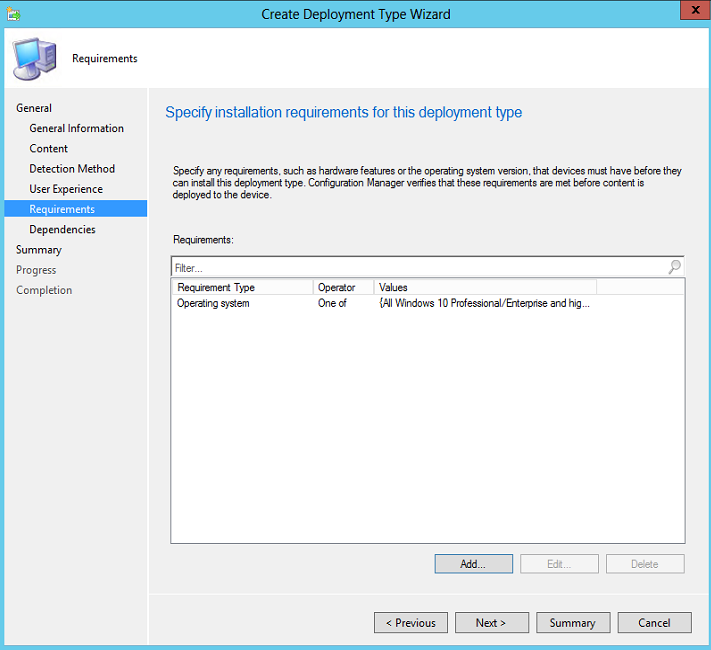
- In the Requirements tab, select the Add button
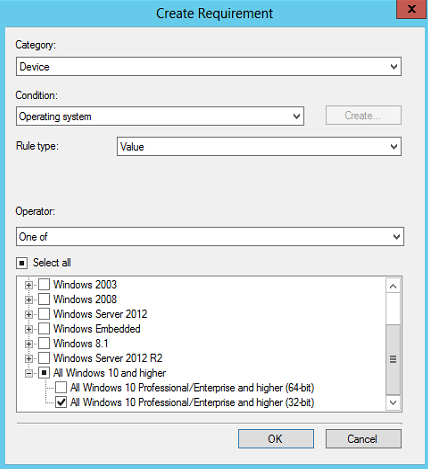
- Select the Operating System condition and choose one of these value
- For Install (32-bit): All Windows 10 and higher (32-bit)
- For Install (64-bit): All Windows 10 and higher (64-bit)
- Once finished, click on Ok
Requirements is used to detect pre-requisites configuration before the application can install. In our case, the application is only available for Windows 10 Pro, Enterprise and Education version.
- Click Next till the end of the wizard
If your goal is to deploy both version, simply repeat step 1 section for 32-bit or 64-bit.
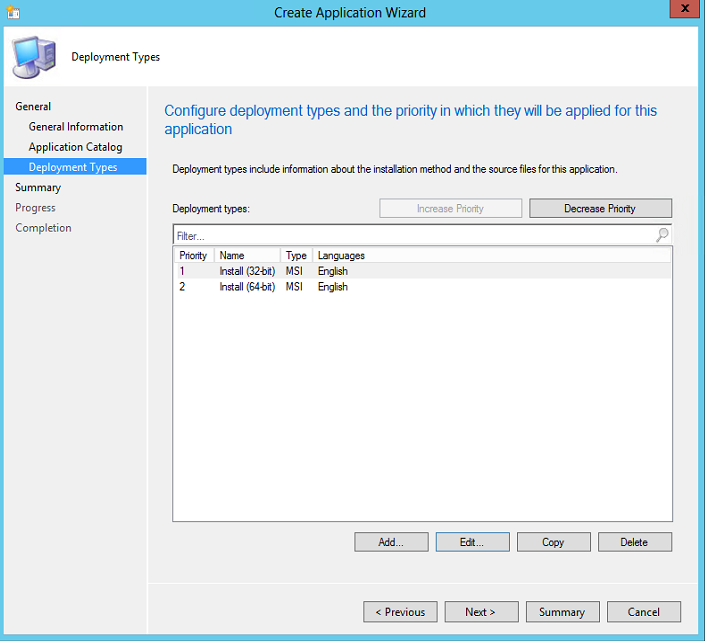
You should see something like that in your Deployment Types tab.
Step 2 | Deploy RSAT
The last step is to use the application and deploy to your respective collections.
- From your application folder, right click on the application and select Deploy
- From the Deploy Software Wizard in the General tab, click on Browse, select the previously created collection from the first section and click Next
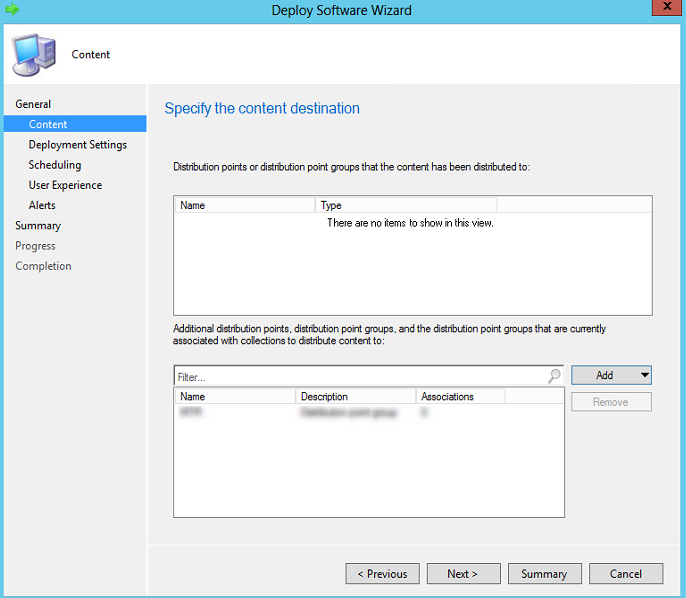
Before you can deploy the application, you must distribute content to your distribution points otherwise you will have deployment issues.
- In the Content tab, add the distribution points needed for your deployment and click Next
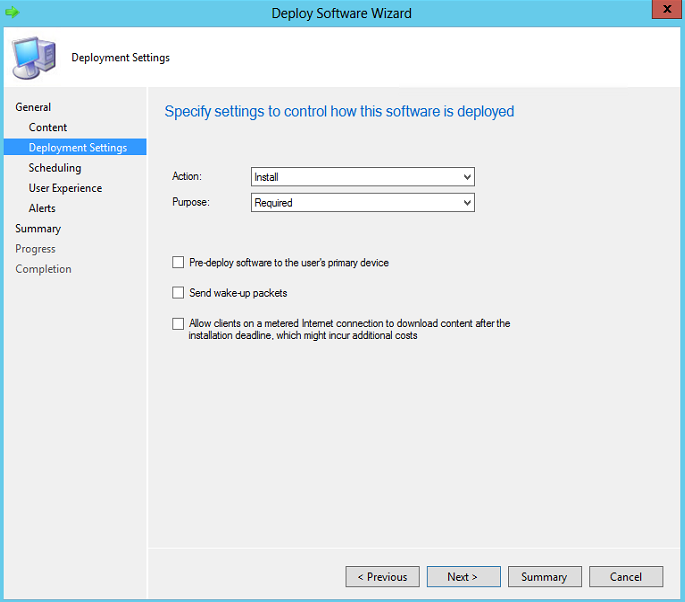
- In the Deployment Settings tab, you have two possibilities for the Purpose of the deployment
- Required: The application will be enforced
- Available: The application will be available to install in the Software Center and/or Application Catalog waiting for an user action
- Click Next
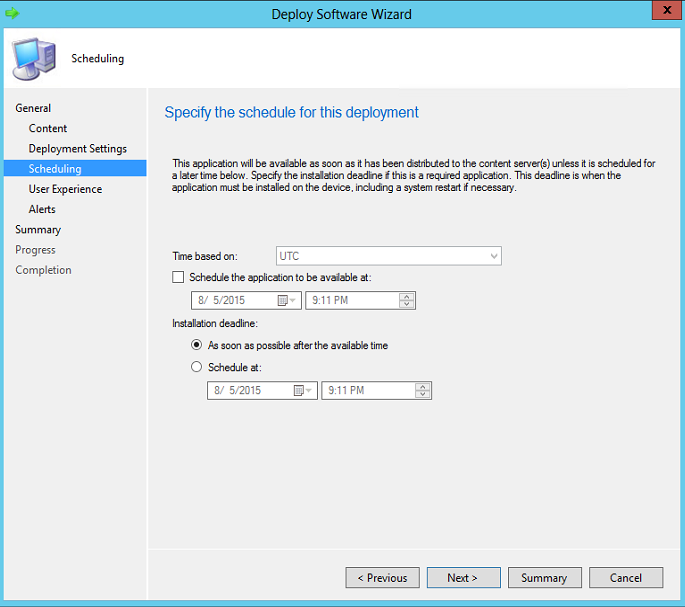
- In the Scheduling tab, configure when do want to make it available and installed, then click Next
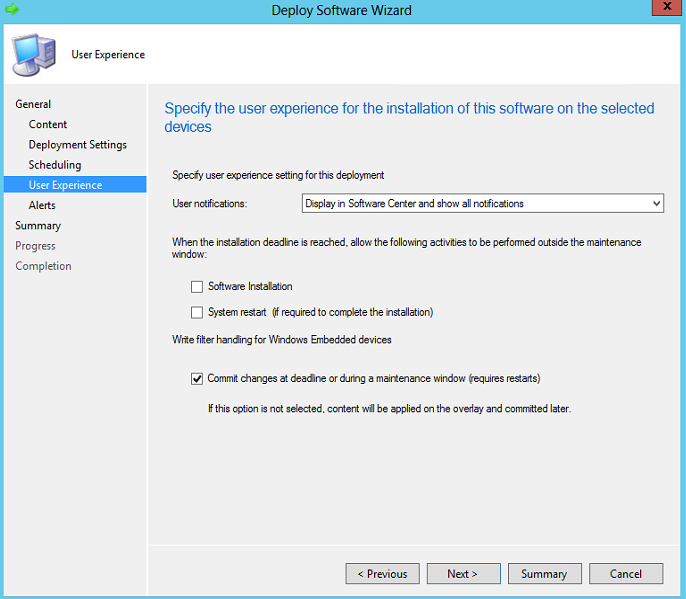
- In User Experience tab, selecting Display in Software Center and show all notifications will display the status of the application deployment to the logged user.
- Click Next
- Click Next to the end
Step 3 | Validation
Validate the application deployment on a Windows 10 computer. If everything has been properly configured, the application will appear in the Software Center.
To open Software Center, simply search for Software Center in your application or type the following command line: C:\WINDOWS\CCM\SCCLIENT.EXE
You should see something like that. Monitor the application deployment if needed.
Windows 10 RSAT SCCM 2012






Alex
08.29.2017 AT 01:15 PMMike Compton
09.25.2015 AT 11:12 AMNicolas Pilon
09.28.2015 AT 11:29 AM