
How to enable Intune Quick Machine Recovery
Founder of System Center Dudes. Based in Montreal, Canada, Senior Microsoft SCCM Consultant, 8 times Enterprise Mobility MVP. Working in the industry since 1999. His specialization is designing, deploying and configuring SCCM, mass deployment of Windows operating systems, Office 365 and Intune deployments.

Benoit Lecours
PresidentTable of Content


Share


Get the latest insights and exclusive content delivered to your inbox
Quick Machine Recovery (QMR) is a Windows 11 capability that can pull a Microsoft-provided remediation from Windows Update while the device is stuck in WinRE (Windows Recovery Environment). It’s meant for those “bad update/driver caused boot failure” scenarios where you normally end up with hands-on recovery at scale. (Remember the CrowdStrike outage in 2024?). This blog post will show how to enable Intune Quick Machine recovery, validate it, and test it.
Intune Quick Machine Recovery Prerequisites
Before starting, there are a couple of important considerations:
Version/Edition
- Quick Machine Recovery is available on Windows 11 24H2 build 26100.4700 or later
- On Windows 11 Home Edition, cloud remediation is enabled by default.
- On Windows 11 Pro/Enterprise, cloud remediation + auto remediation are disabled by default and should be enabled via policy for managed devices.
Network
- Only wired or WPA/WPA2 password-based Wi-Fi are supported for Intune Quick Machine Recovery networking right now.
Intune UI
- Some settings may show as “Windows Insider Only” / “Pending fix” in Intune. You can dismiss that; all features are working as per our test. Microsoft expect to change that with Intune 2603 (March 2026) monthly release.
Quicky Machine Recovery Options
Let’s look at the available options: There are two main settings of quick machine recovery: cloud remediation and auto remediation.
Cloud remediation
Cloud remediation is using Windows Update to find remediations and fix issues on devices.
- When you enable it, the device connects to the network and uses Windows Update during the recovery process
- When you disable it, Windows uses Startup Repair as a local recovery option

Auto remediation
- If enabled, the device can automatically scan and apply remediation
- If disabled or not configured, the device requires manual intervention to continue the recovery process. (This screen will show only if disabled)

Configure Intune Quick Machine Recovery using Settings Catalog
We are now ready to deploy Quick Machine Recovery using Intune, We will use a Settings catalog profile with the Remote Remediation category settings.
In the Intune console :
- Go to Devices / Windows / Configuration / Create / New Policy

- Platform: Windows 10 and later
- Profile type: Settings catalog
- Click Create at the bottom

- Give it a name : Windows – Quick Machine Recovery (QMR)
- Click Next

- On the Configuration Settings screen, Click Add settings

- In the Settings Picker, search for Remote Remediation

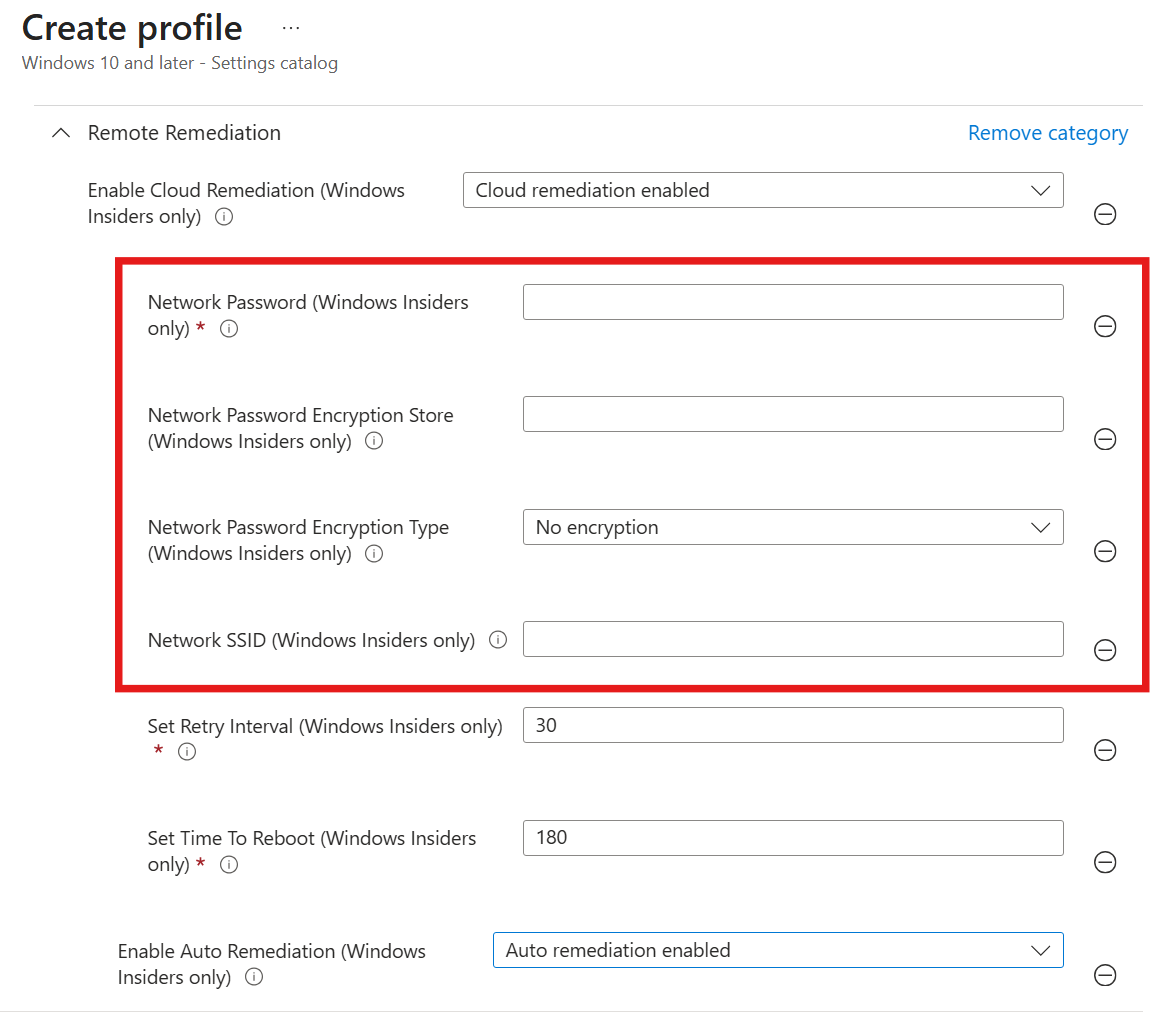
- Back in the Remote Remediation section
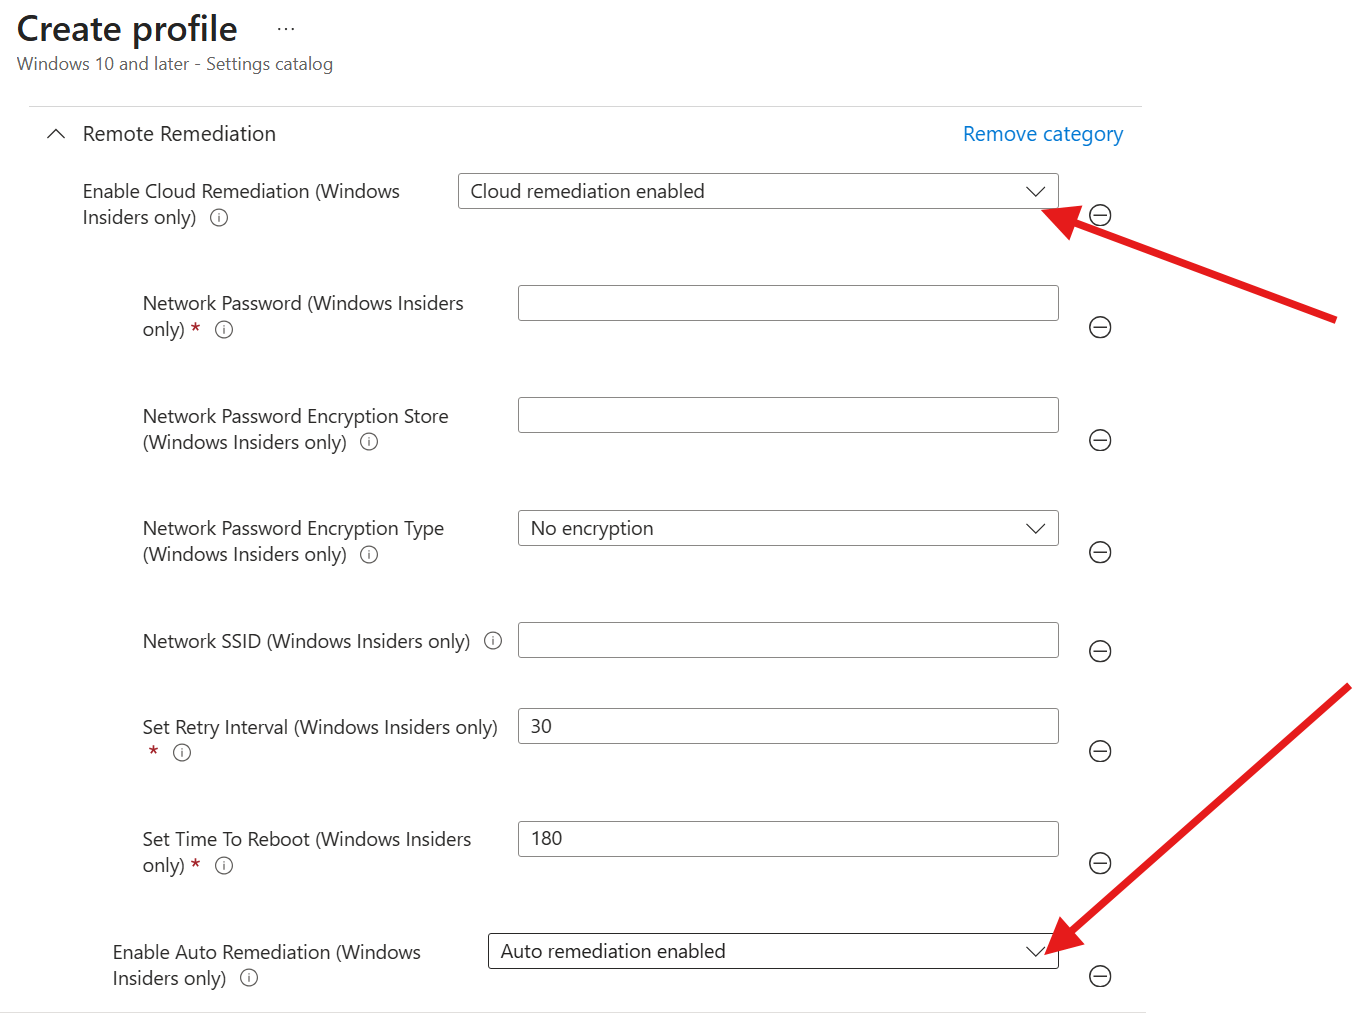
- Enable Cloud Remediation
- Enable Auto Remediation (refer to prior section for explanation of these settings)
- Configure auto remediation to one-time scan or looped scanning intervals to optimize remediation triggers
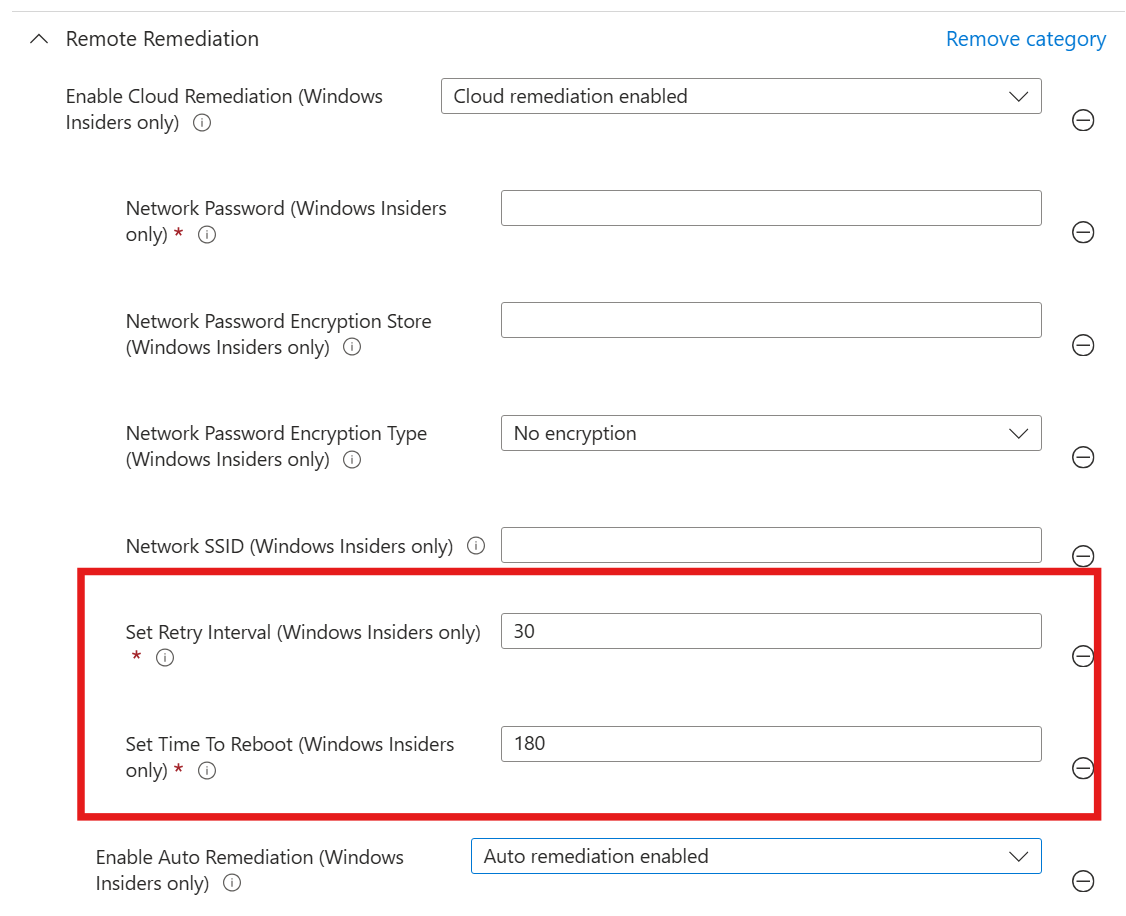
- Set Time To Reboot
- Set Retry Interval
- Configure wifi network connections; this is an optional step. If no wifi network is configured and no wired network is found, you will be prompted to enter a wifi network and password at recovery time. If a network cable is connected, the wifi wizard will be skipped.
- Network SSID
- Network Password
- Network Password Encryption Type
- Network Password Encryption Store
Currently, only wired and WPA/WPA2 password-based Wi-Fi networks are supported.
- We will work with this value for our test :
- Enable Cloud Remediation = Enabled
- Enable Auto Remediation = Enabled
- Set Retry Interval:
0= one-time scan>0= looped scan every X minutes (must be <= Time to reboot)
- Set Time To Reboot (minutes):
- Range: 180 (max 72h), default shown is 180
- Optional Wi-Fi:
- Our SSID + Password

- Assign to a device group containing Windows 11 24H2+ devices
- Click on Save
OMA-URI (RemoteRemediation CSP)
If you prefer CSP/OMA-URI, it’s possible to make the same configuration using CSP. Here’s the available settings:
Cloud remediation
./Device/Vendor/MSFT/RemoteRemediation/CloudRemediationSettings/EnableCloudRemediation(Boolean) =True
Auto remediation
./Device/Vendor/MSFT/RemoteRemediation/CloudRemediationSettings/AutoRemediationSettings/EnableAutoRemediation(Boolean) =True.../SetTimeToReboot(Integer minutes).../SetRetryInterval(Integer minutes;0= one-time,>0= looped)
Wi-Fi configuration
- ./Device/Vendor/MSFT/RemoteRemediation/CloudRemediationSettings/NetworkSettings/NetworkCredentials/NetworkSSID (String)
- ./Device/Vendor/MSFT/RemoteRemediation/CloudRemediationSettings/NetworkSettings/NetworkCredentials/NetworkPassword (String)
- ./Device/Vendor/MSFT/RemoteRemediation/CloudRemediationSettings/NetworkSettings/NetworkCredentials/NetworkPasswordEncryptionType (Integer)
- ./Device/Vendor/MSFT/RemoteRemediation/CloudRemediationSettings/NetworkSettings/NetworkCredentials/NetworkPasswordEncryptionStore (String)
Validation and testing
On a test machine that receives the created policy, open an admin command prompt and run this command :
reagentc.exe /getrecoverysettings
It will give you an XML stating your settings. Validate that your configuration matches your Intune policy

There are also various options that you can use with reagent.exe, but your Intune policy will win over your local settings

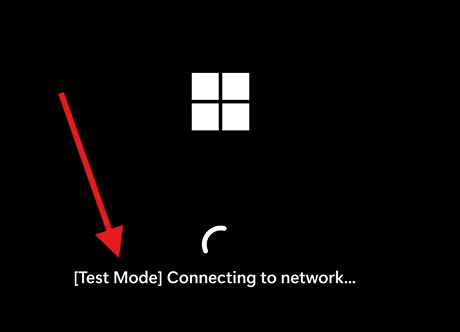
Microsoft provides a “test mode” to simulate the Quick Machine Recovery experience. At the time of this writing, your machine needs to be enrolled in the Windows Insider Program and set to Dev Channel.
On a device that meet this requirement, enable test mode using this command :
reagentc.exe /SetRecoveryTestmode
- Boot into WinRE next reboot:
reagentc.exe /BootToRe
- Reboot, and the machine should go into the Auto Remediation process, simulate an OS crash and reboot back to Windows
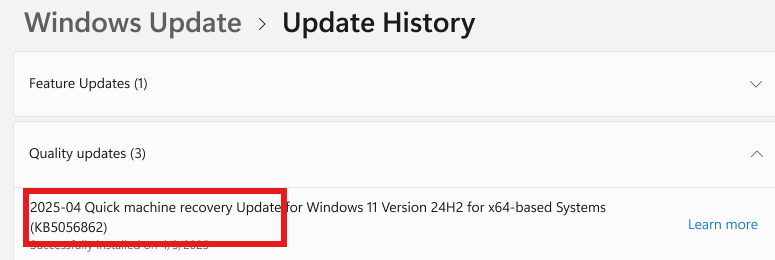
If Quick Machine Recovery applies a remediation, you should see it in the Windows Update history.
- Go to: Settings / Windows Update / Update history
Intune Quick Machine Recovery Conclusion
Intune Quick Machine Recovery is a very useful feature when a device becomes unusable after an update, configuration change, or driver issue. Instead of reimaging the device or asking the user to bring the computer to IT, the auto-remediation process may be able to fix the problem.
This helps reduce downtime, improves user experience, and saves a lot of troubleshooting time for IT teams. Even if you do not need it every day, enabling Quick Machine Recovery is a good step to strengthen your endpoint recovery strategy.
Share
Get the latest insights and exclusive content delivered to your inbox


Only authorized users can leave comments
Log In