This post will describe how to connect your SCCM infrastructure to the Desktop Analytics cloud-based service. We will show how to create your workspace and connect it to an SCCM 1906 server. In the latest SCCM 1906 version, some new features were added to Desktop Analytics :
From Microsoft :
You can now get more detailed insights for your desktop applications including line-of-business apps.
Use the DesktopAnalyticsLogsCollector.ps1 tool from the Configuration Manager install directory to help troubleshoot Desktop Analytics. It runs some basic troubleshooting steps and collects the relevant logs into a single working directory.
Important Info
Desktop Analytics is still in a Preview phase.
Why use SCCM Desktop Analytics
Desktop Analytics is a standalone cloud-based service that connects with SCCM. By using Desktop Analytics service, you can easily find interesting information about your Windows clients.
Receive mitigation suggestions based on cloud-enabled data insights
Create pilot groups that represent your organization based on application and drivers
Use those pilot group to Deploy Windows 10
The main advantage is that it can help an organization stay current with Windows 10 by helping you assess problems from drivers and application compatibility. There’s really no reason not to use Desktop Analytics if you have all the requirements.
Windows Analytics vs Desktop Analytics
Desktop Analytics is a “new version” of Windows Analytics. It has all the same features plus it can be connected with SCCM.
The Desktop Analytics service includes:
Upgrade Readiness
Update Compliance
Device Health
Richer app and Office macro insights
Easier integration with SCCM
Prerequisites Before using Desktop Analytics and SCCM integration
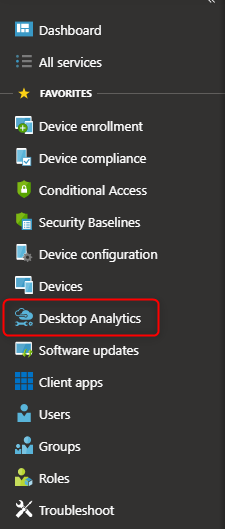
If you are not redirected to the Desktop Analytics page, click on it on the left menu
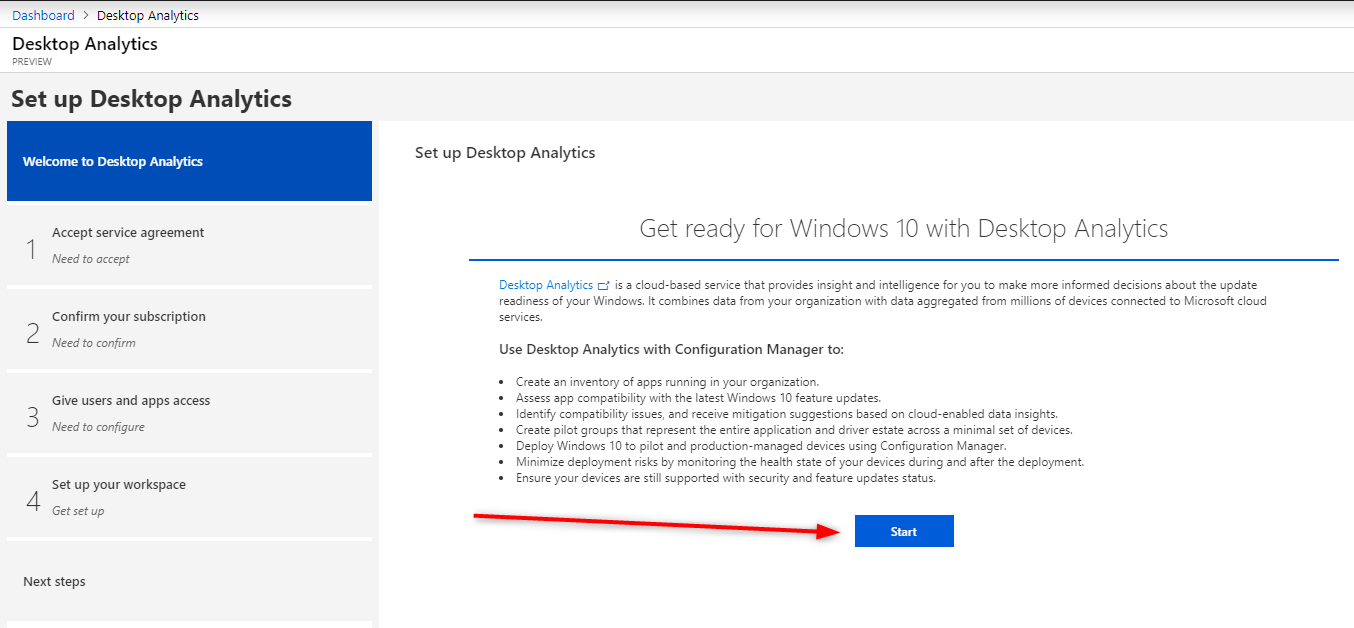
On Welcome to Desktop Analytics screen, click Start
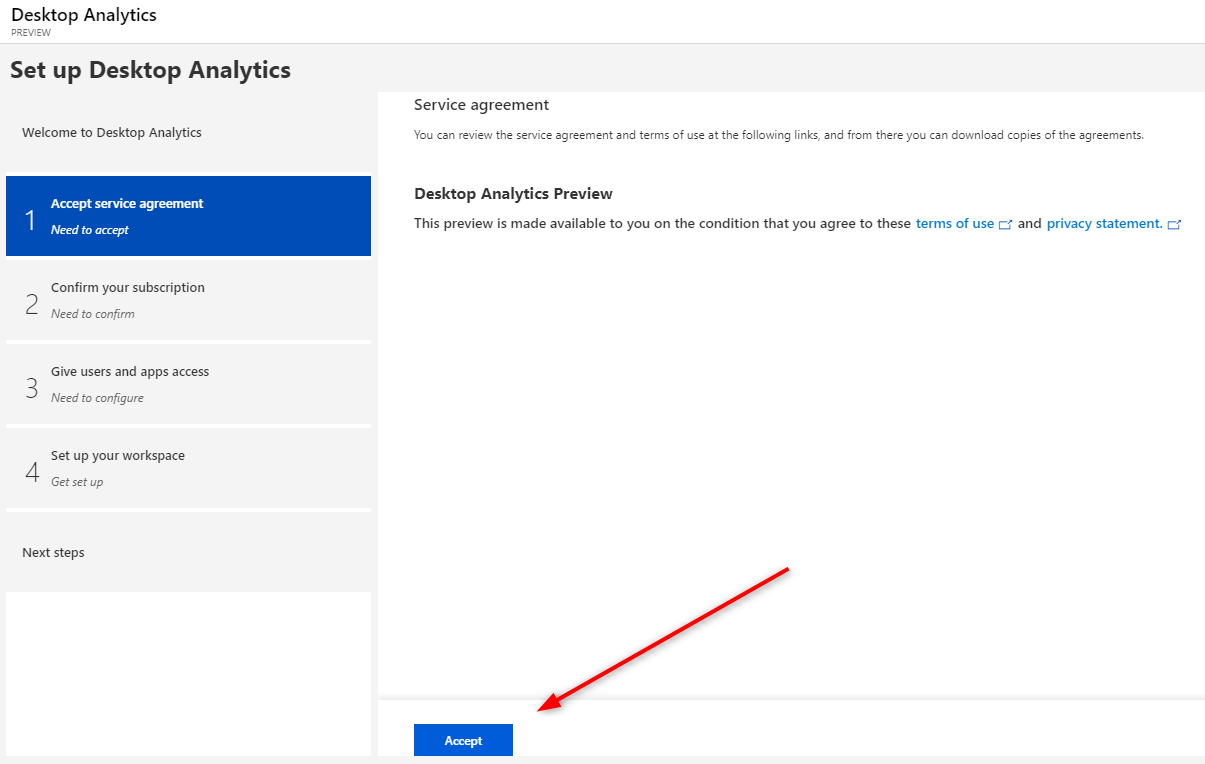
On the Accept service agreement screen, click Next
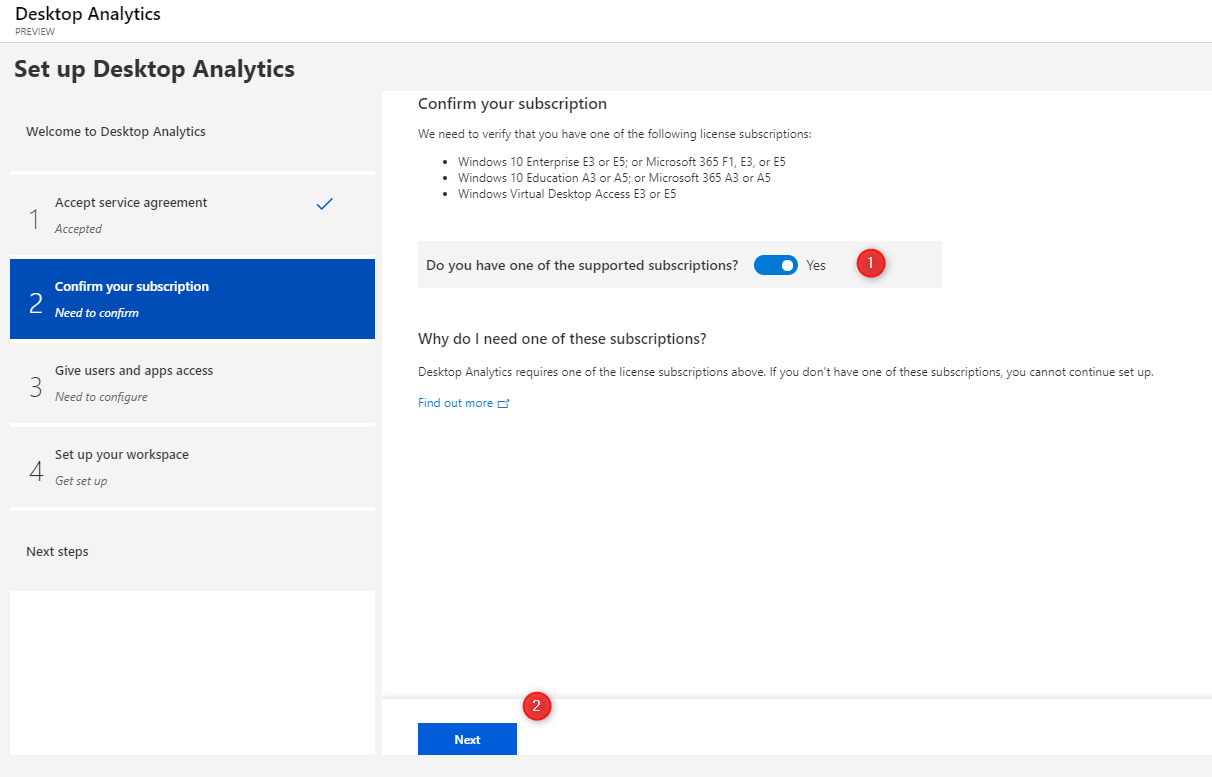
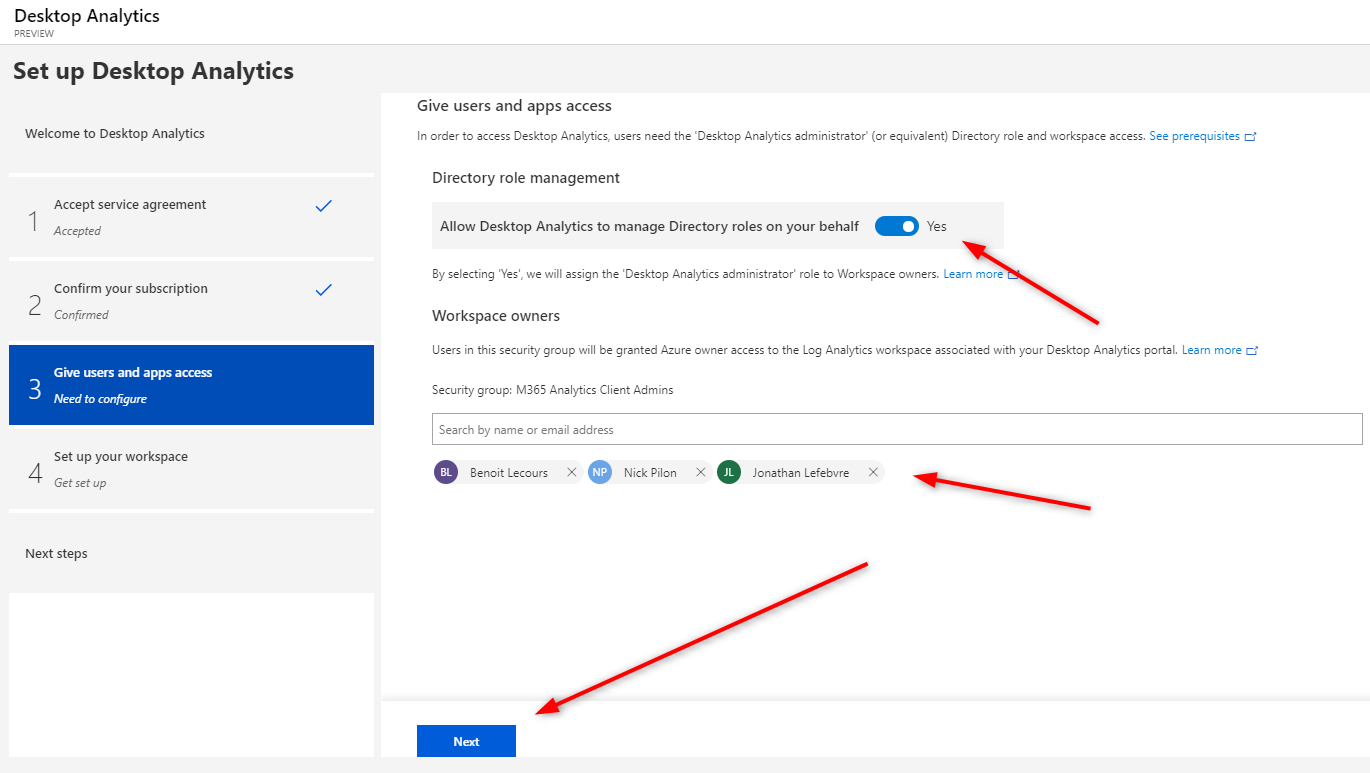
Click the slider to Yes, Click Next
Move the Allow the Desktop Analytics to manage directory roles on your behalf slider to the right (Yes)
Under Workspace Owners, add desired users who will have access to your Desktop Analytics portal
Click Next
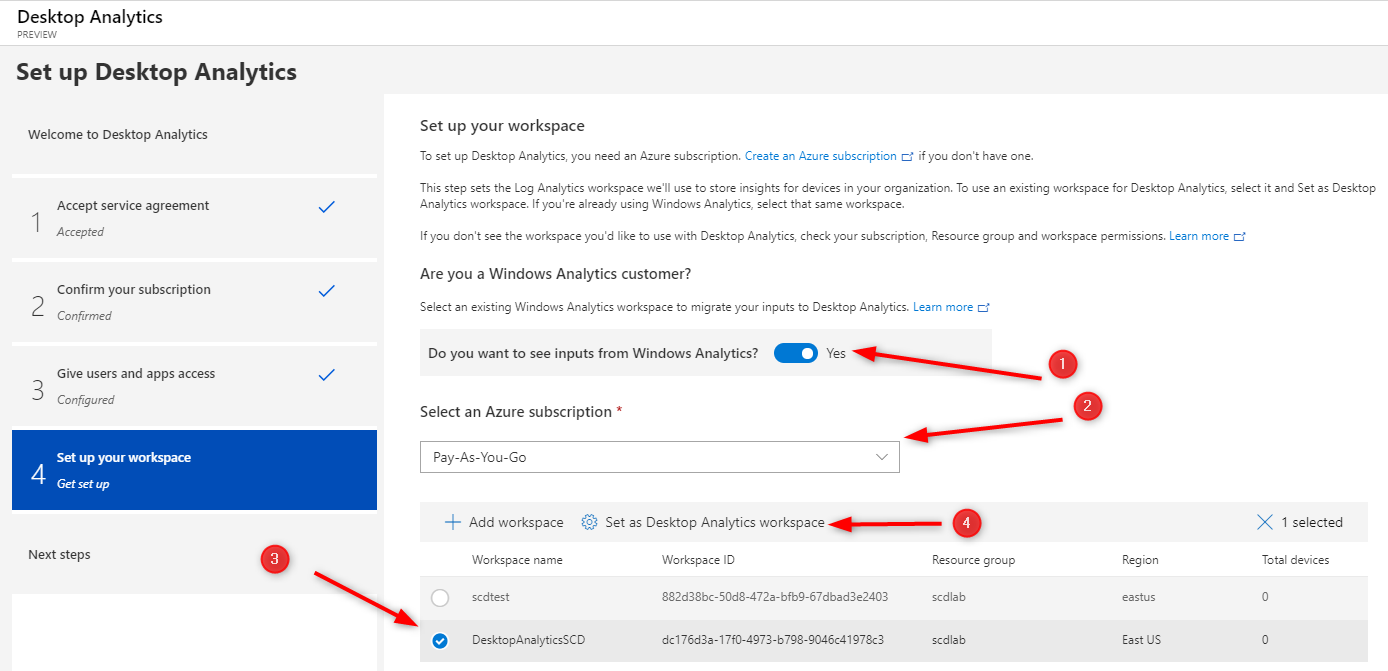
On Set up your workspace page, select your Azure Subscription. You can add a new workspace or use an existing workspace. We will create a new workspace
Click Add Workspace and click Set as Desktop Analytics workspace
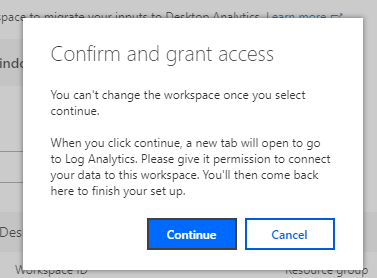
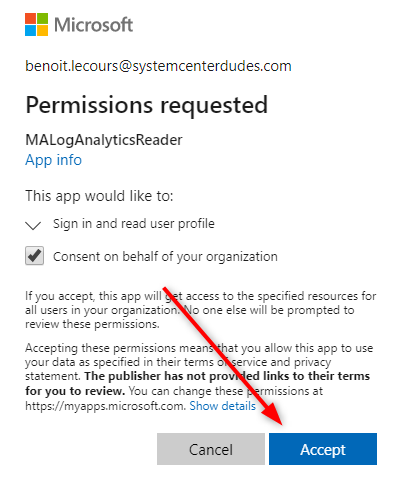
On the Confirm and grant access box, click Continue, then Accept the permission requested
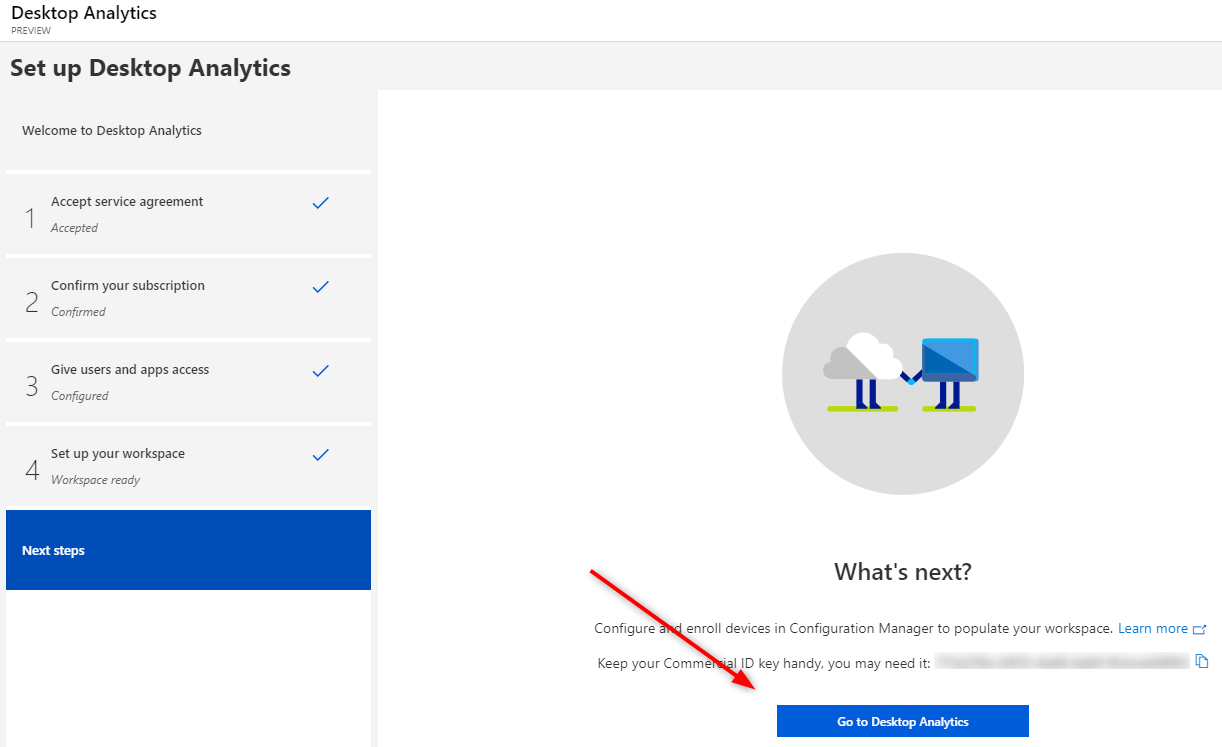
When you successfully add the workspace, you will find the following details. Validate the Workspace Name, Workspace ID and Commercial ID Key. Click Next
Desktop Analytics is now configured. Click Go to Desktop Analytics
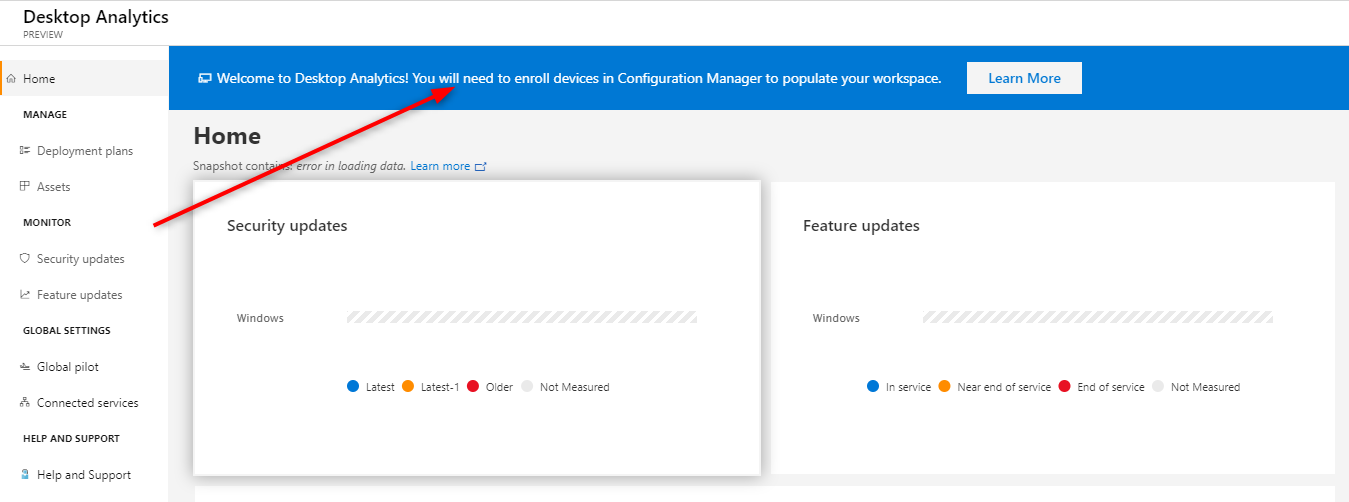
On the Desktop Analytics home screen, you are warned that It could take up to 72 hours to process data. Be patient, you’ll also see a warning: Welcome to Desktop Analytics! You will need to enroll devices in Configuration Manager to populate your workspace. This is what we’ll be doing in the next steps.
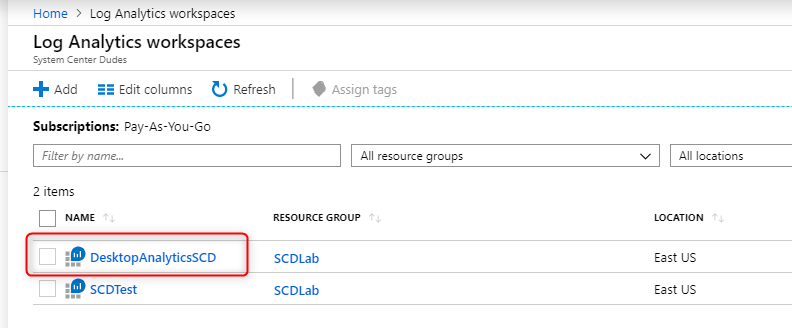
Under the hood, if you log into your Azure Portal and go in the Log Analytics workspace, you’ll see that your workspace has been created
Connect SCCM with Desktop Analytics
It’s now time to connect SCCM with the newly created Desktop Analytics workspace.
Open the SCCM console
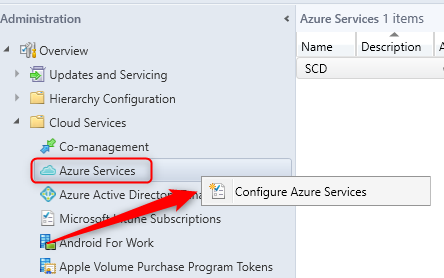
Navigate to Administration / Cloud Services / Azure Services.
Right-click Azure Services and click Configure Azure Services
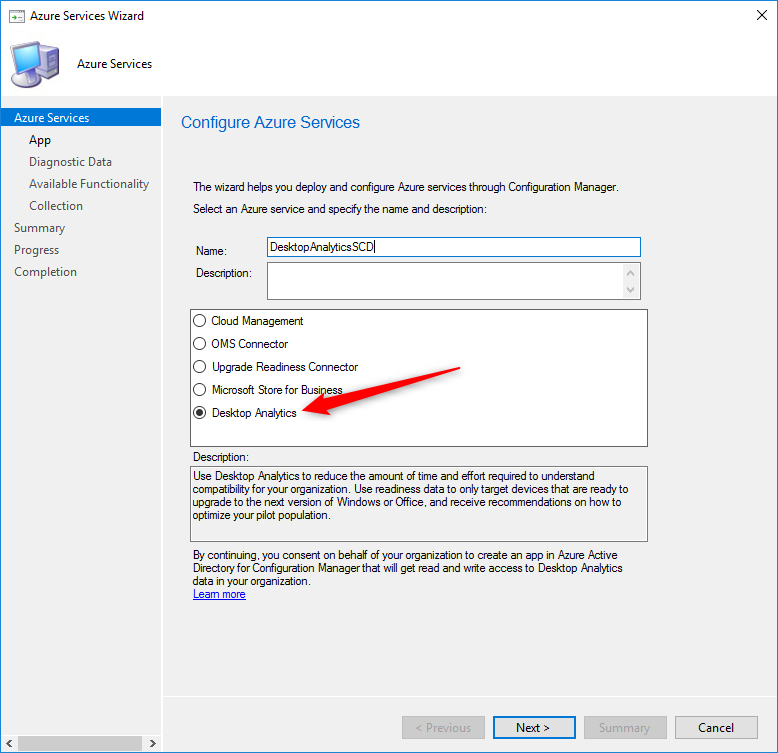
Set a name and select Desktop Analytics, Click Next
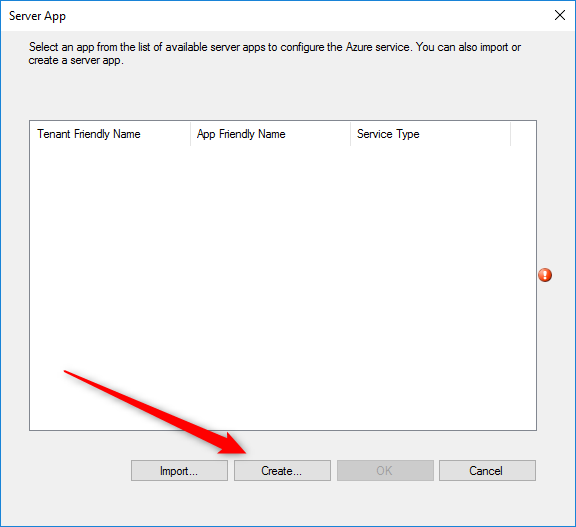
Select the Azure environment and click Browse to select the associated Web App. On the Server app window, click Create
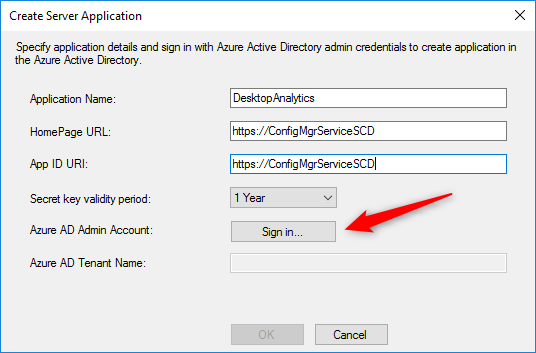
Specify an Application name
The HomePage URL and App ID URI should be set to https://ConfigMgrService. If you get an error that Another object with the same value for property identifierUris already exists, this is probably because you’ve already configured another Azure service with that name. Set a unique name and click Sign-In
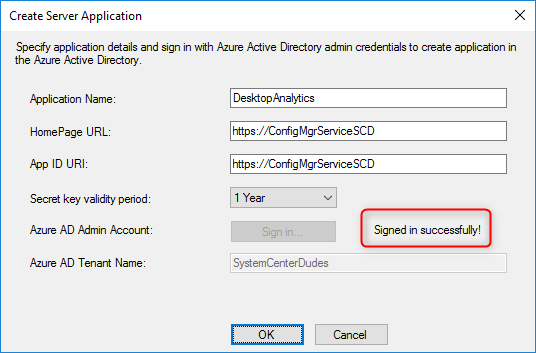
Enter your Azure Credentials and ensure that the login is successful, click OK to close the window
Click Next
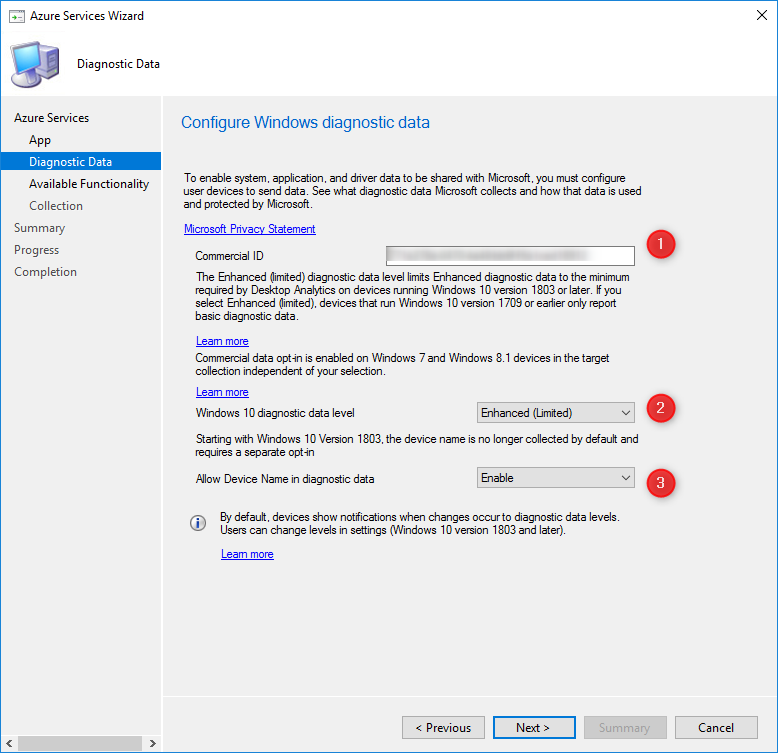
On the Diagnostic Data page, make a note of Commercial ID
Select Enable to Allow Device Name in Diagnostic Data, click Next
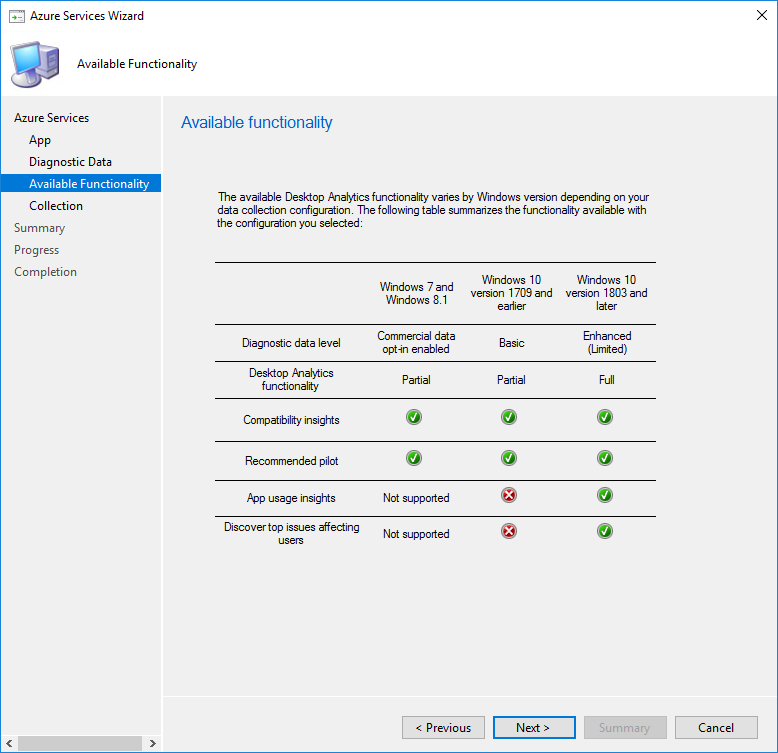
In the Available Functionality screen, click Next
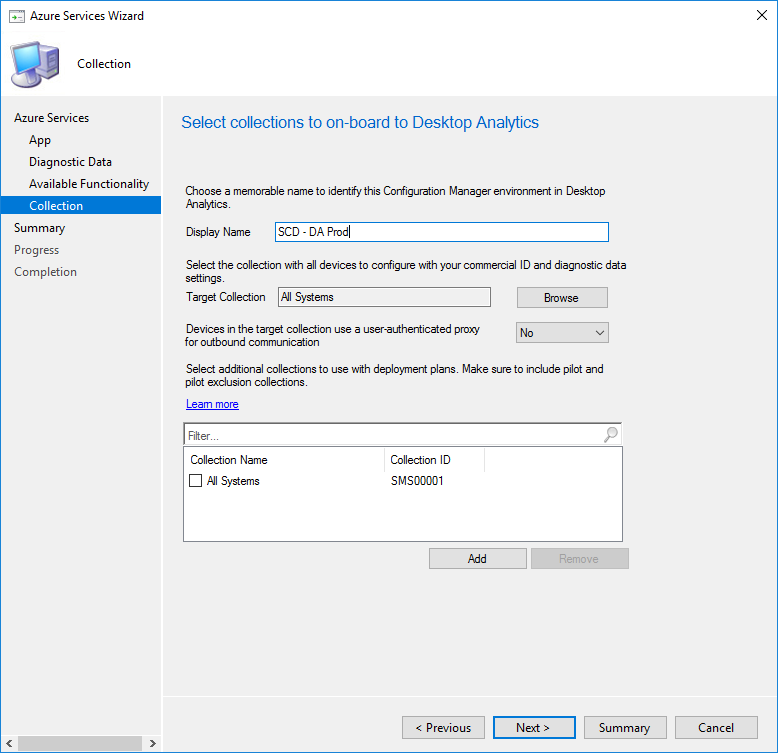
Select the SCCM collection that will target Desktop Analytic onboarding by clicking the Add button. You’ll be able to add more collection later. Since this is a lab environment we selected All Systems collection. Choose a Pilot collection to start on your site.
The Target collection includes all devices that SCCM configures with your commercial ID and diagnostic data settings.
Once selected, click Next
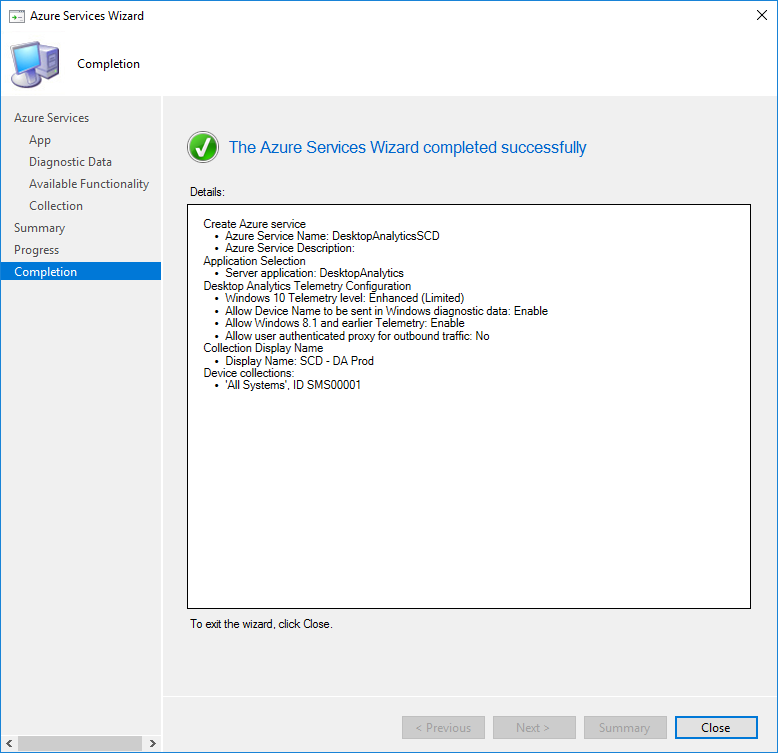
On the Summary screen, verify all settings, Click Next and Close
Verification
Once completed you can verify that the connection has been made
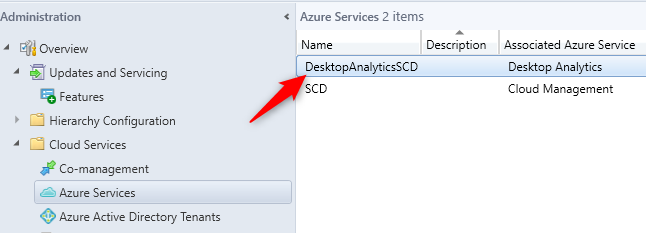
Go to Administration / Cloud Services / Azure Services
You’ll see that the Desktop Analytics service is listed
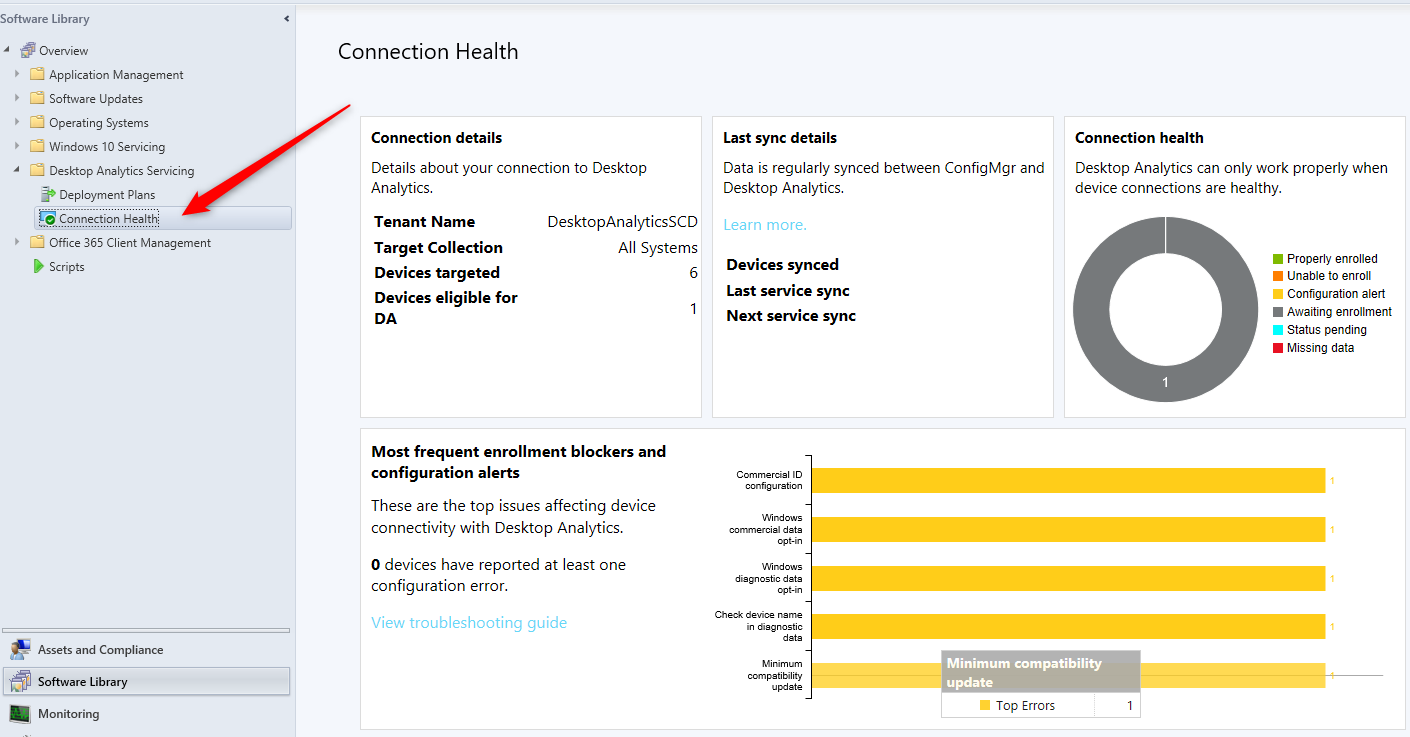
To monitor the enrollment status of devices :
Go to Software Library / Analytics Servicing / Connection Health
This Dashboard shows valuable data to help you. Microsoft has also release good documentation about how to troubleshoot issues
SCCM 1906 and later also have a PowerShell script DesktopAnalyticsLogsCollector.ps1 from the SCCM install directory\cd.latest\SMSSETUP\TOOLS\DesktopAnalyticsLogsCollector) to help troubleshoot Desktop Analytics.
Enroll Devices
Once that your service is connected, the work is just beginning, you need to enroll the most device as possible to gather valuable information.
Depending on the Operating System, you need to make sure that they have all the required updates.
For Enrollment, you don’t need to install any client. Desktop Analytics relies on diagnostic data sent depending on the configured settings.
SCCM will use the collection you specified in the previous steps to configure your devices.
Create Deployment Plans
Once your devices are enrolled you need to create Deployment Plans. Deployment plans are used to simulate a Windows deployment and to :
Automatically recommend which devices to include in pilots
Identify compatibility issues and suggest mitigations
Assess the health of the deployment before, during, and after updates
Track the progress of your deployment
Unfortunately, these plans are not created in SCCM. You need to create them in your Desktop Analytic portal and they will be synced in SCCM. You’ll then use SCCM to deploy the plans to collections.
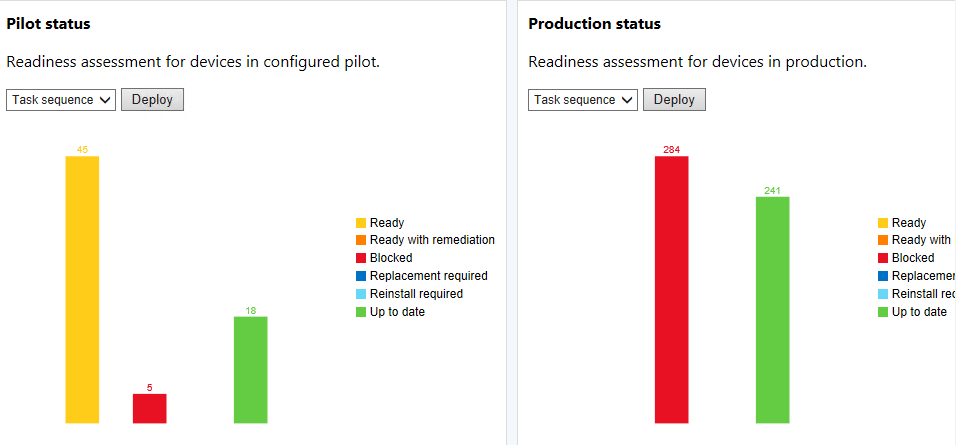
By clicking on the Deployment Plan, you’ll be able to see the results in the SCCM Console
Log file reference – Configuration Manager | Microsoft Docs
Desktop Analytics Logs Files
Use the following log files to help troubleshoot issues.
The log files on the service connection point are in the following directory: %ProgramFiles%\Configuration Manager\Logs\M365A.
The log files on the Configuration Manager client are in the usual C:\Windows\CCM\Logs directory.
Log
Description
Computer with log file
M365ADeploymentPlanWorker.log
Information about deployment plan sync from Desktop Analytics cloud service to on-premises Configuration Manager
Service connection point
M365ADeviceHealthWorker.log
Information about device health upload from Configuration Manager to Microsoft cloud
Service connection point
M365AHandler.log
Information about the Desktop Analytics settings policy
Client
M365AUploadWorker.log
Information about collection and device upload from Configuration Manager to Microsoft cloud
Service connection point
SmsAdminUI.log
Information about Configuration Manager console activity, like configuring the Azure cloud services
Service connection point
Desktop Analytics is still in the preview phase and it’s possible that process change during the development phase. We’ll try to keep this post as current as possible as the product hits General Availability.
Reporting
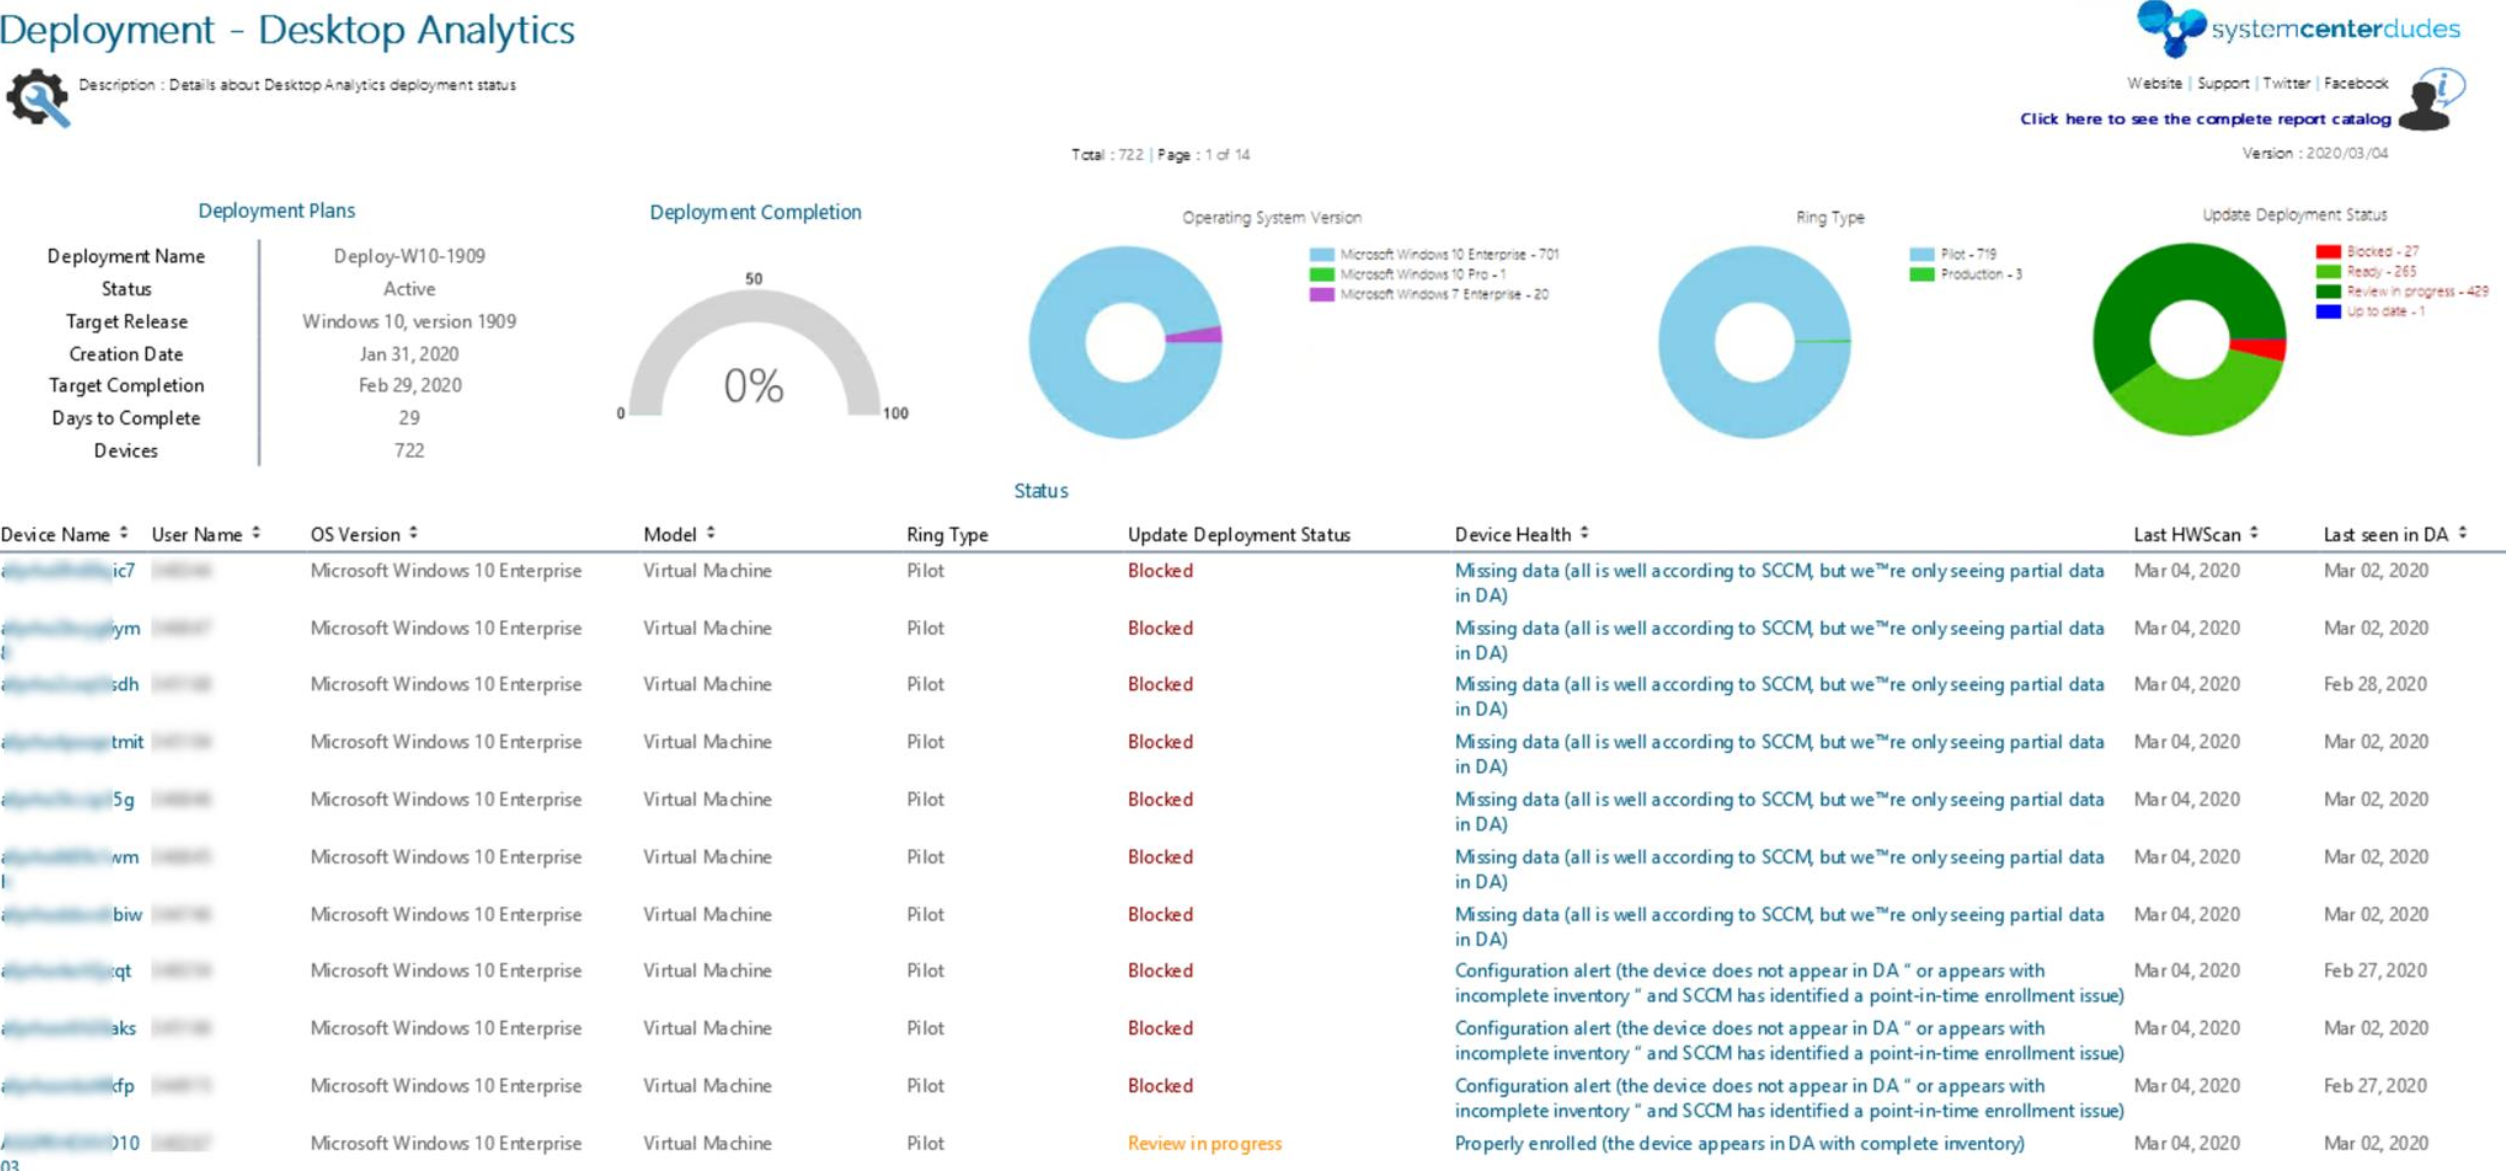
We build 2 SSRS reports that will help you using Desktop Analytics. For more details, click here.
Request a Quote
Please fill out the form, and one of our representatives will contact you in Less Than 24 Hours. We are open from Monday to Friday.
Never share sensitive information (credit card numbers, social security numbers, passwords) through this form.
Request Sent
Thank you for subscribing to our newsletter or requesting a quote.
You will receive our next month's newsletter. If you have requested a quote, we will get in touch with you as soon as possible.
Comment Sent
Thank for your reply!
Error
Something went wrong!
We use cookies to ensure that we give you the best experience on our website. If you continue to use this site we will assume that you are happy with it.





Thank for your reply!