
How to manage Intune Windows 365 Cloud PC
Contributor of System Center Dudes. Based in Montreal, Canada, Senior Microsoft SCCM consultant, working in the industry for more than 10 years. He developed a strong knowledge of SCCM and MDT to build automated OS deployment solution for clients, managed large and complexe environment, including Point of Sale (POS) related projects.

Jonathan Lefebvre
Table of Content


Share


Get the latest insights and exclusive content delivered to your inbox
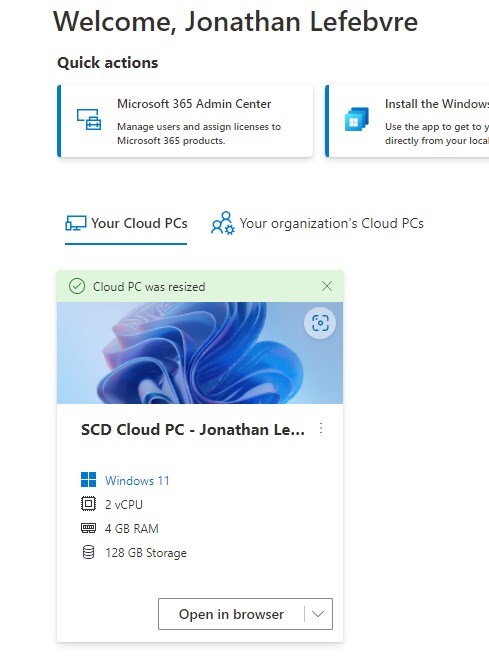
In one of our previous posts, we detailed how to configure the basics for Windows 365 Cloud PC. Once Windows 365 Cloud PCs are provisioned, they will likely need management at some point.
Cloud PC delivers software, servers, storage, analytics, networks, and databases over the internet, offering more flexibility and scalability than traditional on-premises infrastructure. You can deploy a PC in a couple of click and access it quickly and easily.
In this blog post, we will provide many details on managing Intune Windows 365 Cloud PC.
Dynamic Entra ID groups and Intune Filters
Depending on the need, Entra ID groups or Intune filters can be used to target Cloud PC with policies, apps, etc easily.
Note that Intune filters are processing much faster than Entra ID groups.
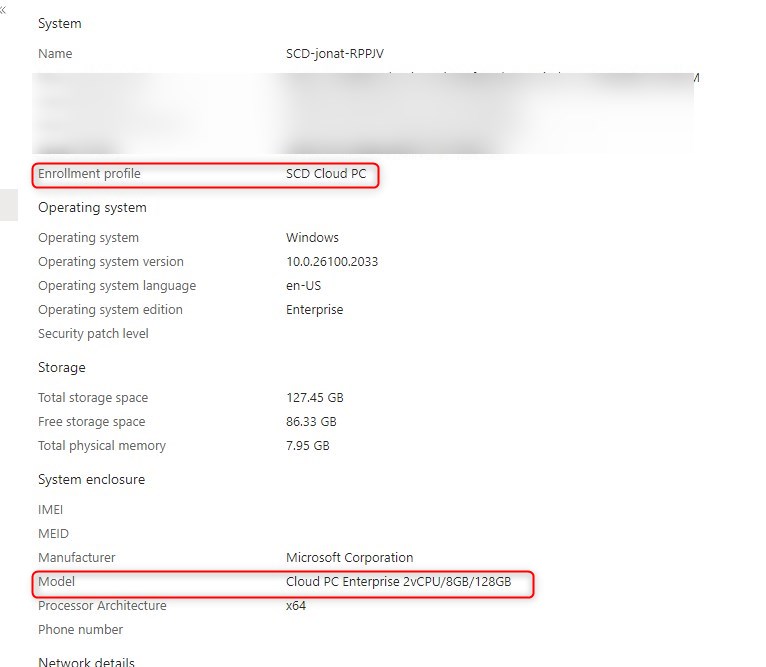
In both cases, the properties EnrollmentProfile or DeviceModel can be used.
To Create a dynamic Entra ID group:
- In the Intune or EntraID portal, access the Groups section to create a new dynamic group
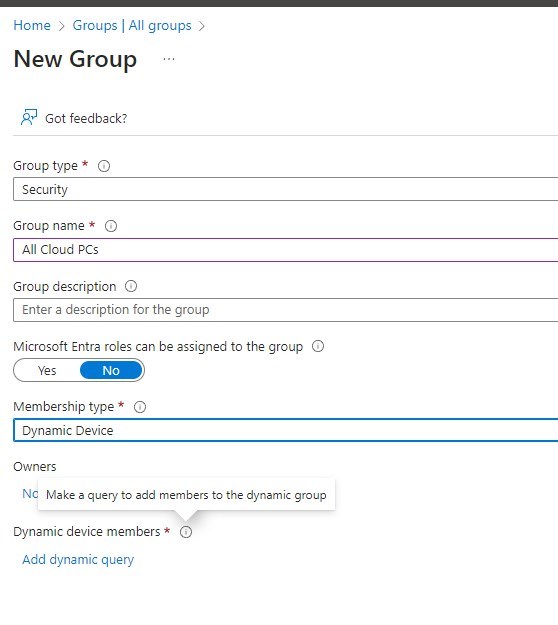
- A few options are available for the rule
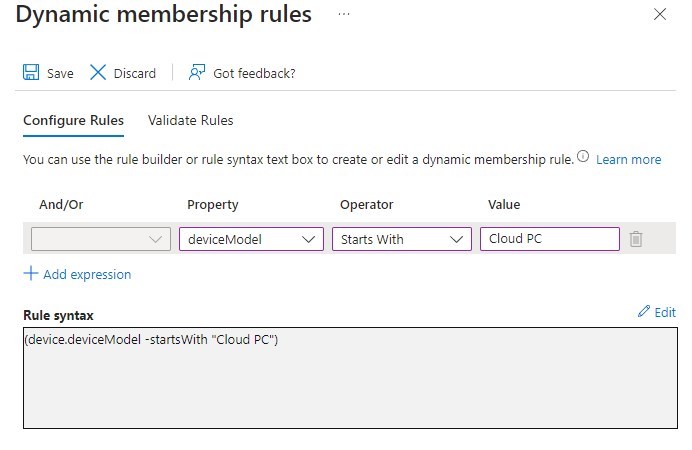
- Use the model name
- Property devicemodel
- Operator StartWith
- Value Cloud PC
- Use the Enrollment profile, provided by the Provisioning policies from the Windows 365 configurations.
- Use the model name
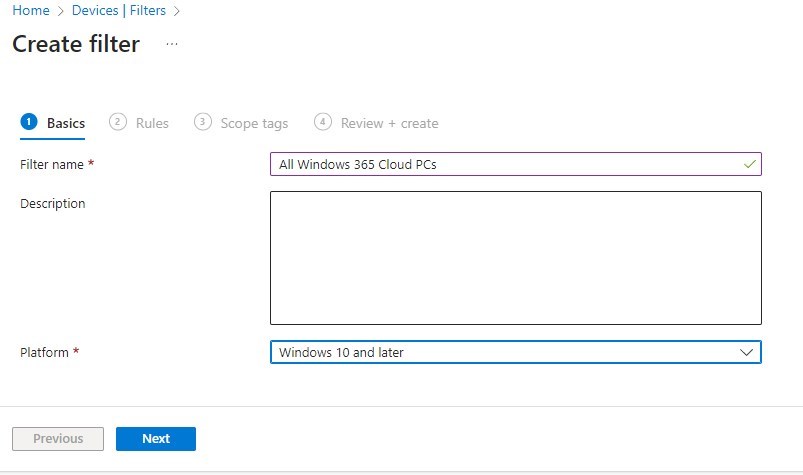
To create an Intune device Filter:
- In the Intune portal, under Devices / Organize Devices / Filters, select Create and then Managed Devices
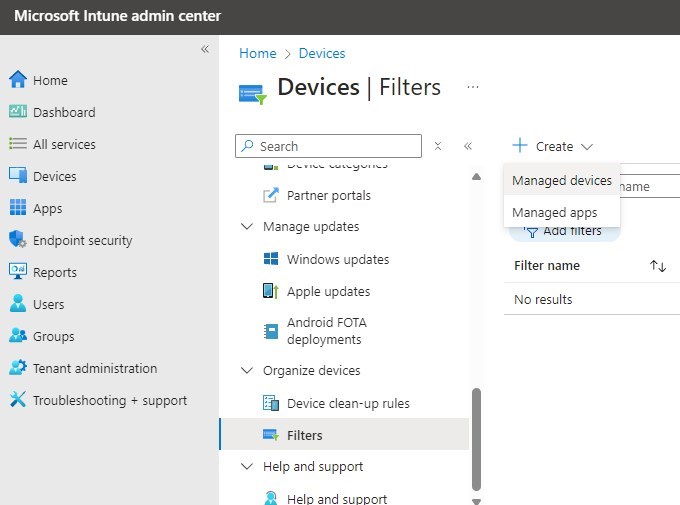
- Specify the Name and select Windows 10 or Later
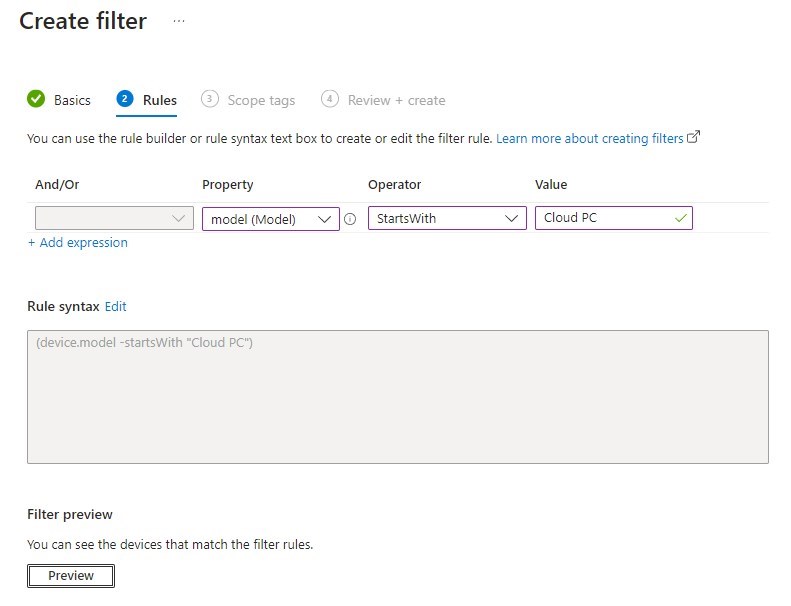
- A few options are available for the Intune Windows 365 Cloud PC rule
- Use the model name
- Property model
- Operator StartWith
- Value Cloud PC
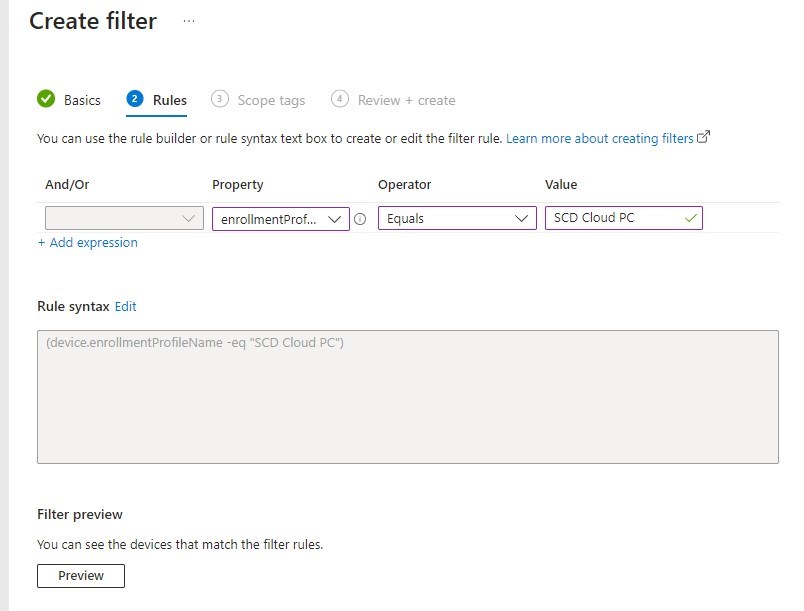
- Use the Enrollment profile, provided by the Provisioning policies from the Windows 365 configurations.
- Property enrollmentProfile
- Operator Equal or StartWith
- Value <Name of the Provisioning policy>
- Use the model name
Filter can then be used across various configurations in Intune.
How to resize a Intnue Windows 365 Cloud PC
Resizing a Windows 365 CloudPC is supported for many scenarios such as adjusting RAM, VCPU cores, and disk space(only upgrade). Note that any GPU Cloud PC does NOT support resizing.
A few options are available to resize a Windows 365 Cloud PC:
- Resize a single Cloud PC
- whether via direct license assignment or group-based license.
- Bulk Resize Cloud PCs
- whether via direct license assignment or group-based license.
Resizing essentially always happens by doing these actions in order :
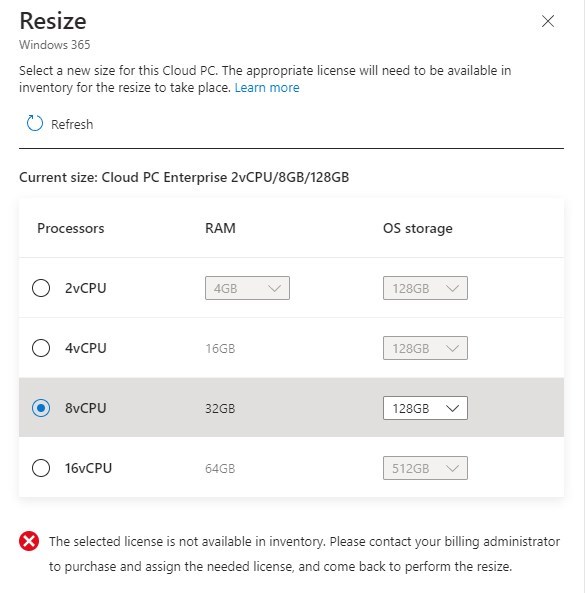
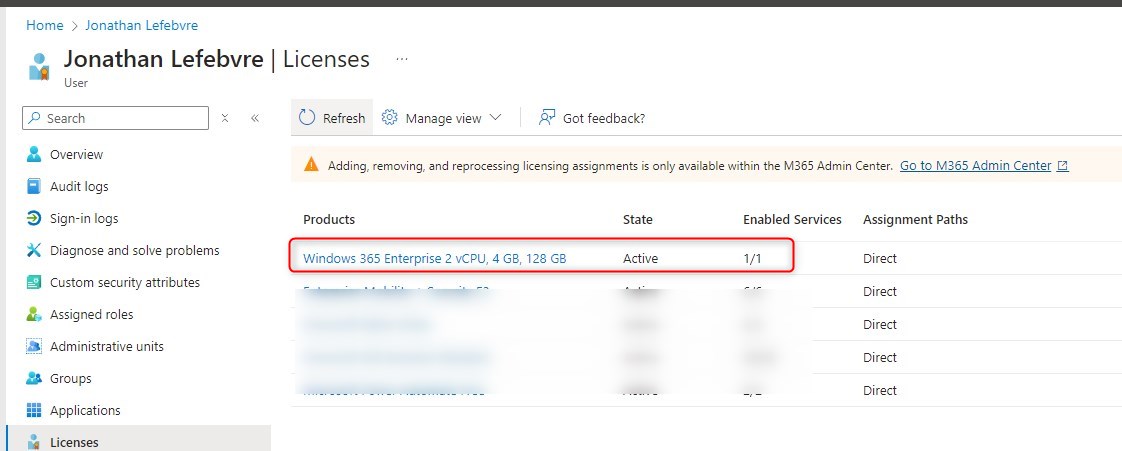
- Make sure the license for the new Cloud PC size is available in the environment
- Initiating the resize of the CloudPC from the Intune console.
Do Not assign the new license to the user yet, if done at this point, a new Cloud PC will be provisioned.
Note about modifying the license
If the license is removed before the resizing, the device will be set in Grace period. This will block the resize. The device must be in Provissionned mode to resize.
If the license isn’T available in the Tenant, it will display like this.
Initiate resizing
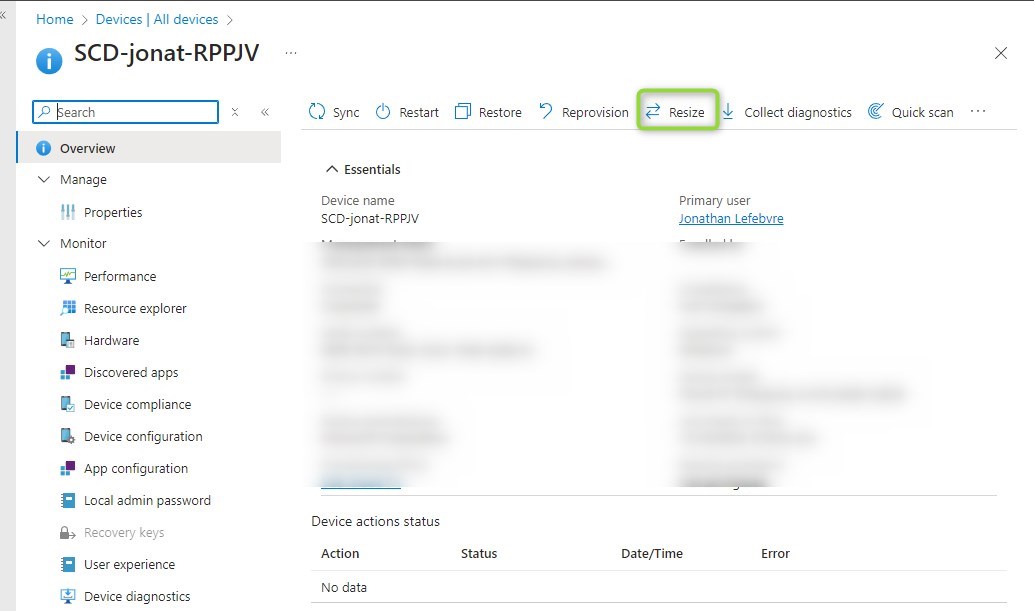
- Browse the device in the Intune portal
- In the actions at the top, click on Resize.
- similar action can be done via the bulck action for multiple devices.
- Assuming the license as been well purchased, the new Cloud PC size will be available to be picked up.
- If license isn’t available, none of the option will be available to initiate a resize.
- OS Storage that is lower is greyed out and not supported.
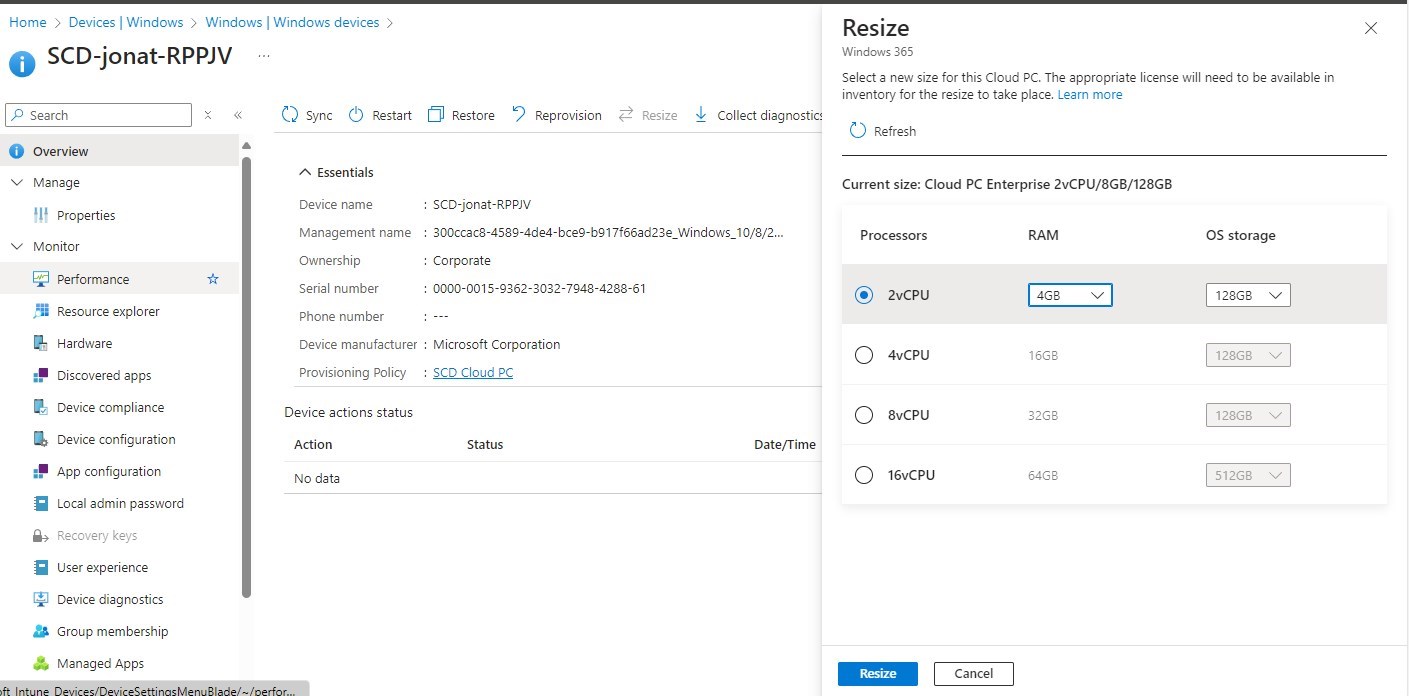
- Once initiated, within minute the Cloud PC will shutdown to start the resize.
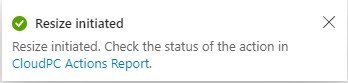
- the user will see that the Cloud PC has been shut down.
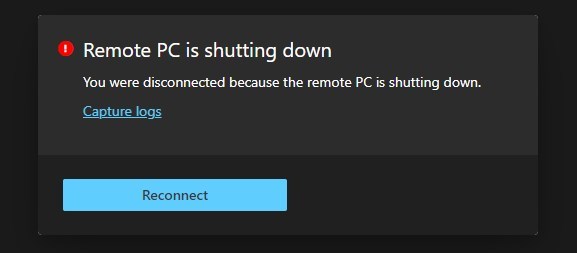
- After a few minutes, the resize is completed and the user can connect again.
- When using user license assignement, it will automatically change the assigned license from the previous sizing toward the new one.
- This appears to be a new behavior, as it is not currently documented like that.
Group license resize will involve slightly different behavior.
For more details about resizing a Windows 365 Cloud PC, see Microsoft Learn.
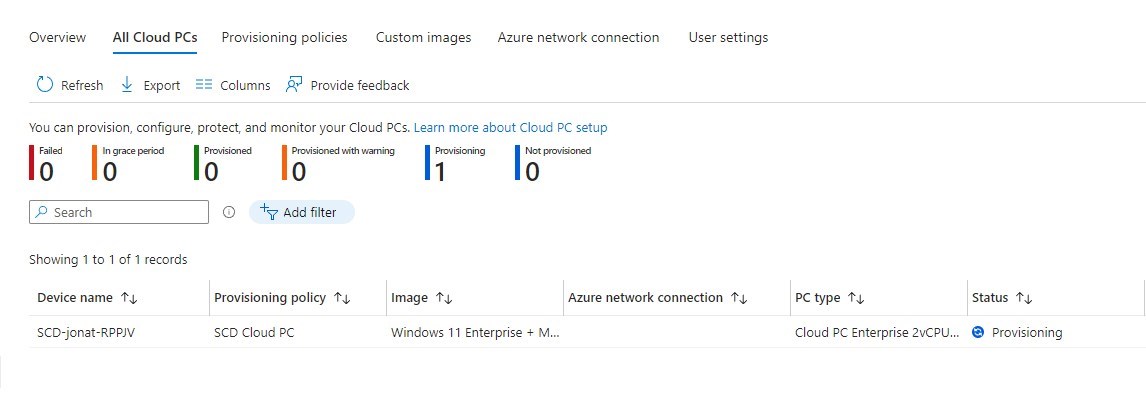
How to Reprovision a Windows 365 Cloud PC
Reprovisionning a Cloud PC will basically wipe the current Cloud PC and generate a brand new one for the user. All data will be lost.
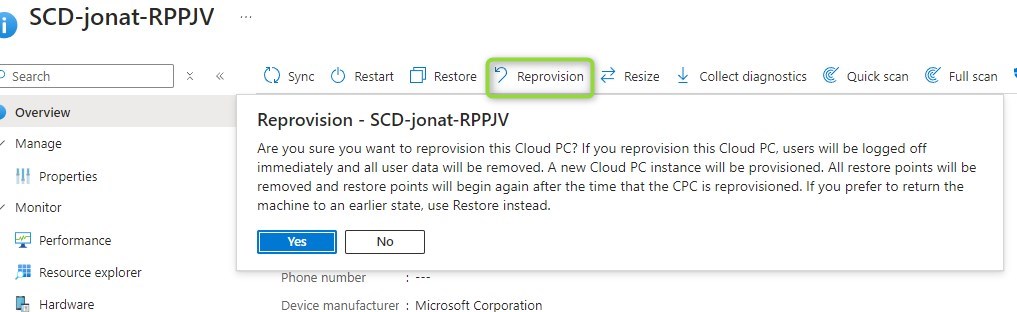
- Within seconds, the Cloud PC will begin the reprovisioning. Expect the same time as when originally created the Cloud PC.
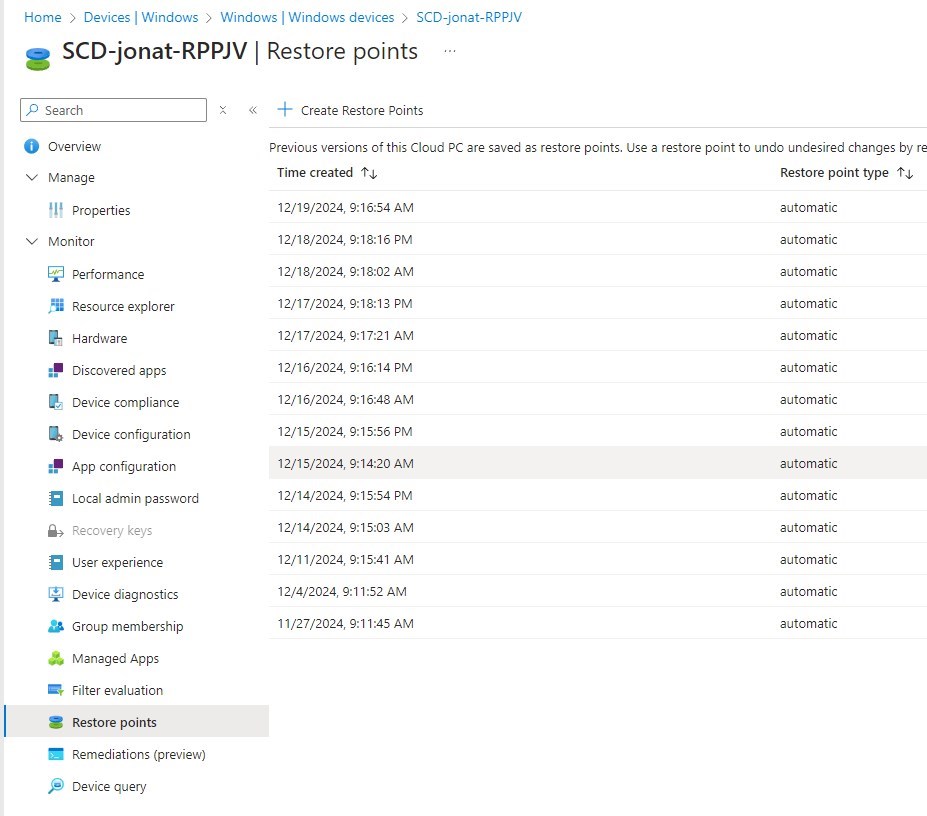
How to restore a Windows 365 Cloud PC
Restoring Windows 365 Cloud PC is enabled by default. It allow the Cloud PC to return to a specific point in date/time, without a complete wipe of the device.
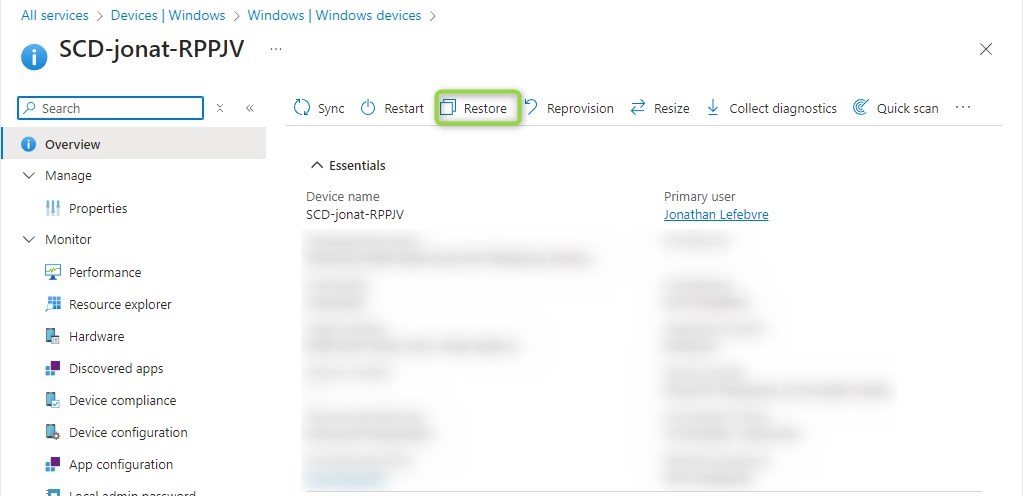
It is also possible to force a restore point under each device / Restore point
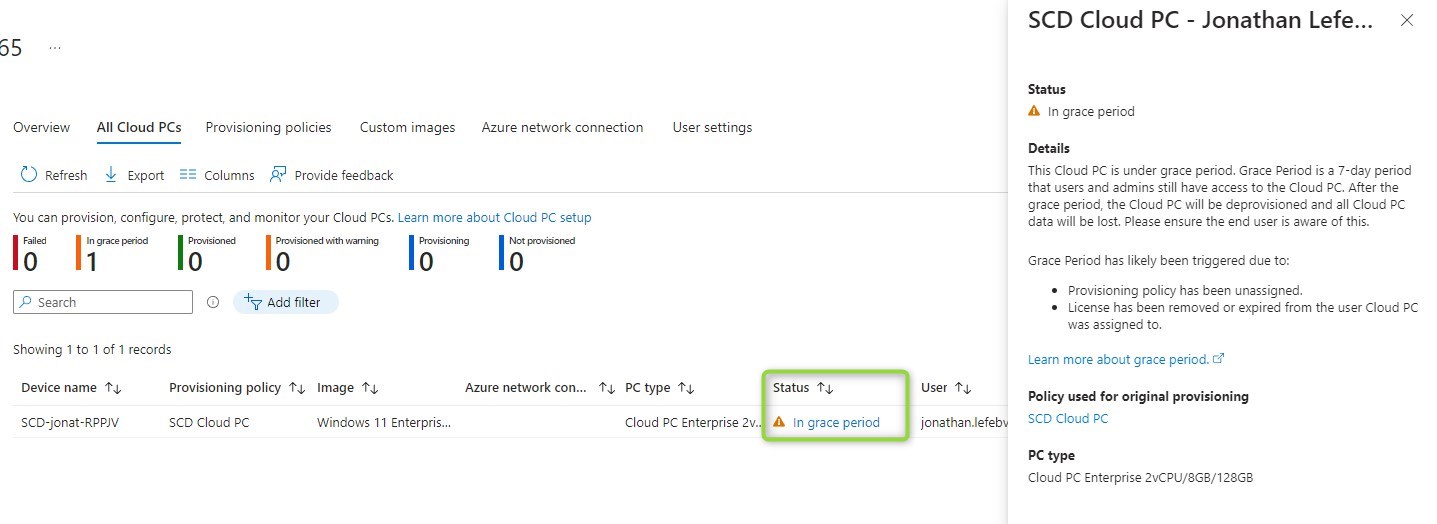
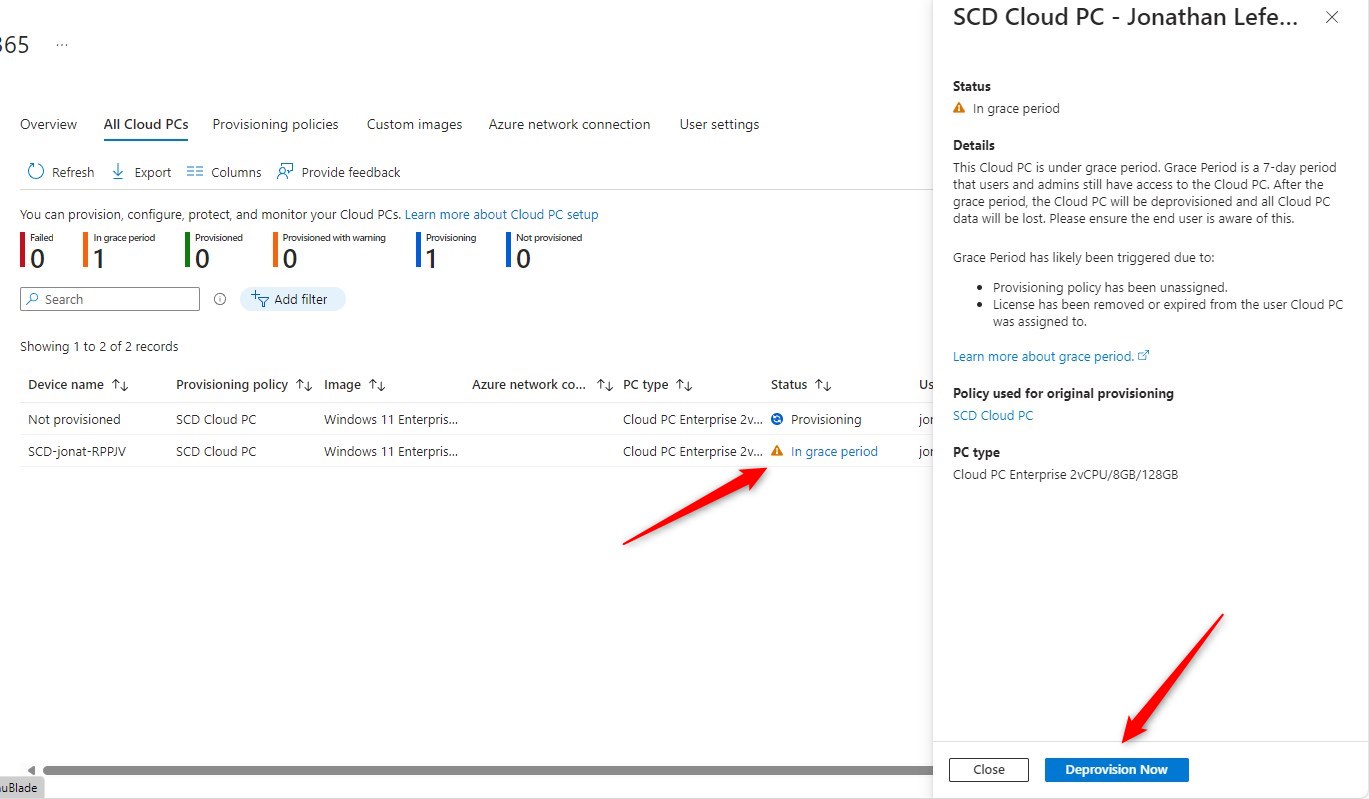
How to deprovision a Windows 365 Cloud PC
- The first step is to unassign the license from the user.
- Under Devices / Windows 365 / All Cloud PCs, the user’s Cloud PC will be in grace period.
- By default, it will remain like this for 7 days.
- To deprovision now, click on In grace period and select Deprovision Now
- This will shutdown the Cloud PC and remove it completely.
Note that while the device is in grave period, it is still possible to use it for up to 7 days.
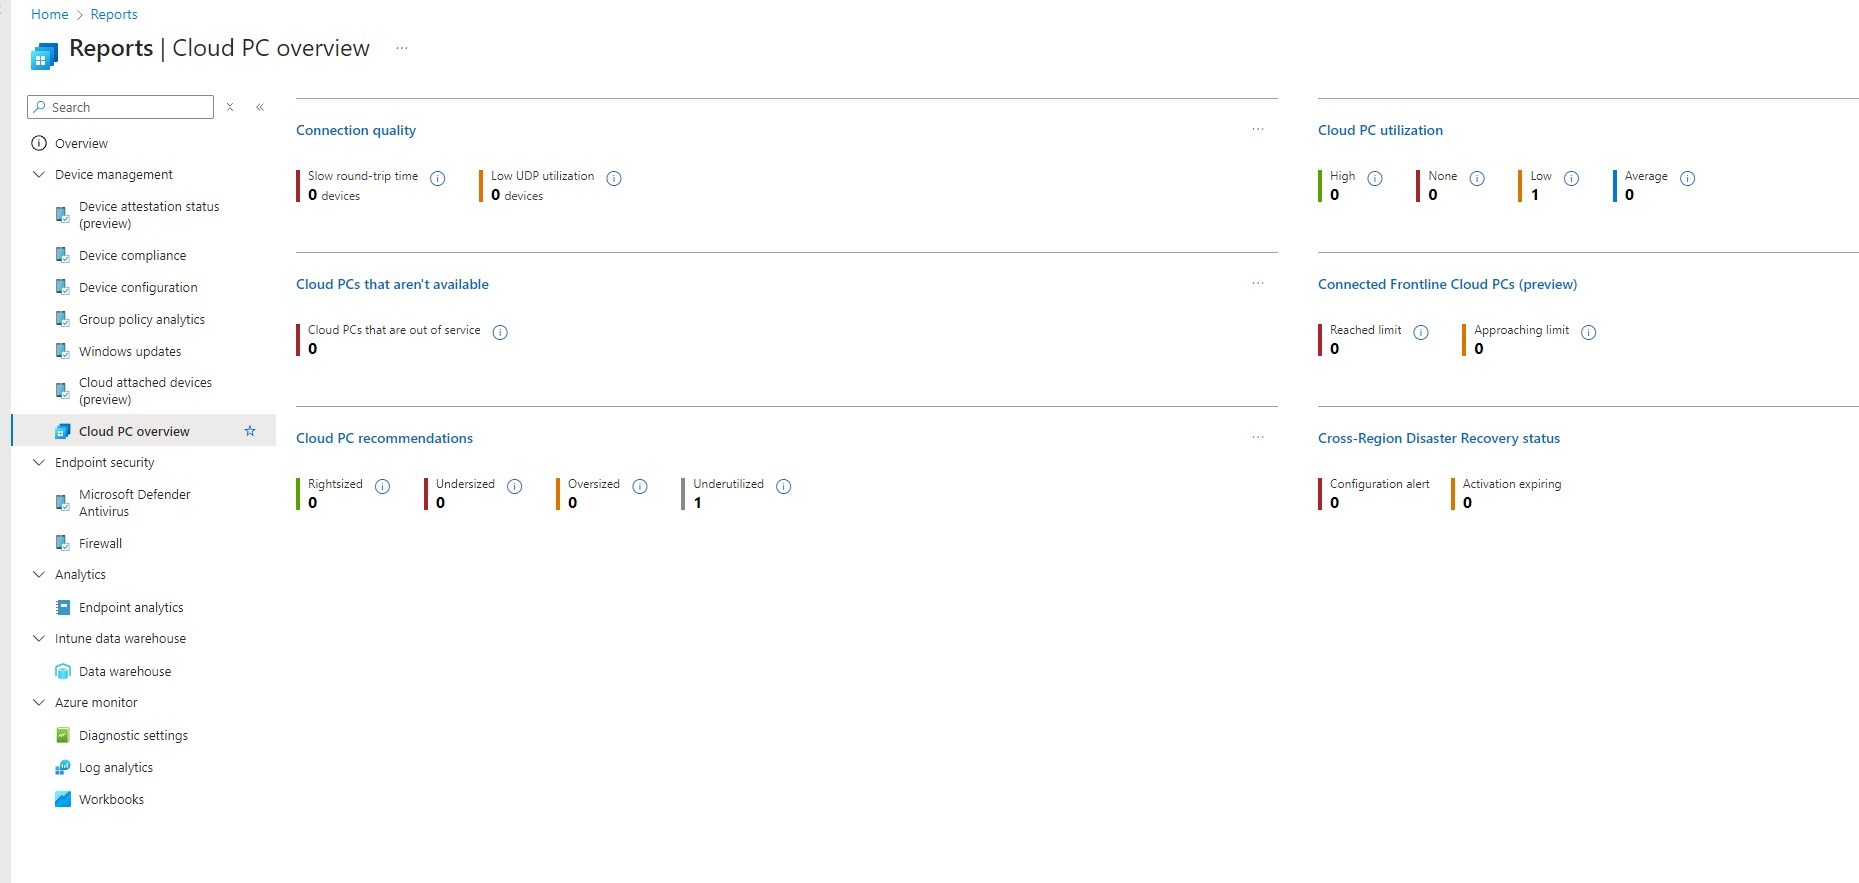
Reporting
Under Reports / Cloud PC overview, a lot of details are available to evaluate how Cloud PCs are used and help assign them the right size or even consider removing the license to deprovision.
There is more to managing Windows 365 Cloud PC, but this should help a bit!
Share
Get the latest insights and exclusive content delivered to your inbox


Only authorized users can leave comments
Log In