
How to Configure Windows Hotpatch with Intune
SCD Consultant, Contributor. Specialized in Microsoft Endpoint Manager (SCCM, InTune), Windows Autopilot, Windows10 (11) and Office365 Deployment and maintenance.

Marc-Andre Chartrand
Table of Content


Share


Get the latest insights and exclusive content delivered to your inbox
Microsoft has introduced Hotpatch for Windows 11 Enterprise, a feature that allows you to apply critical security updates without rebooting the device. For IT admins, this is a game-changer: fewer interruptions, faster compliance, and happier end users.
In this Intune Windows Hotpatch post, we’ll cover:
- What Hotpatch is and why it matters
- Prerequisites for enabling Hotpatch
- How to configure Hotpatch in Intune (step-by-step with screenshots)
- What the end-user experience looks like
What is Hotpatch?
Hotpatch is a servicing innovation that delivers Monthly “B” release security updates without requiring a reboot. Traditionally, patching meant downtime — users had to restart their devices to apply updates. With Hotpatch:
- Security updates are applied in-memory
- Devices stay online and productive
- Reboots are only required for baseline updates (roughly every 3–4 months)
Originally introduced for Windows Server Azure Edition, Hotpatch is now available for Windows 11 Enterprise devices managed with Intune and Windows Autopatch.
Intune Windows Hotpatch Prerequisites
Before enabling Hotpatch, make sure:
- Licensing: Windows 11 Enterprise E3/E5 or equivalent
- Management: Devices must be enrolled in Windows Autopatch via Intune
- Note: Autopatch is now available for GCC Tenants! If it doesn’t appear in your Intune, contact your license reseller so they can add a 0$ SKU for Windows Enterprise that will unlock it.
- OS Version: Windows 11 Enterprise, version 24H2 or later
- Hardware: Supported Intel/AMD processors (ARM64 support is limited)
- Policy: Devices must be targeted with an Autopatch quality update policy
Configure Hotpatch in Intune
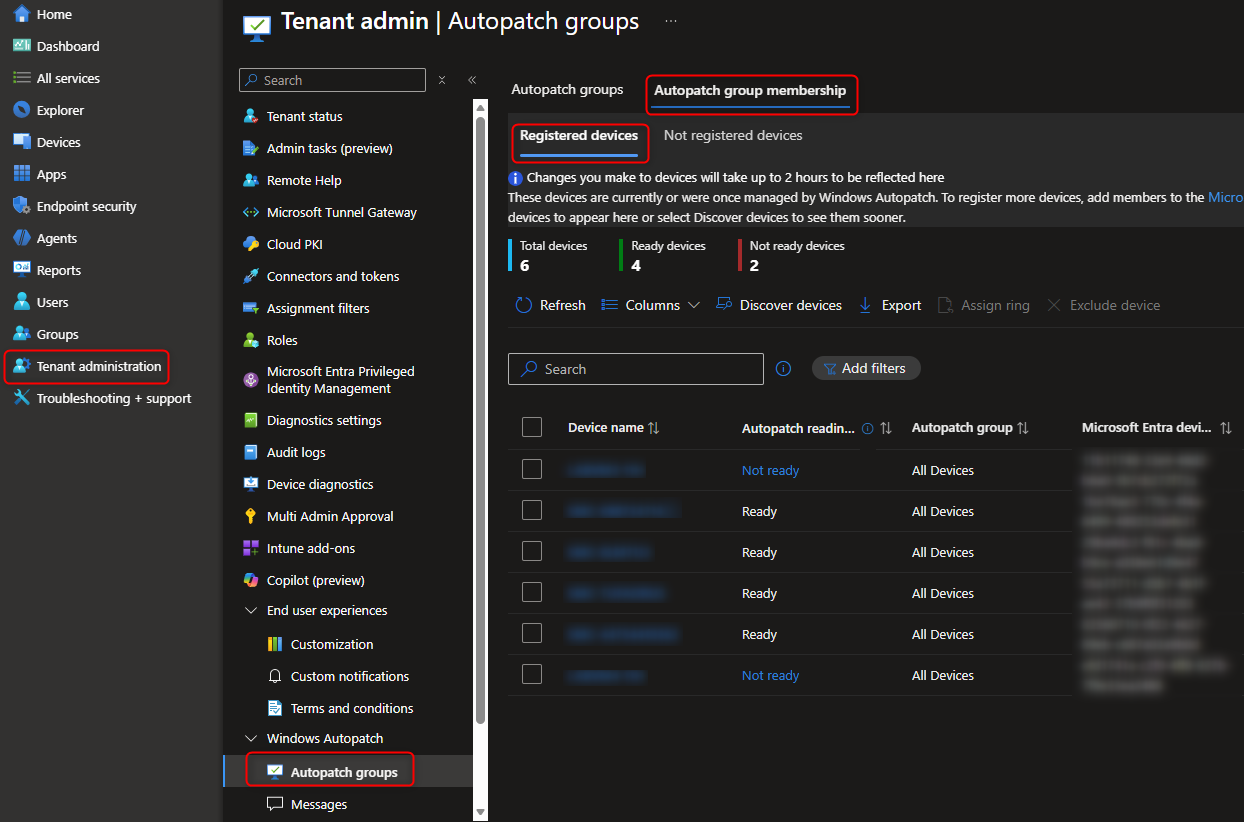
Step 1 – Verify Autopatch Enrollment
- In the Intune Admin Center, go to:
Tenant administration > Windows Autopatch - Ensure your tenant is enrolled and devices are registered.
Note: Devices marked as Not ready are registered, but Autopatch detected conflicting settings that would prevent updates from applying. They could be registered for Hotpatch, but would not be patched until remediated.
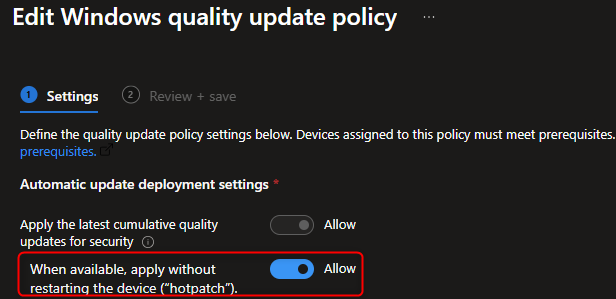
Step 2 – Create a Quality Update Policy
- Navigate to:
Devices > Windows > Quality updates (Preview) - Select + Create profile.
- Configure the policy:
- Name: Windows 11 Hotpatch Policy (or something similar that suits your naming convention)
- Enable Hotpatch: ✅ Allow
- Assign the policy to your device groups.
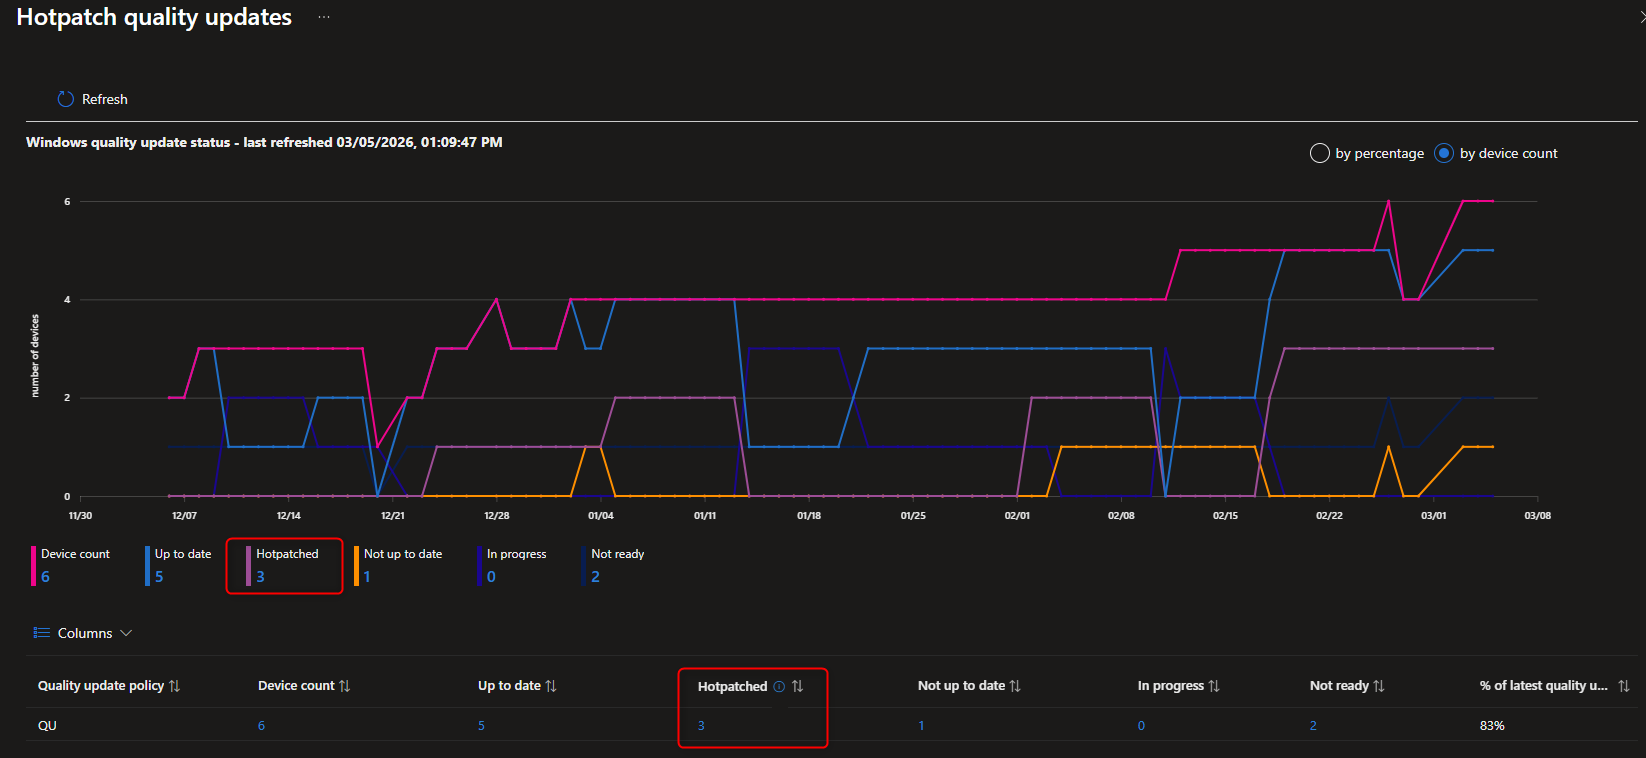
Step 3 – Monitor Deployment
- Go to Reports > Windows Autopatch > Quality updates
- Verify that Hotpatch updates are being applied without requiring reboots.

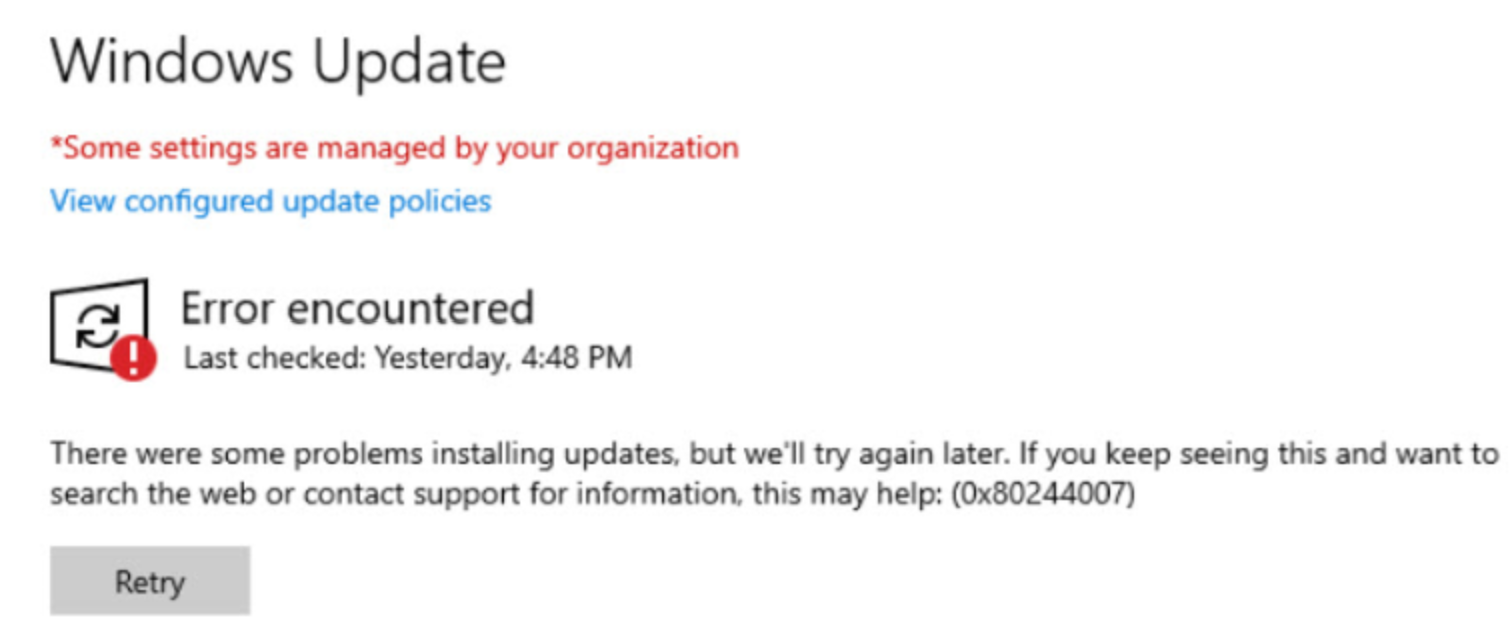
End-User Experience
From the user’s perspective:
- Updates install silently in the background.
- No forced reboots after every Patch Tuesday.
- Reboots are only required for baseline updates (quarterly).
This means fewer interruptions, smoother workflows, and higher productivity. This also means the computers will now restart only once every 3 months, which could affect performance and application/OS reliability.
Why Hotpatch Matters
- Security: Devices stay compliant faster.
- Productivity: Less “Update and Restart” interruptions mid-meeting.
- IT Efficiency: Reduced helpdesk tickets related to patching downtime or vulnerable devices.
- Future-Proofing: Aligns with Microsoft’s cloud-first, always-on servicing model.
Intune Windows Hotpatch Wrap-Up
Hotpatch is one of the most impactful updates to Windows servicing in years. By combining Intune and Windows Autopatch, IT admins can deliver security updates with zero downtime for end users. If you’re managing Windows 11 Enterprise devices, enabling Hotpatch should be high on your roadmap.
Share
Get the latest insights and exclusive content delivered to your inbox


Only authorized users can leave comments
Log In