
Create Adobe Photoshop Intune package for mass deployment
Contributor of System Center Dudes. Based in Montreal, Canada, Senior Microsoft SCCM consultant, working in the industry for more than 10 years. He developed a strong knowledge of SCCM and MDT to build automated OS deployment solution for clients, managed large and complexe environment, including Point of Sale (POS) related projects.

Jonathan Lefebvre
Table of Content


Share


Get the latest insights and exclusive content delivered to your inbox
Application packaging in Intune or SCCM is one of the jobs that can frequently create headaches. For many years, Adobe products have been challenging to automate and deploy for MECM/Intune Admins. Whether because of updates, licensing, or unclear instructions, it has always been a challenge for Adobe Creative suite products. I was recently tasked to package Adobe Photoshop with Intune. To my pleasant surprise, Adobe now has a cloud admin console that makes that process a breeze compared to what was done before. In this blog post, we will detail how to generate a source installation for Adobe Photoshop using the Adobe Admin Console and deploy it using Intune.
Requirements
We will start by downloading the software from the Adobe website. Here are the high-level steps :
- Access to Adobe Admin portal
- Admin role Deployment is enough to create the package.
- See more details about accessing Adobe Admin portal
- IntuneWinAppUtil to create Intune packages
- Access creates an application in Intune portal
Create Adobe Photoshop deployment package
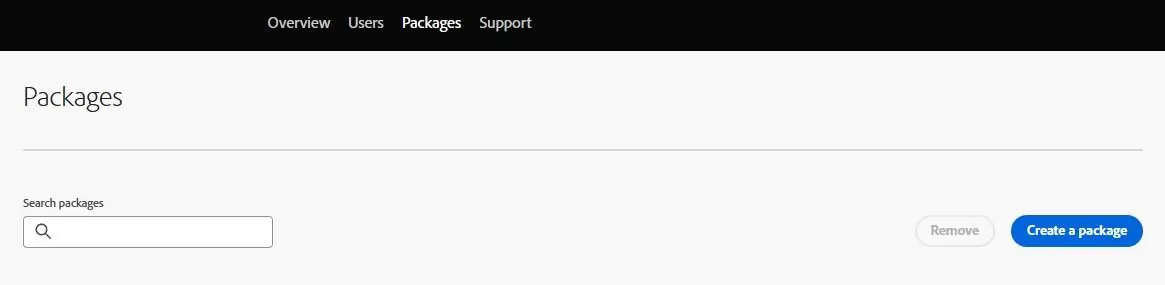
- Log in to the Adobe Admin portal and click on Packages at the top
- Click Create Package
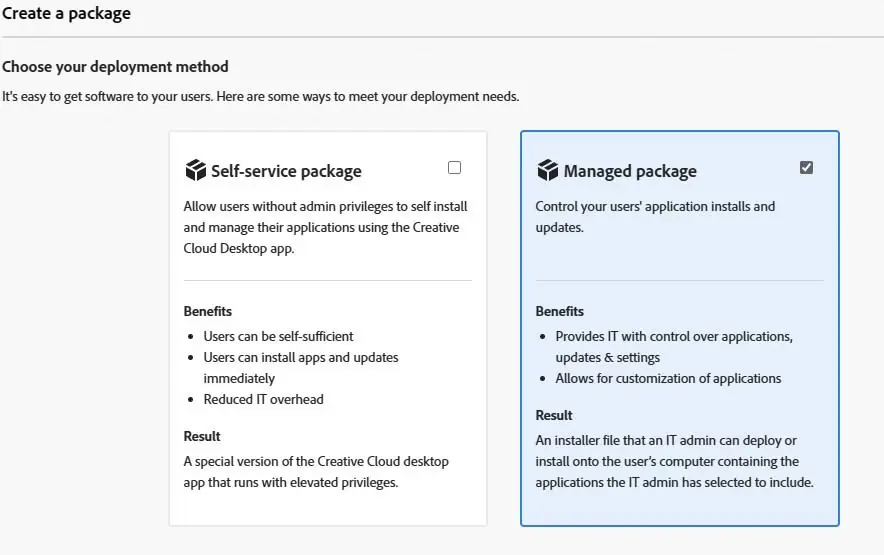
- Select Managed Package
- Select the platform to be supported
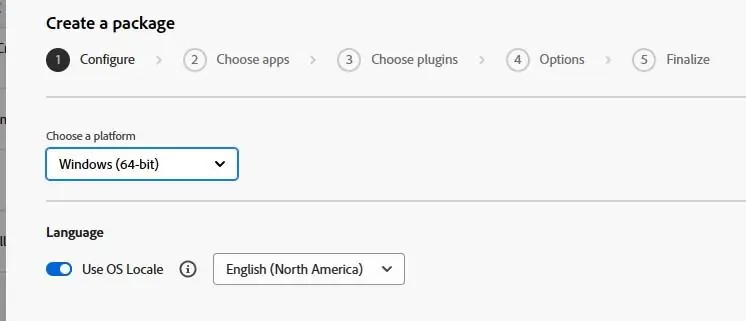
Abode products need to match the architecture of the OS. 32 Bit applications won’t work on 64-bit Windows 10/11. Failure to do so will result in the following error in the PDApp.log generated by the installer.

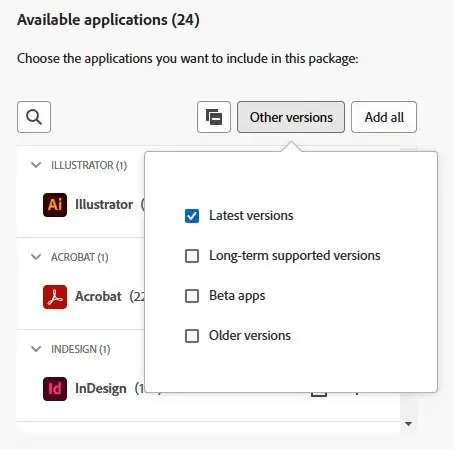
- Select the Adobe application you wish to download, in our case, we’ll select Photoshop
Creative Cloud Desktop application is mandatory to manage Adobe products.

Various build options are also available to be selected.
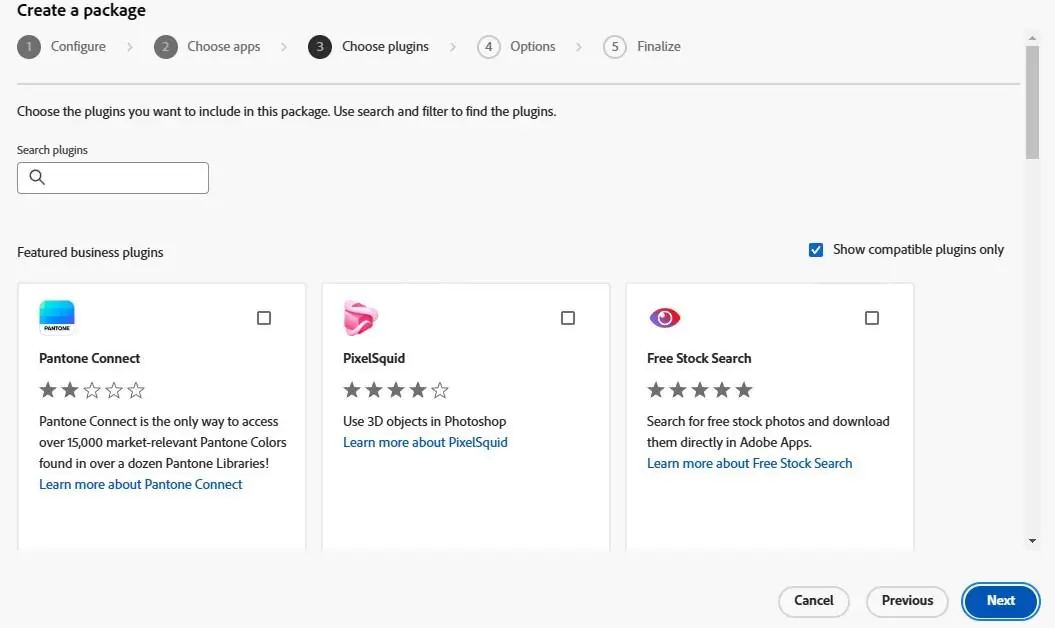
- Additional plugins can be included
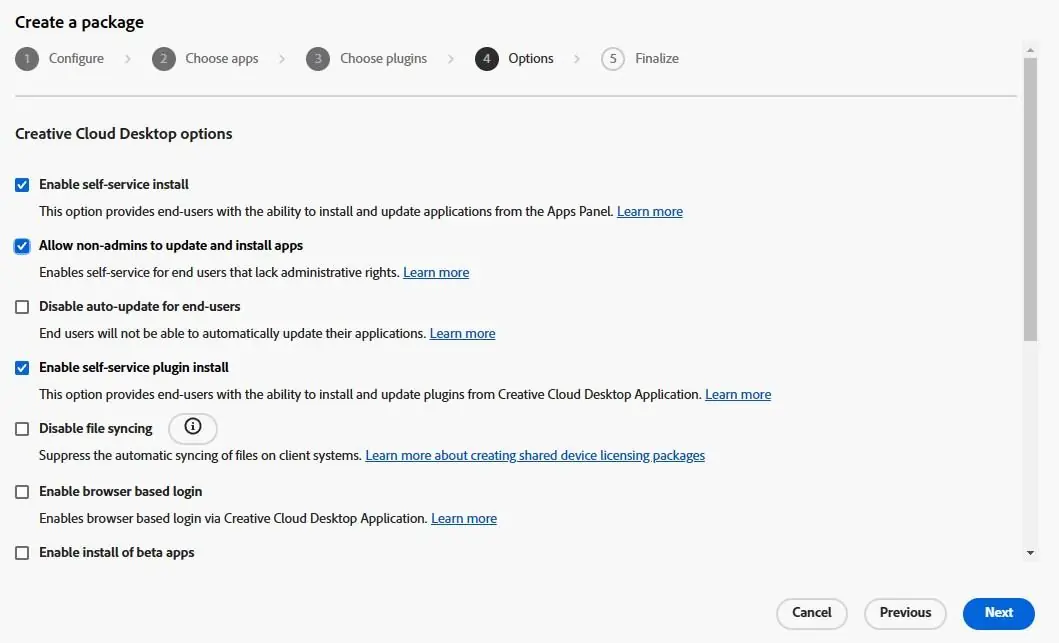
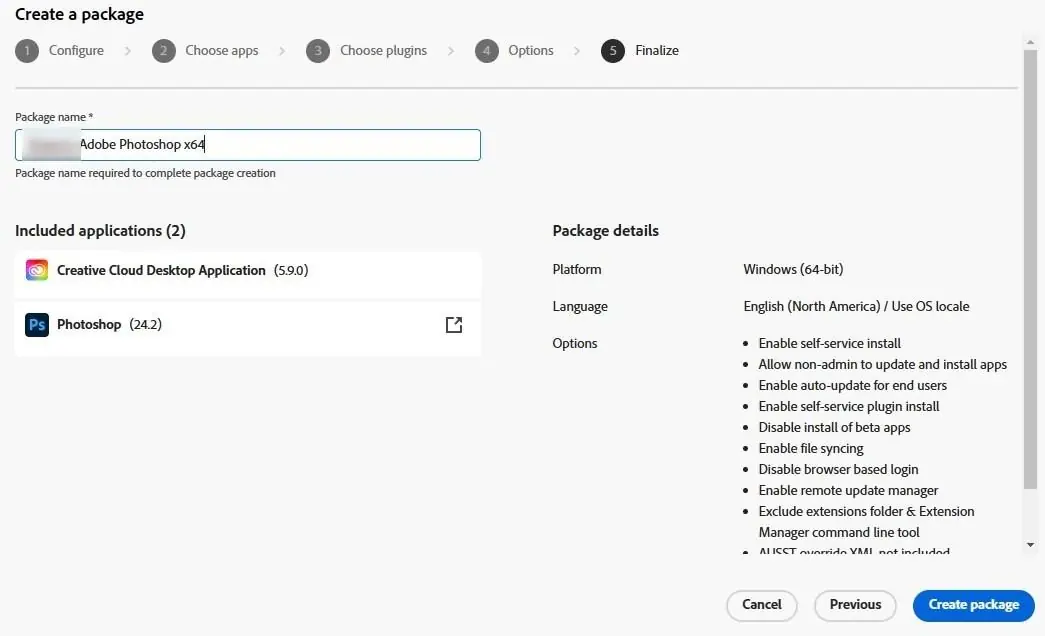
- Review the install options for the package. For Intune package delivery, select the following:
- Enable Self-service install
- Allow non-admins to update and install apps
- For details about those options, see Adobe’s docs
- Name the package and click Create
- The package building will require a few minutes to complete.
Note that the download expires within a few days of creation. Once expired, the package must be re-created
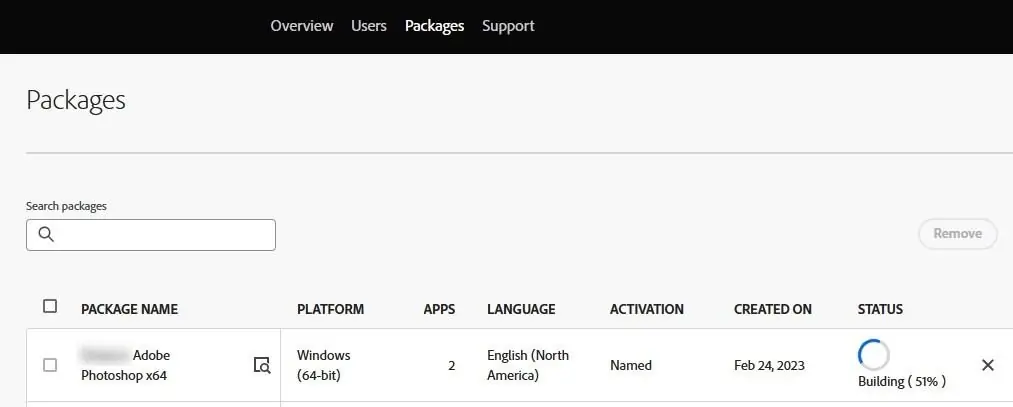
- Once completed, click on download to access the customized install source files.

For more details about the creation of a Managed Package, see Adobe Docs
Create Adobe photoshop Intune package source
We will now create the folder structure to host our Adobe package.
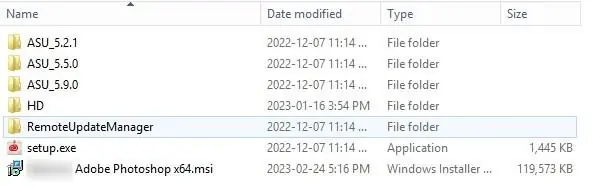
- The download is a simple zip file. Extract it using your favorites tool

- The actual files used to deploy Adobe Photoshop with Intune are under Build subfolder.
- To create the source file for the Intune Win32 app, use the IntuneAppUtil in a command prompt.
- The source folder must contain files and the folder included under the build subfolder downloaded.
- The setup file should be the MSI. SEtup.exe could be used, but when MSI is available, it’s always better.
- Output folder is where to save the intune package

Create Adobe Photoshop Intune Win32 Application
We will now head to the Intune portal and prepare the Photoshop intune package
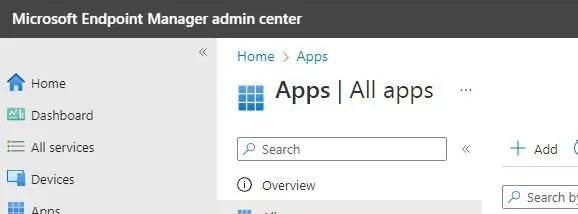
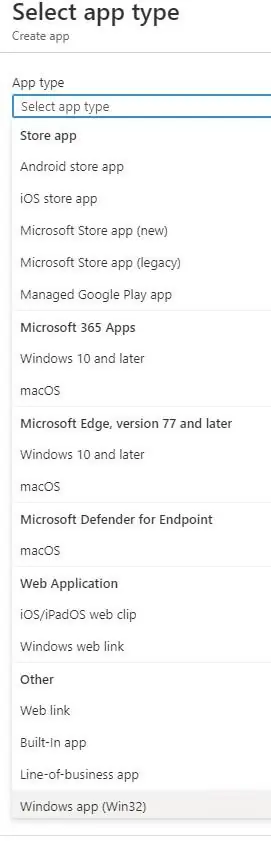
- Log in the Intune admin portal, go to Apps and select Add
- Select Windows App(Win32)
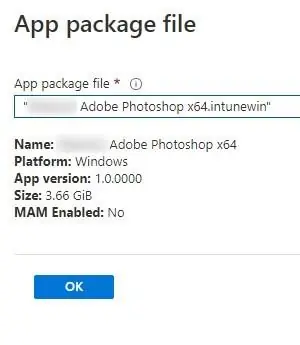
- Select the .intuneWin file created previously
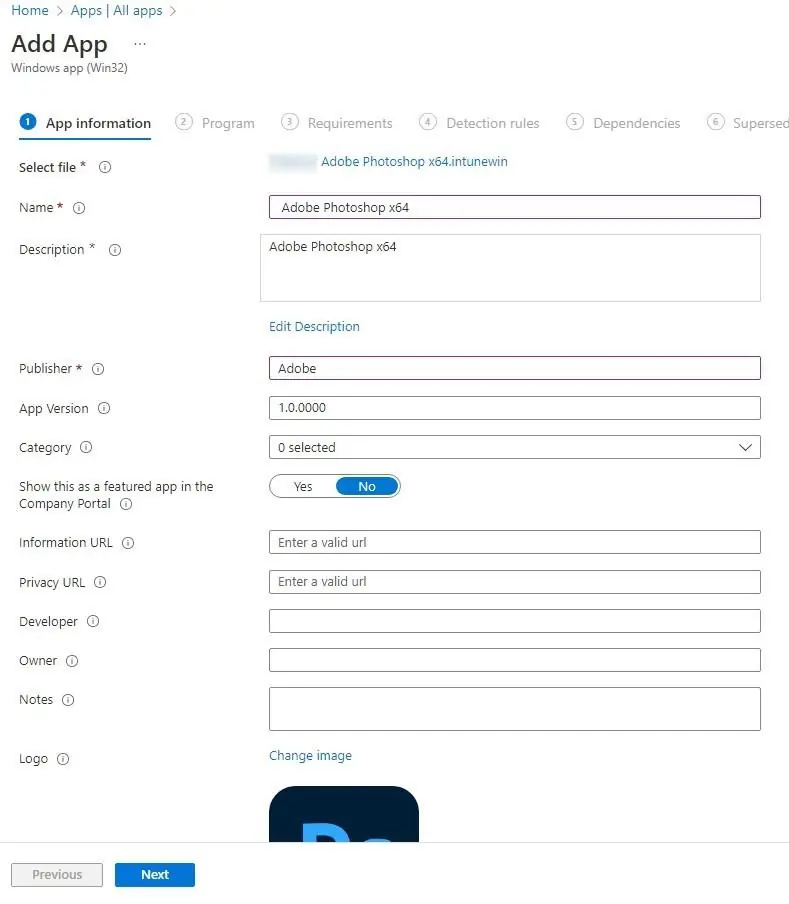
- Input the details for Adobe Photoshop.
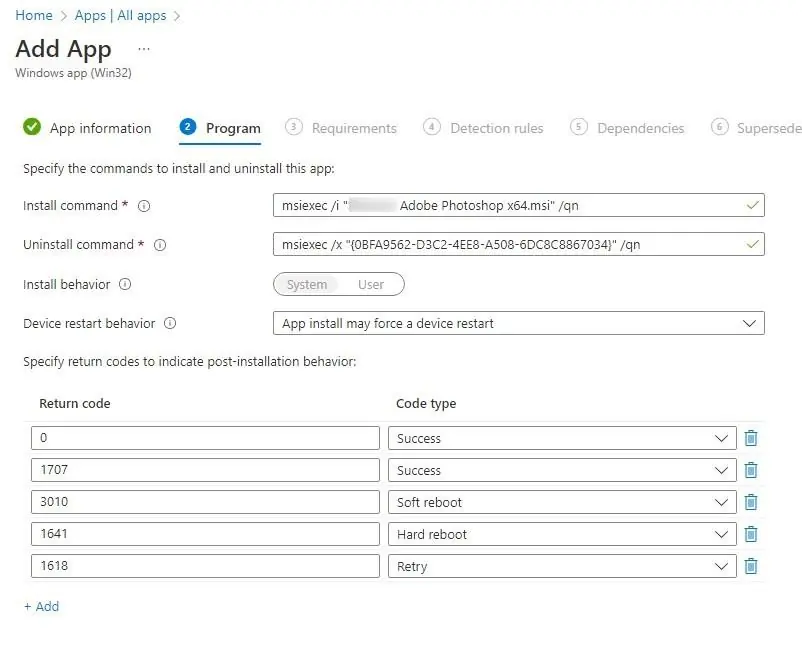
- Review command lines for Install and Uninstall.
Setup.exe can also be used by using the –Silent parameter.
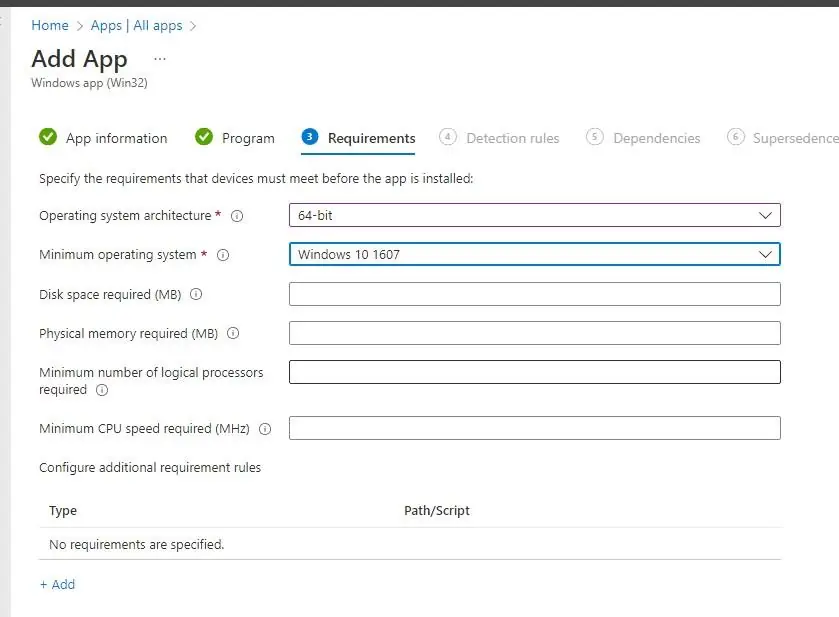
- Select the requirements.
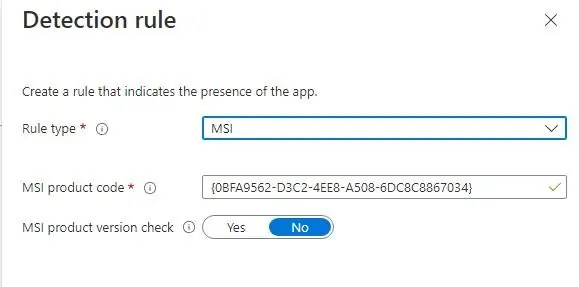
- Add a Manual detection rule for MSI. it will auto-populate with the MSI ID of the source file
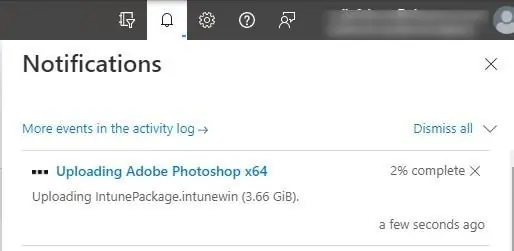
- Once complete, the upload will take a little while. Closely monitor the status making sure it upload successfully.
For more details about Intune’s Win32 Application, see Microsoft docs.
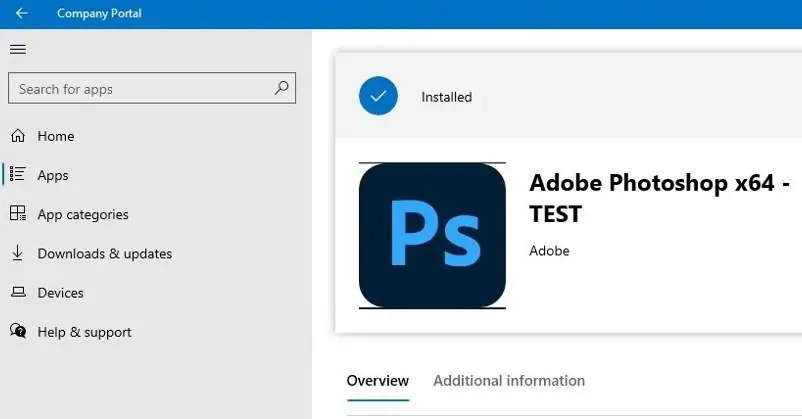
Results
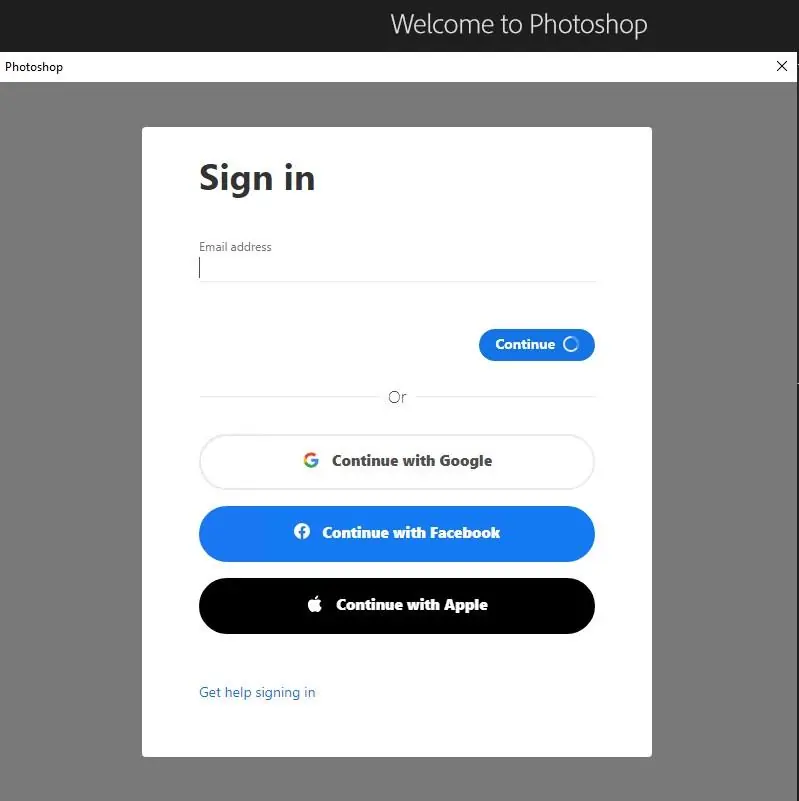
On a test device, Adobe Photoshop is installed along with the required Creative cloud application.
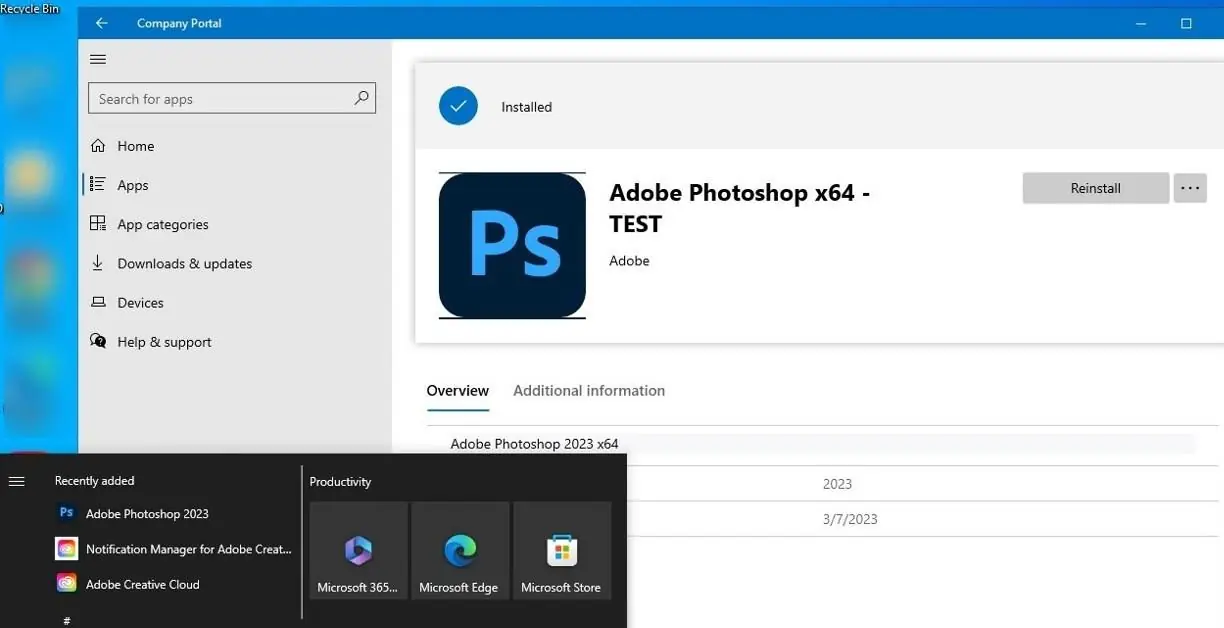
Once launched, it requires a login to receive the license to use it.
For more details, see Adobe docs
Share
Get the latest insights and exclusive content delivered to your inbox


Only authorized users can leave comments
Log In