

SCCM Windows Store for Business Integration
Contributor of System Center Dudes. Based in Montreal, Canada, Senior Microsoft SCCM consultant, working in the industry for more than 10 years. He developed a strong knowledge of SCCM and MDT to build automated OS deployment solution for clients, managed large and complexe environment, including Point of Sale (POS) related projects.

Jonathan Lefebvre
Table of Content


Share


Get the latest insights and exclusive content delivered to your inbox
A few month ago, Microsoft released Windows Store for Business to help IT administrators to buy, manage and distribute Windows Store Apps on Windows 10 devices. At that time, the solution was useful but not fully operational from an administration perspective. Windows Store for Business integration with SCCM is a new feature of SCCM 1606 and it’s a great addition.
This new feature offers the possibility for an enterprise to distribute and manage apps for Windows 10 devices while using similar methods for standard 32-bits applications.
Key Features
- Manage Volume-Purchased apps
- Synchronize the list of purchased apps
- Apps that are synchronized appear in SCCM Console
- Easy creation of apps from the Windows Store for Business using the Application model
- Same distribution and deployment methods as standard applications
- Review licensing information in the SCCM console
Limitations
- Support only free apps. Paid apps can’t be managed with the integration for now.
- For hierarchy with a central administration site and at least one primary site, deployment of offline Windows Store for Business apps to devices managed by Intune
This post will detail how to integrate the Windows Store for Business with SCCM 1606 and how to deploy a Business App to a Windows 10 computer.
[su_box title=”Note” style=”glass” title_color=”#F0F0F0″]This post assume Azure AD is already configured[/su_box]
SCCM Windows Store for Business integration Pre-Requisites
- Windows 10 version 1511 and up
- Azure AD with an account Global Administrator
- SCCM Current Branch 1606 (Follow our upgrade guide)
- Supported browser to access Windows Store for Business website
- Internet Explorer 10 and up
- Microsoft Edge
- Chrome current version
- Firefox current version
- Proxy Configuration
- All those URLs must be allowed to acquire, install or update apps
- login.live.com
- login.windows.net
- account.live.com
- clientconfig.passport.net
- windowsphone.com
- *.wns.windows.com
- *.microsoft.com
- *.msftncsi.com/ncsi.txt
- All those URLs must be allowed to acquire, install or update apps
You can read more information on this TechNet post.
Azure Active Directory required configurations
In order to integrate Windows Store for Business, a Web API must be created in Azure AD for SCCM.
- Open Azure AD via https://manage.windowsazure.com/
- Select Applications and click Add at the bottom
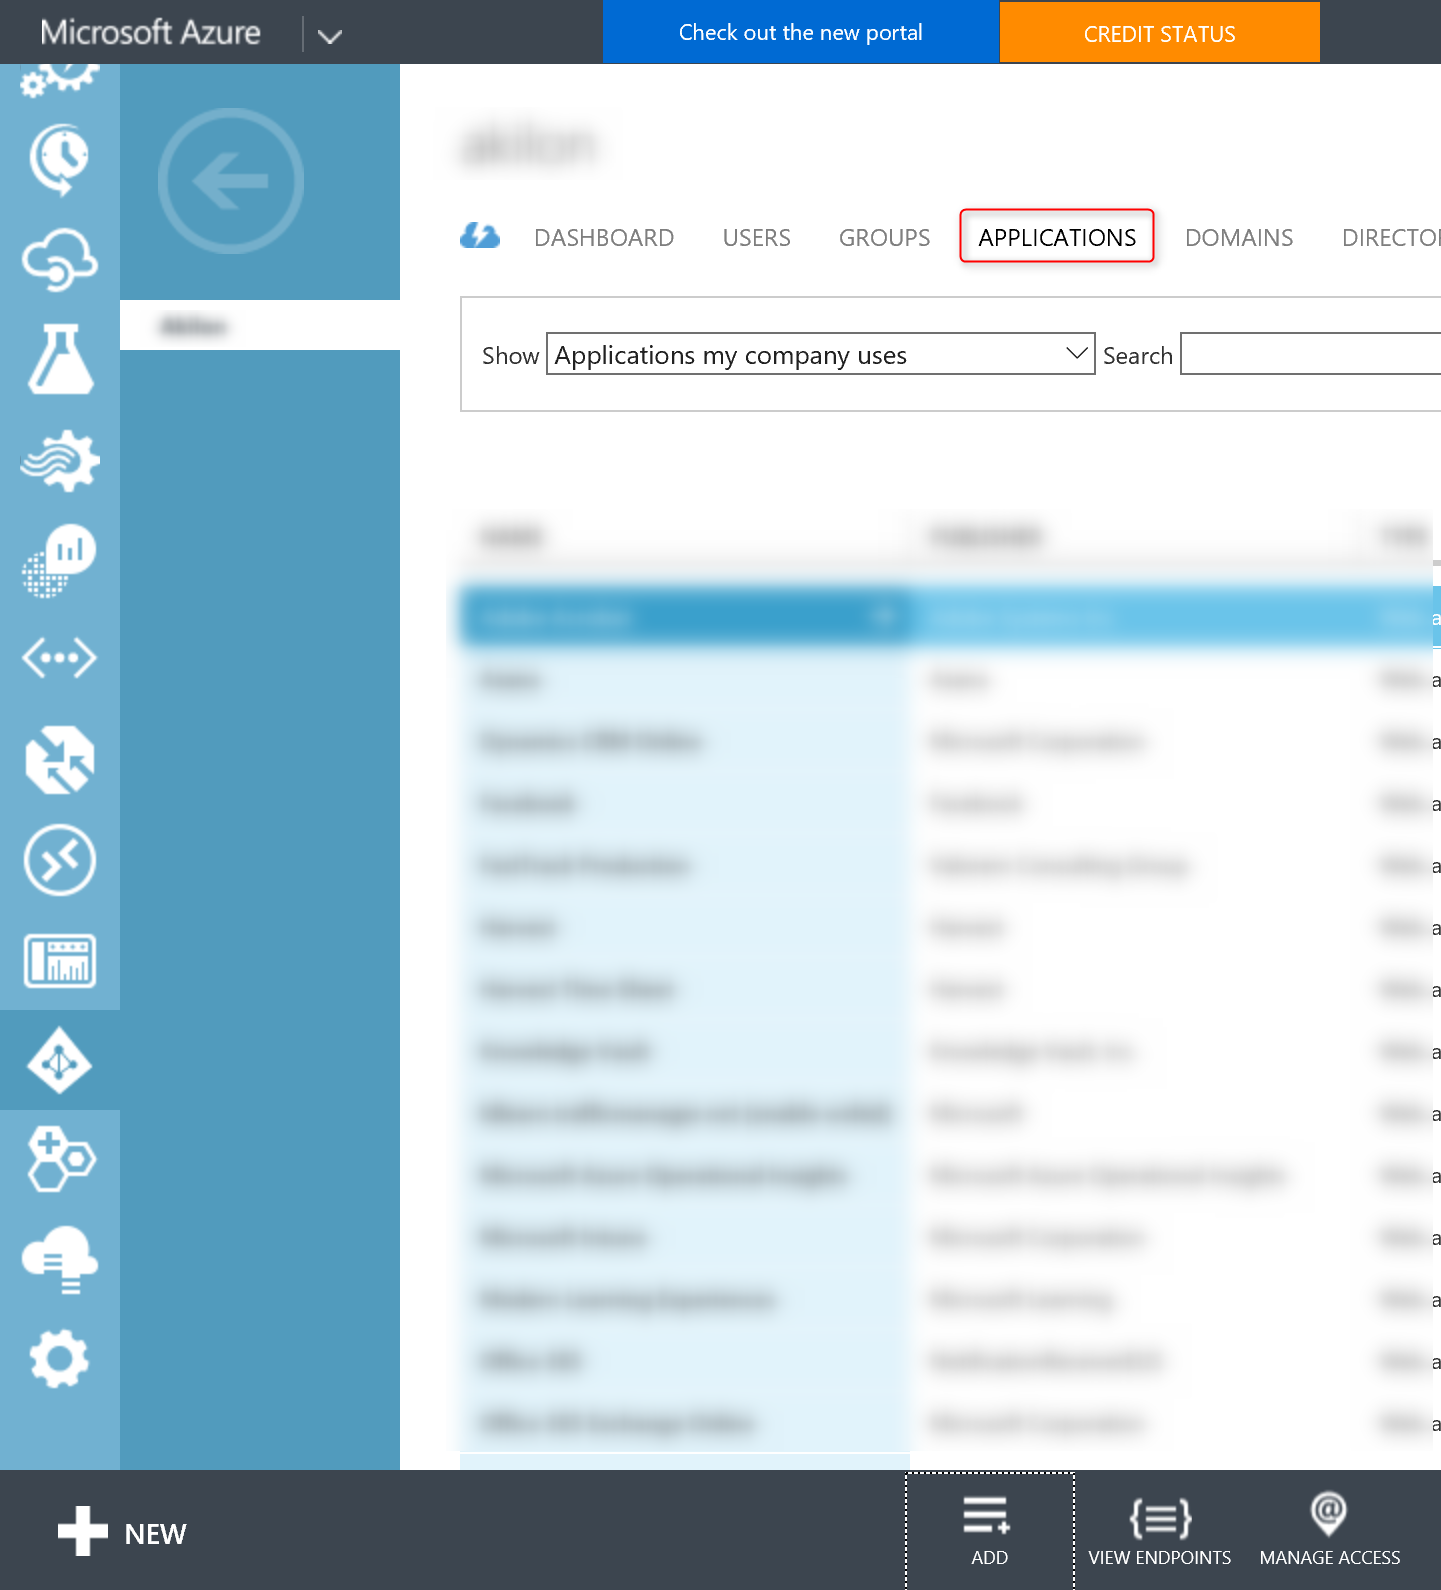
- Select Add an application my organization is developing
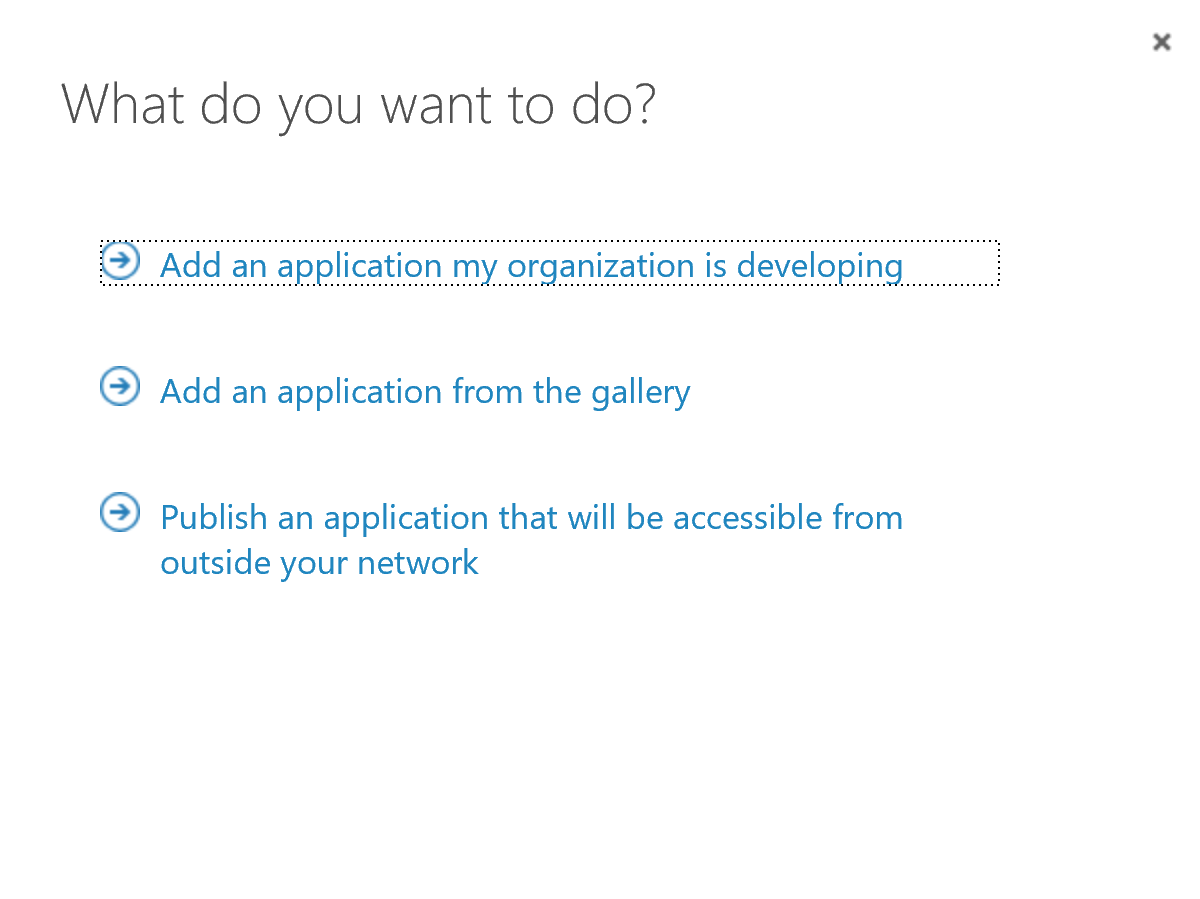
- Type an application name like Microsoft ConfigMgr and select Web application and/or Web API

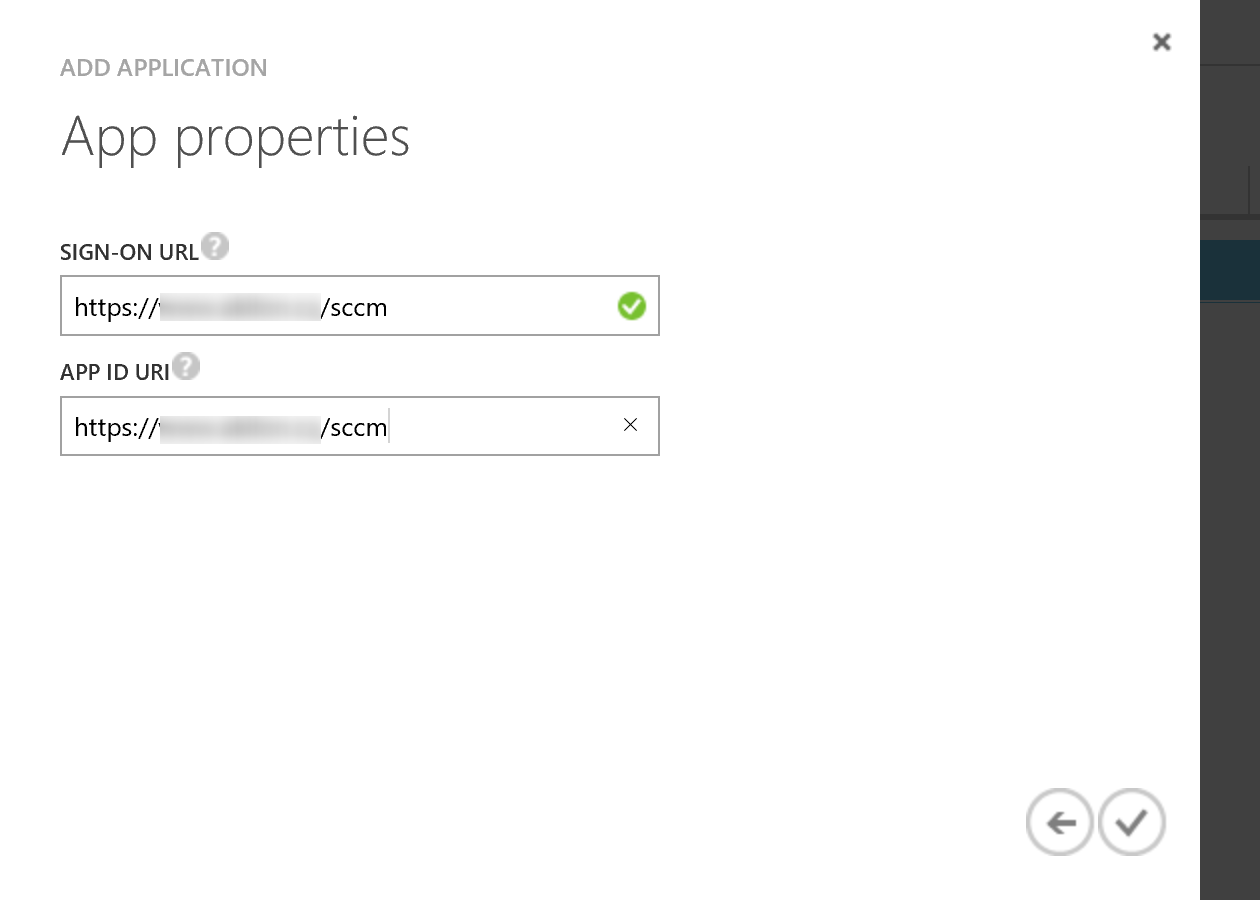
- Specify the Sign-on URL and APP ID URL by following this format https://yourdomain.com/SCCM
- Make sure both links are the same
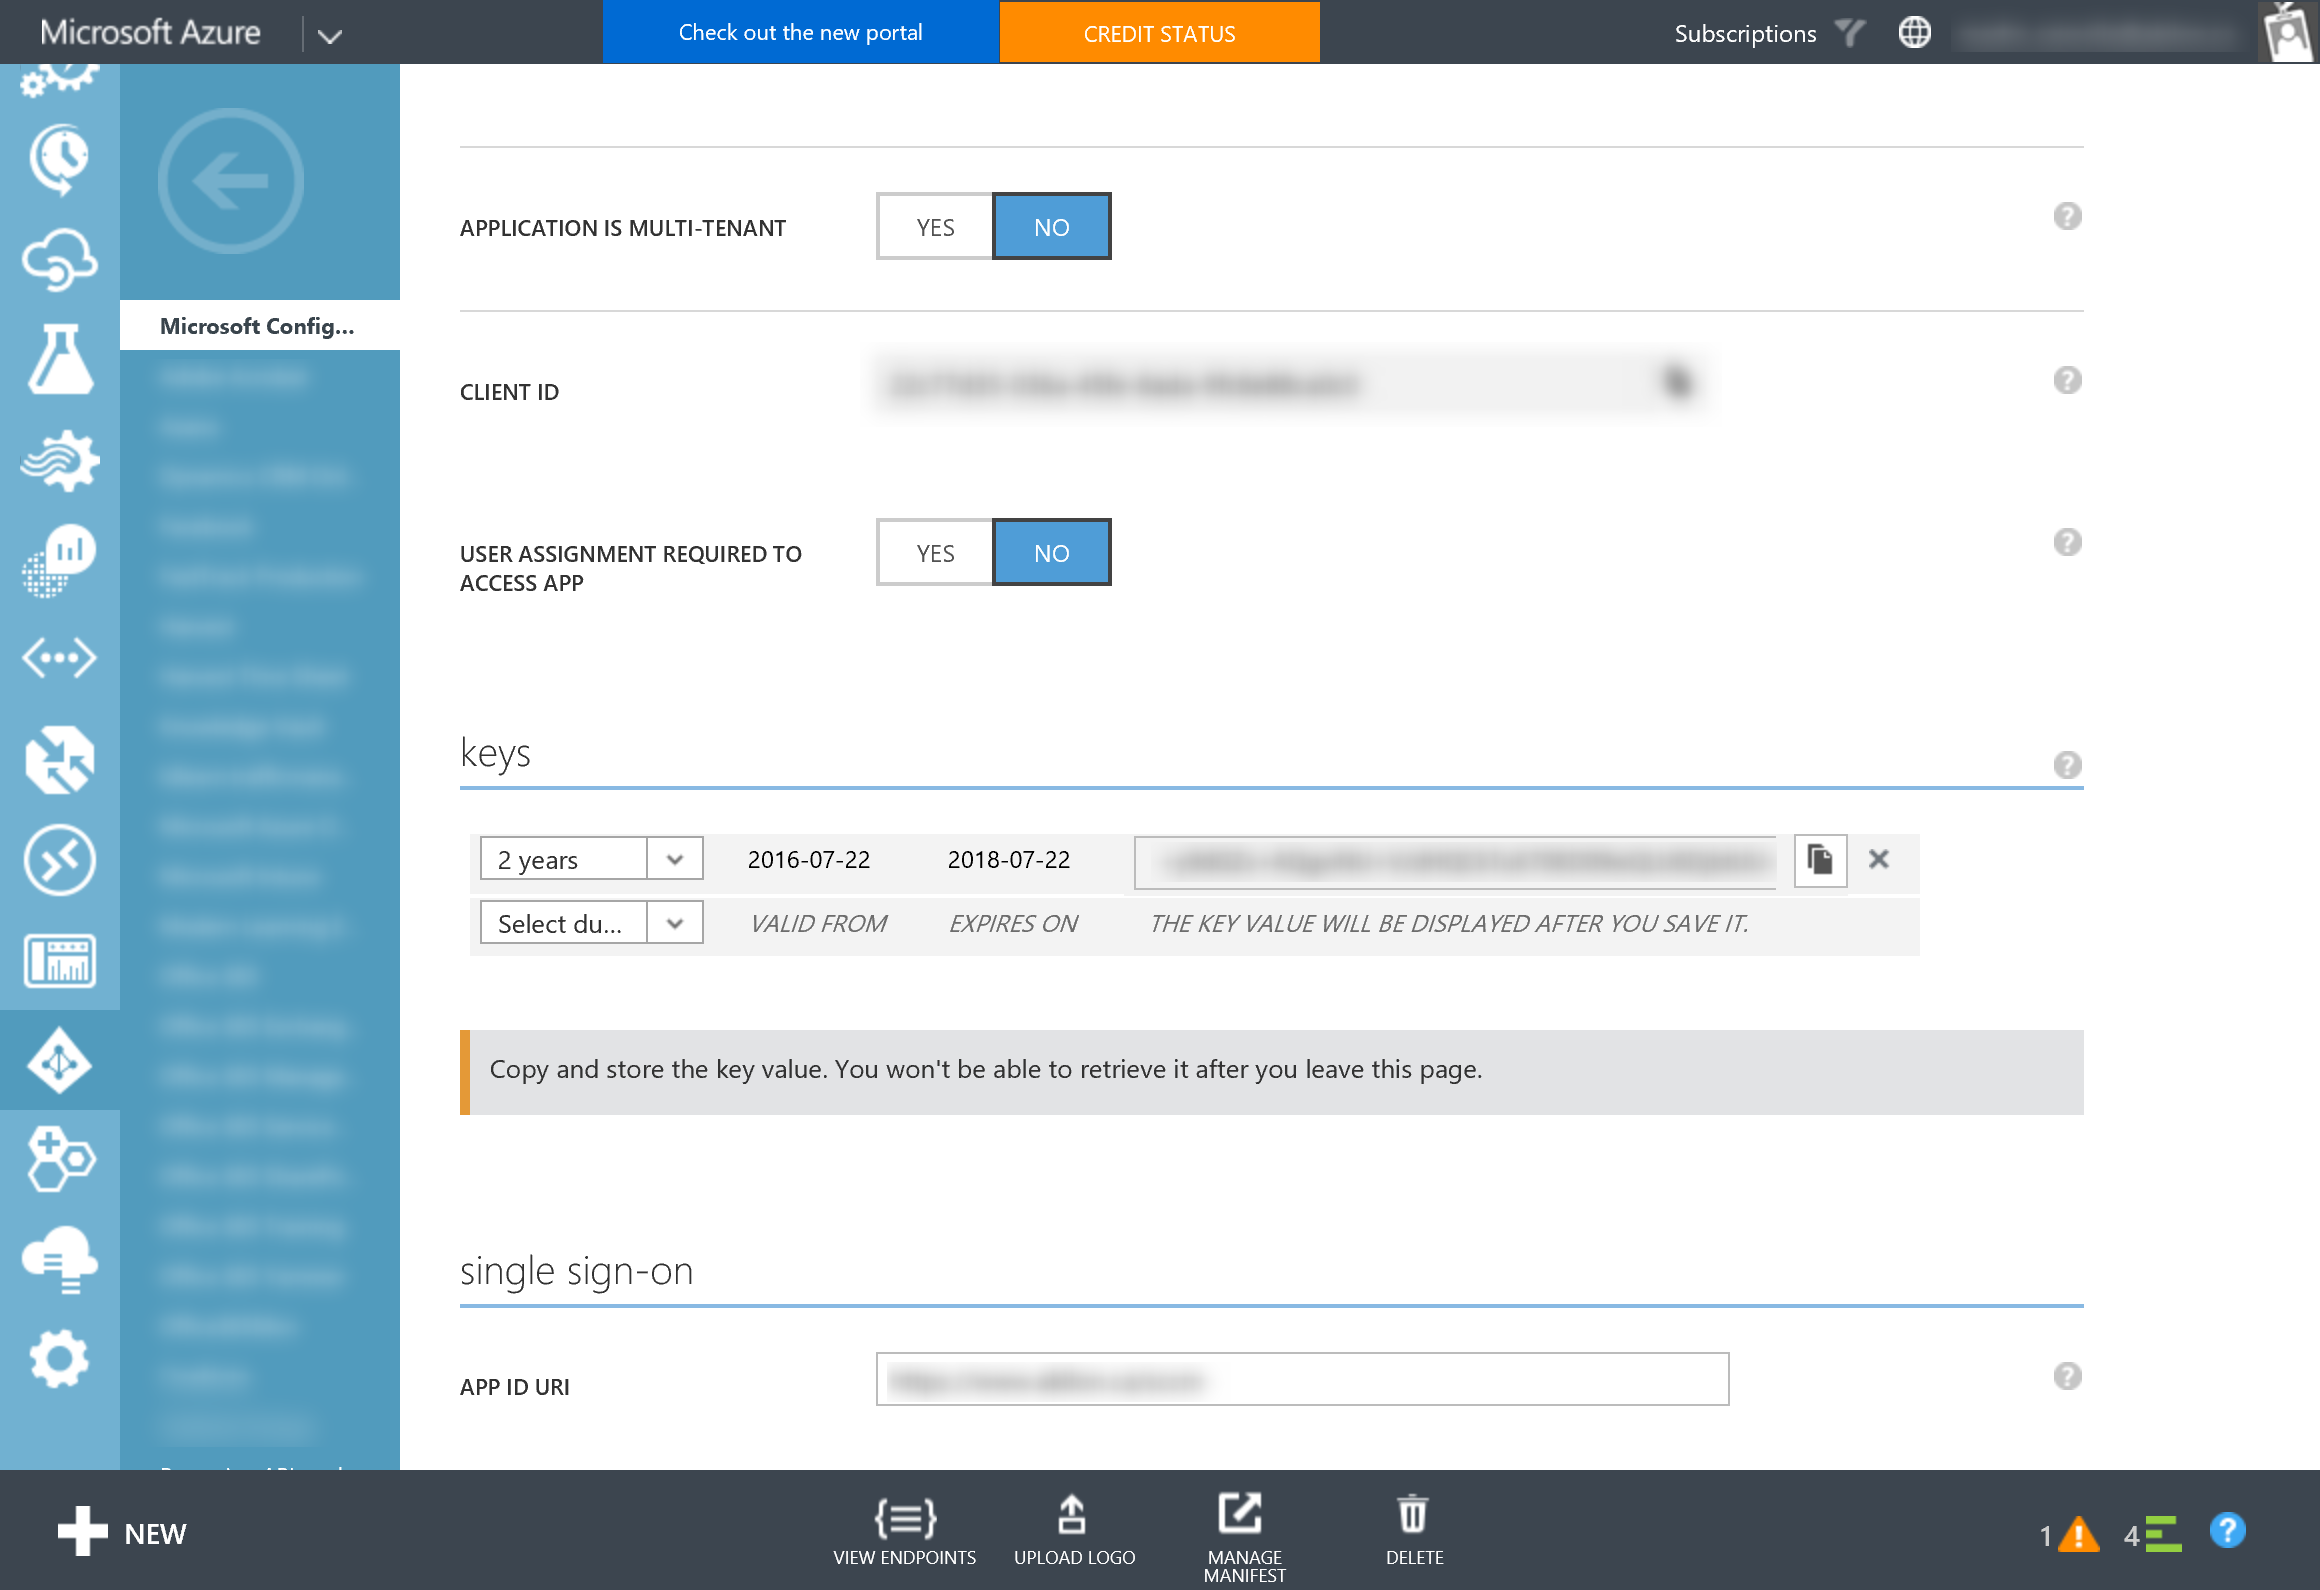
- Highlight the application created and select Configure

- Under Keys, select the duration and then click Save
- Do NOT close this window as we’ll need these information later to integrate in SCCM
Sign Up for Windows Store for Business
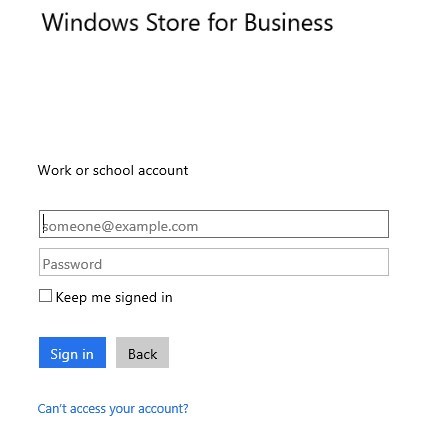
- Go to https://www.microsoft.com/business-store and click Sign In
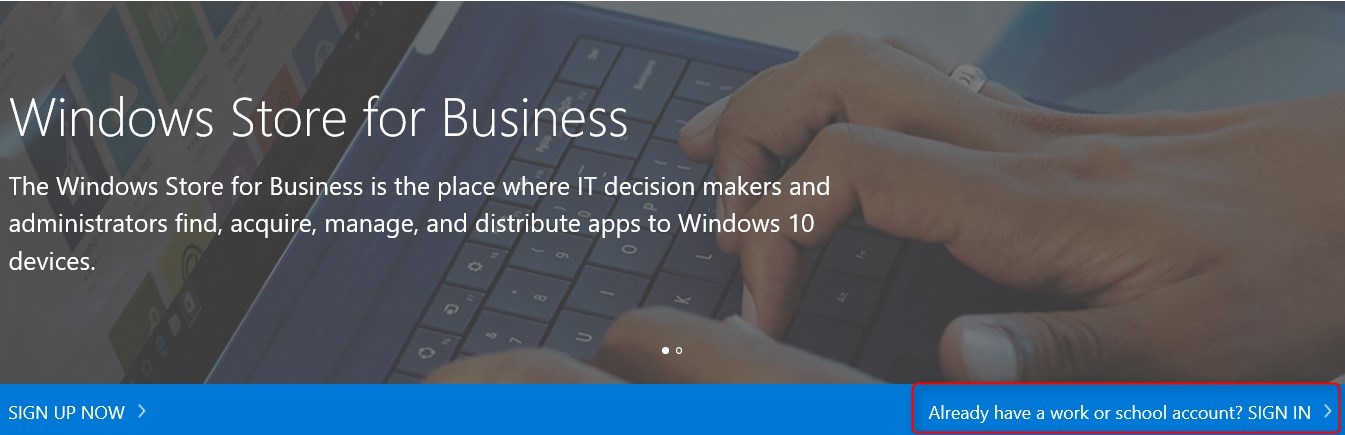
- Sign-in with a Global Administrator account
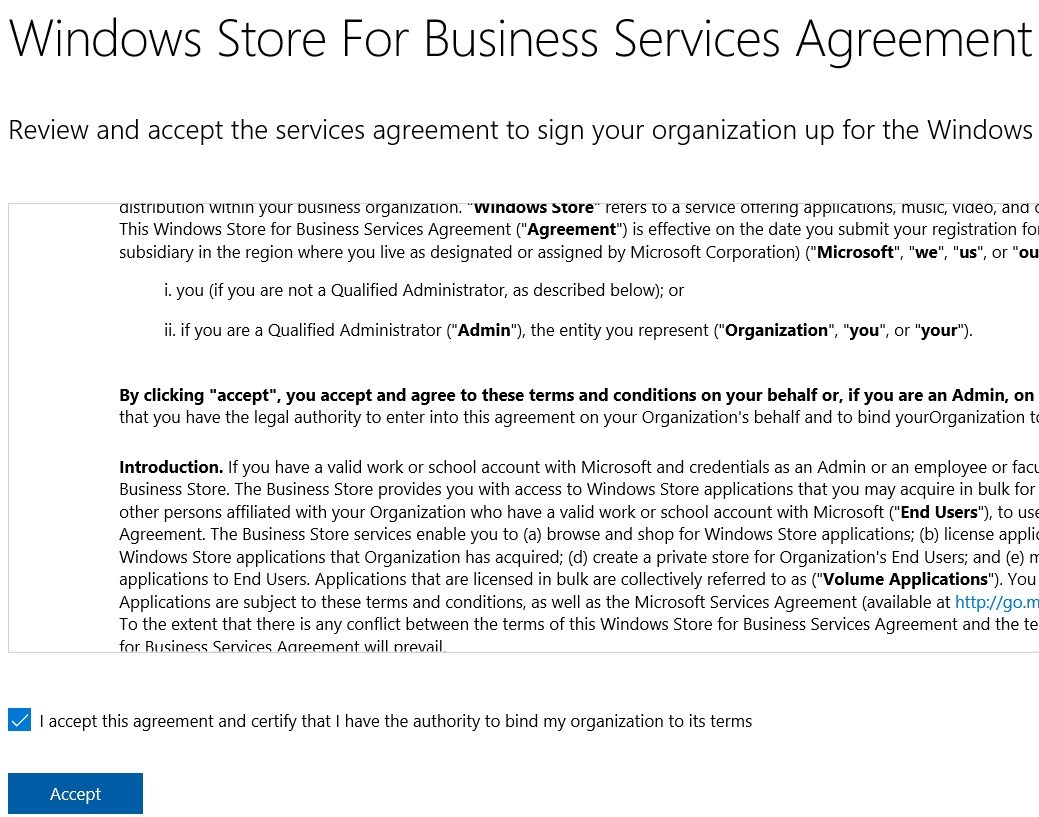
- Accept agreement by checking the box and click Accept
- Windows Store for Business is now enabled
Configure Windows Store for Business
Permissions
First, it’s a good idea to have a look at the roles and permissions for the Windows Store for Business. They are NOT related to SCCM roles and permissions.
- Go to Settings – Permissions
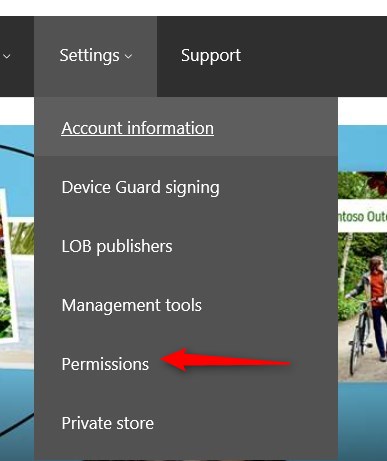
- You must be a Global Administrator to assign roles and permissions
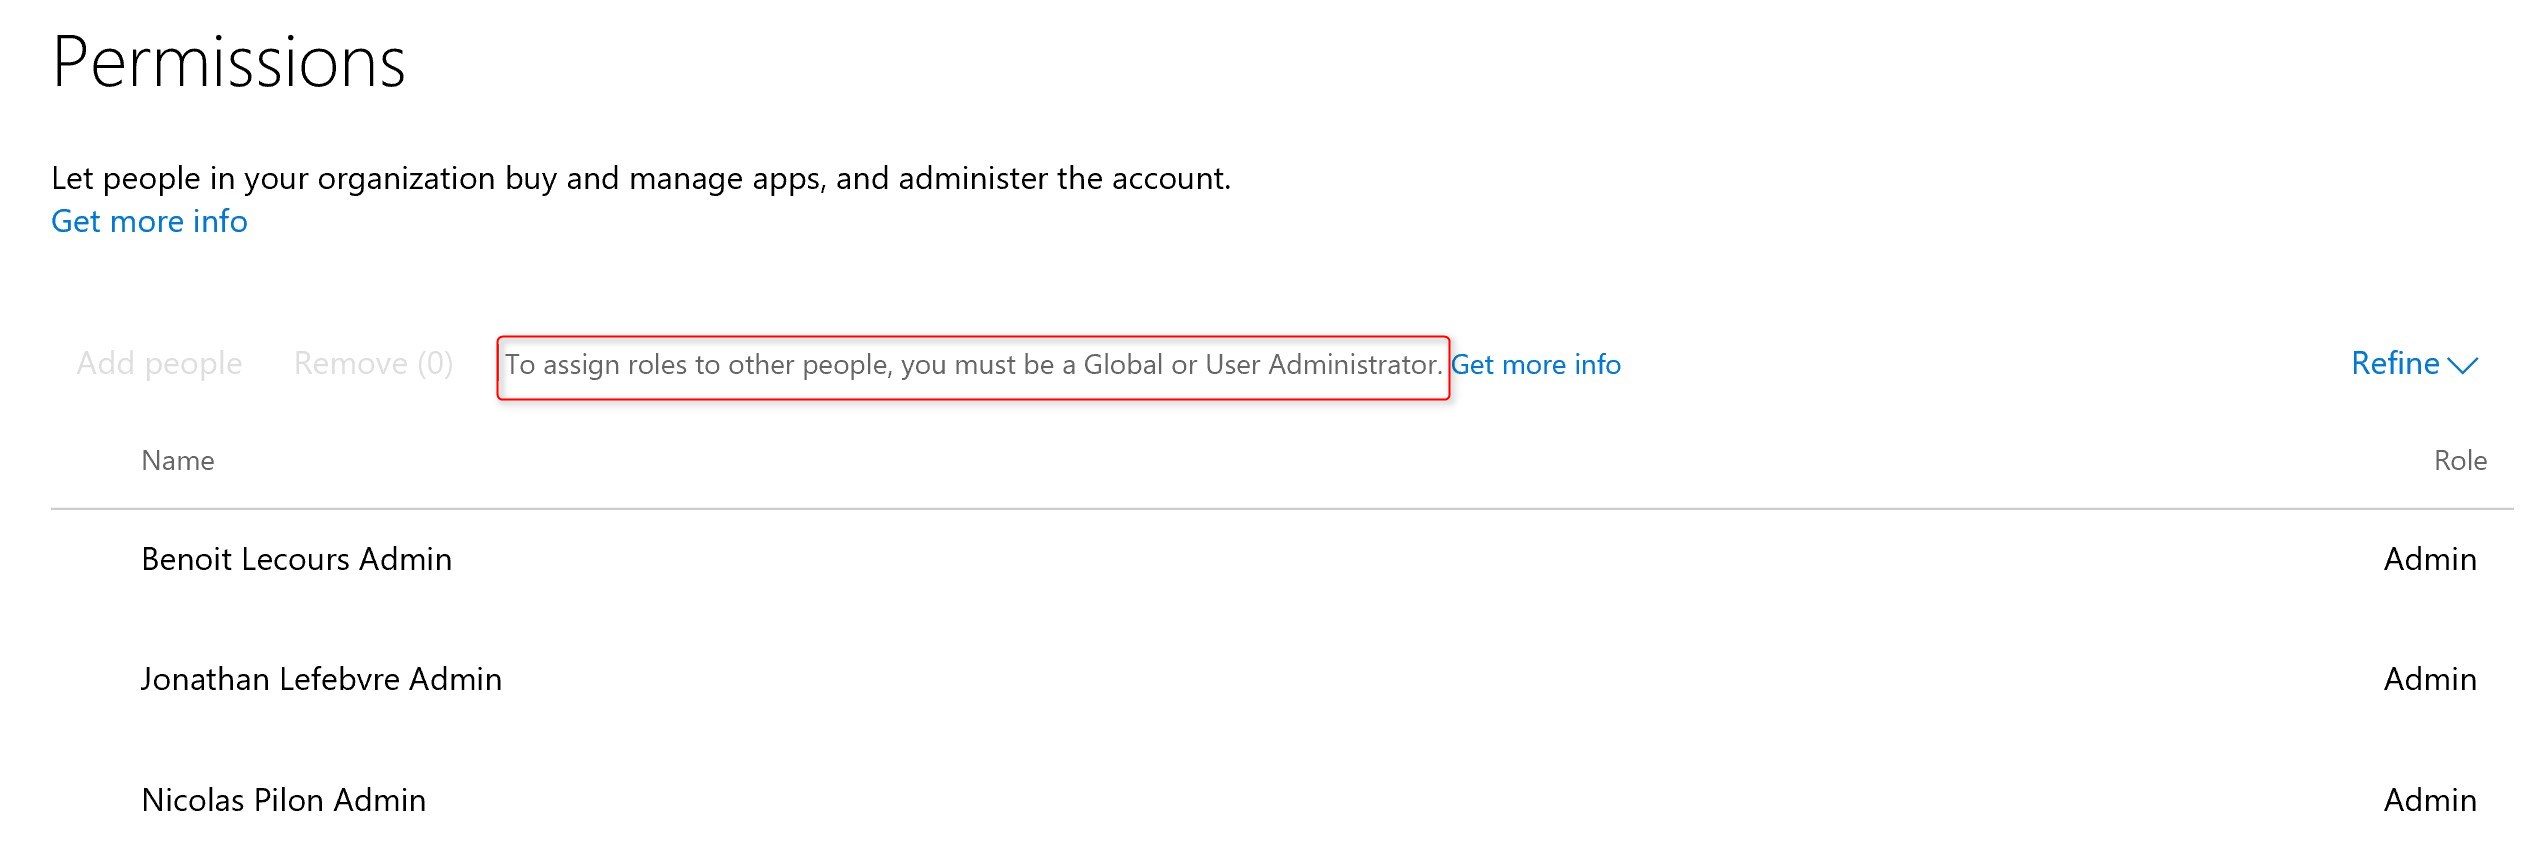
- For more details on roles and permissions for Windows Store for Business, please read this TechNet post
Offline Licensed
In order to install offline applications, we must allow Windows Store for Business to do it
- Go to Manage – Account Information
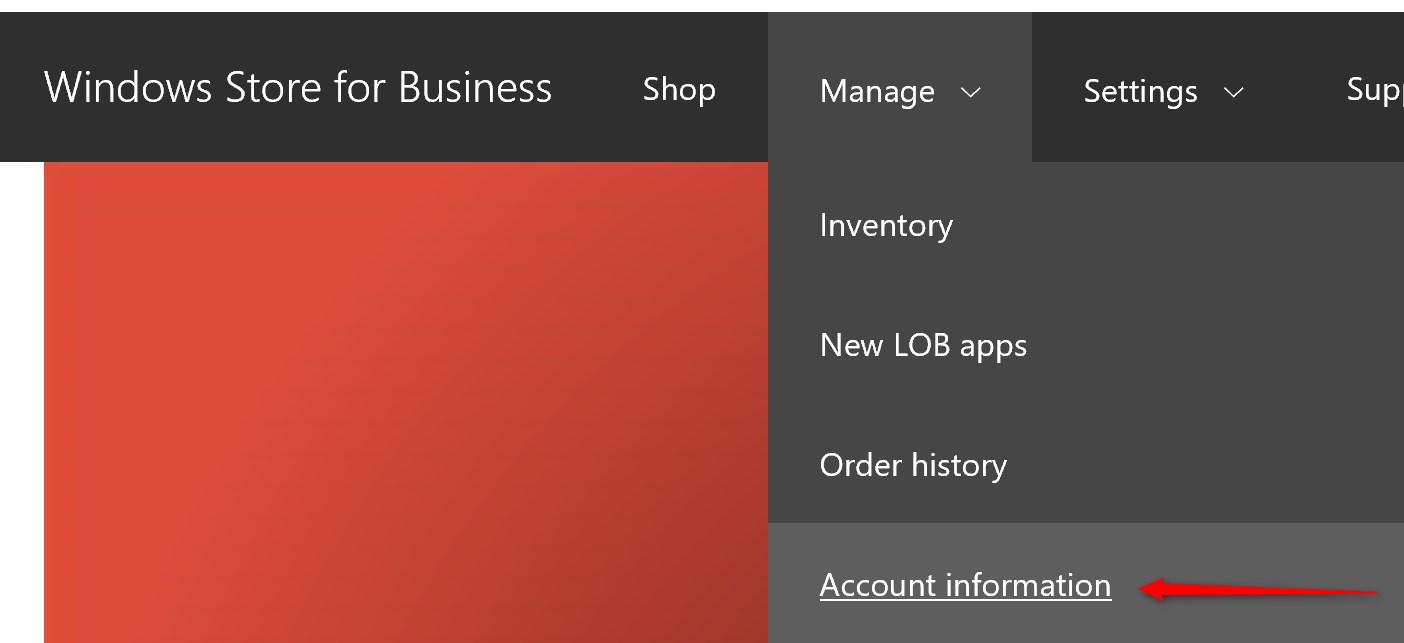
- Scroll to Offline licensing section
- Check the box Show offline licensed apps to people
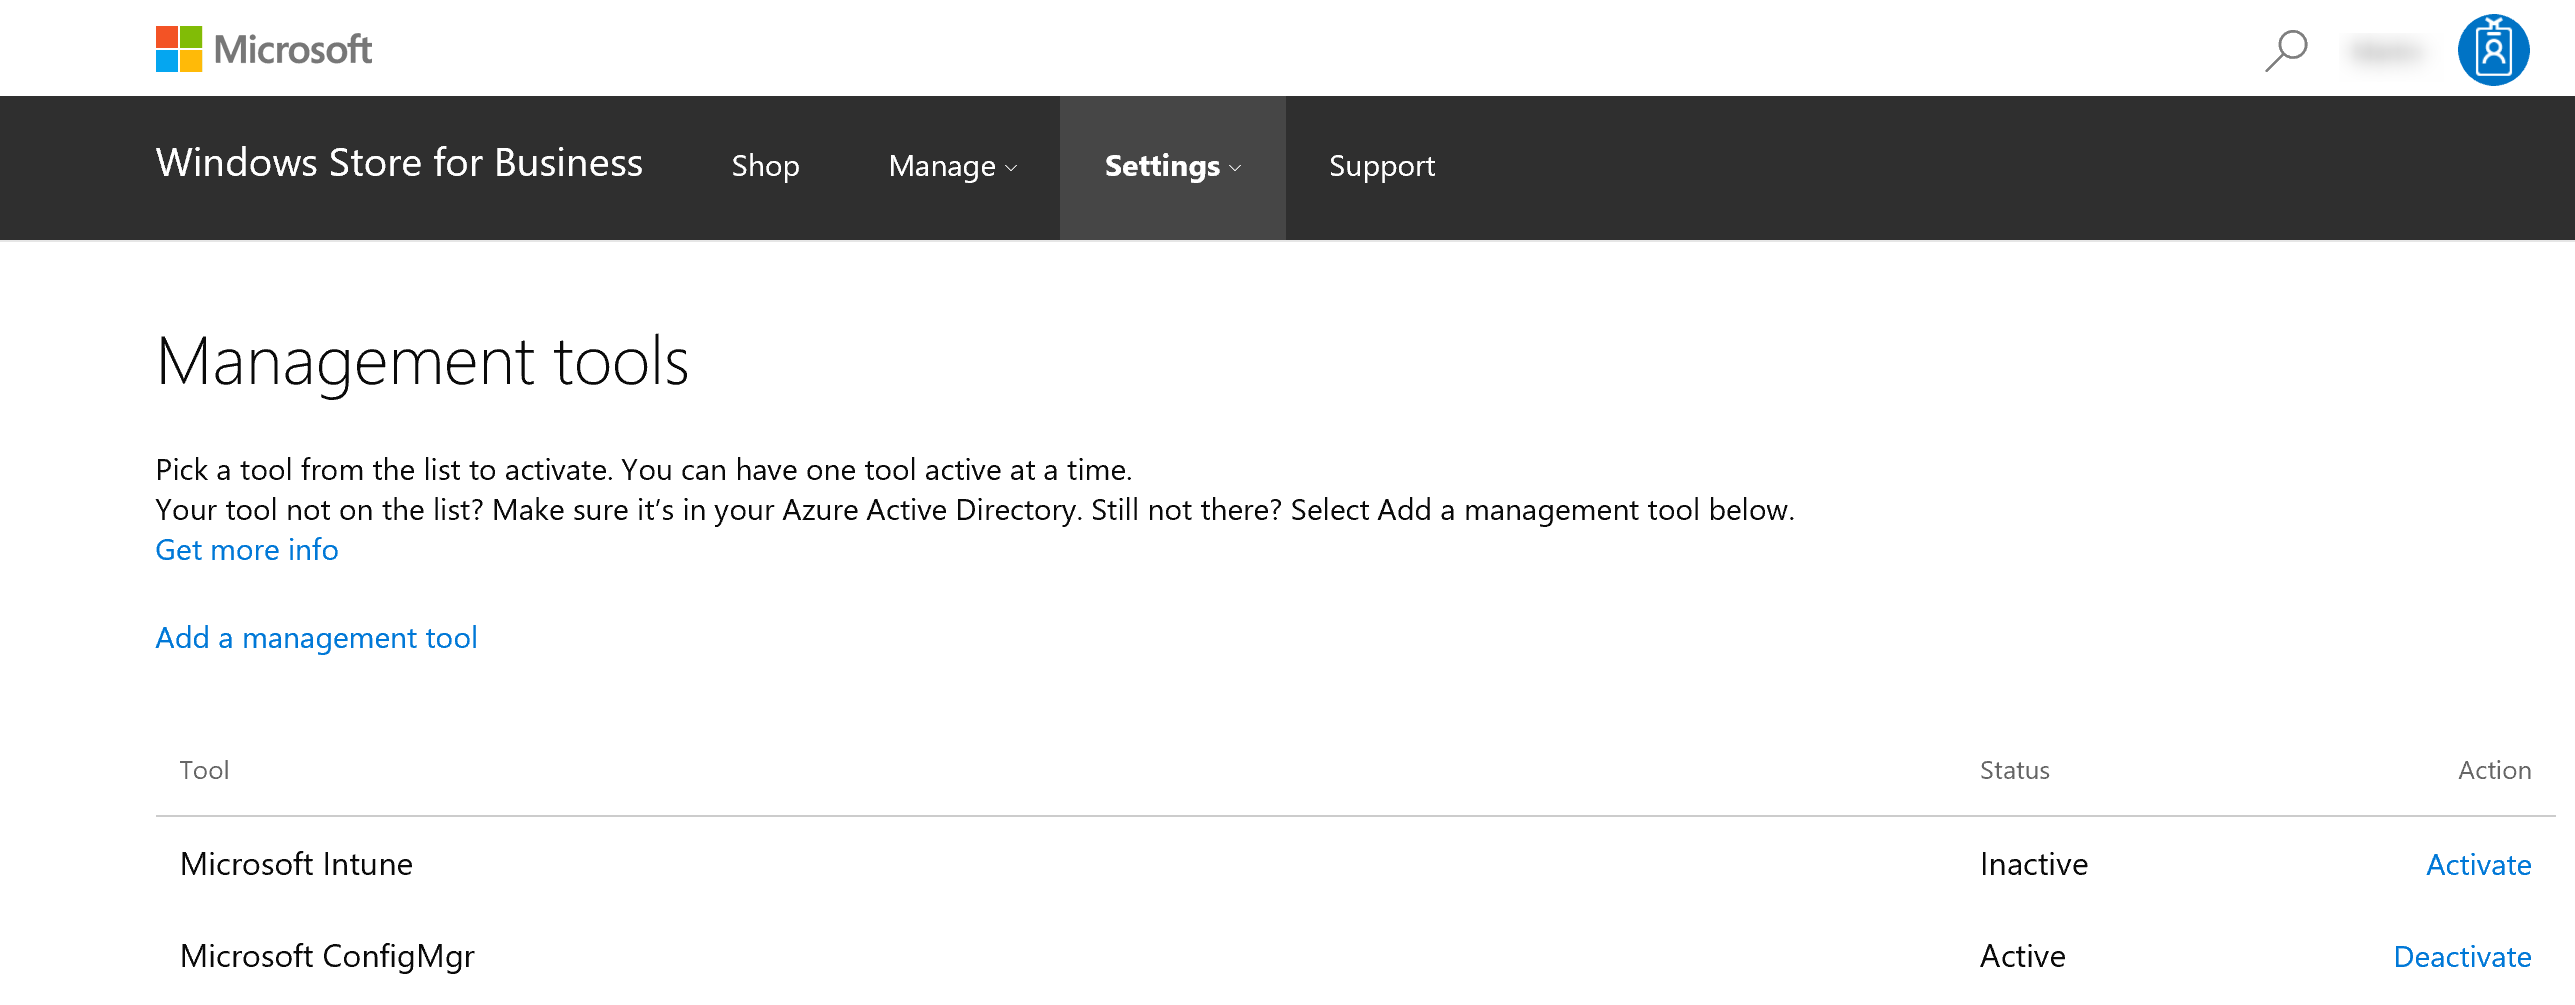
Management Tools
Windows Store for Business must add a management tool for SCCM integration. This management tool is the Web API created in previous steps.
- Go to Settings – Management Tools
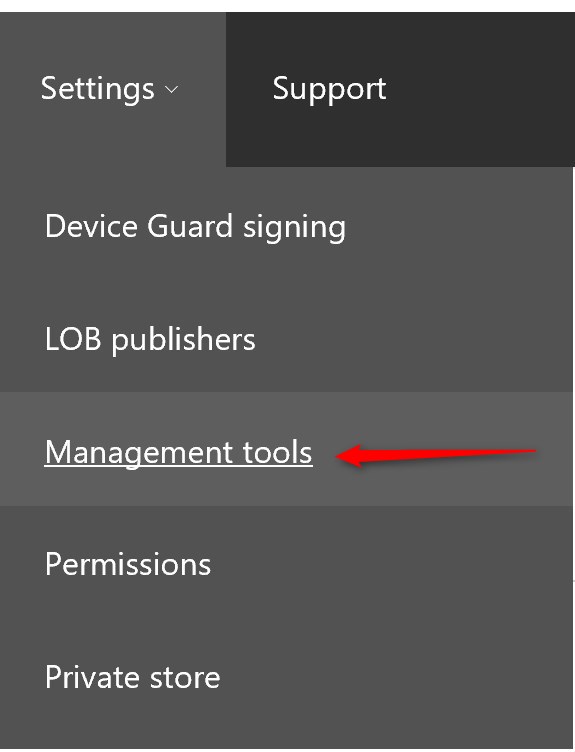
- Click Add a Management Tool

- Search for Microsoft ConfigMgr or the name specified in the WEB API from the earlier steps
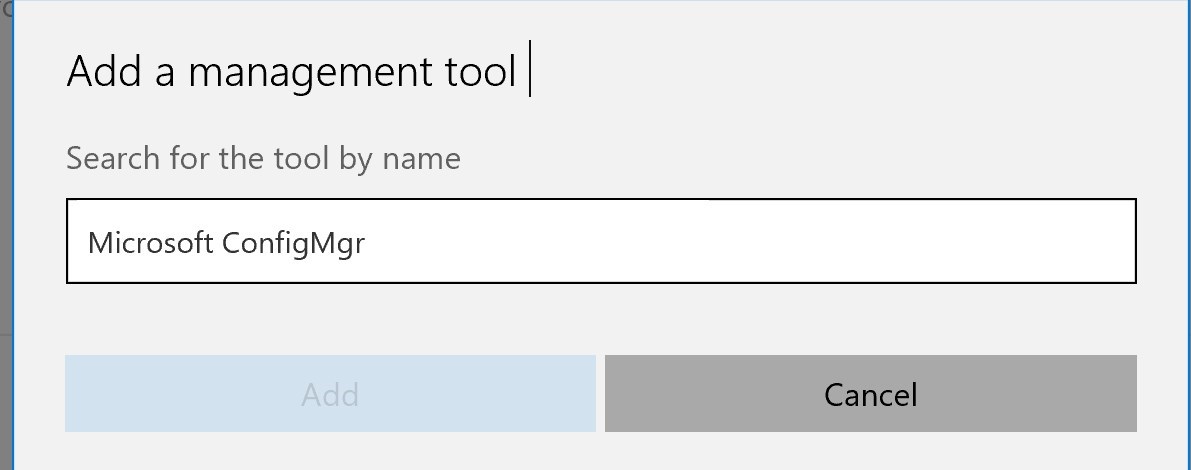
- Be sure he Microsoft ConfigMgr tool is Active
Integration with SCCM Current Branch 1606
After the upgrade to SCCM CB 1606, a new feature is available for Windows Store for Business Integration.
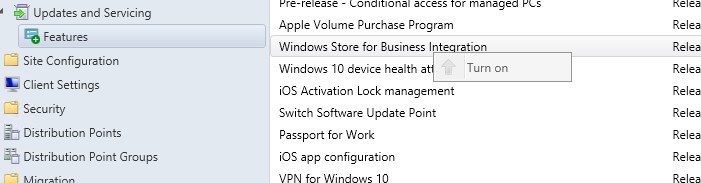
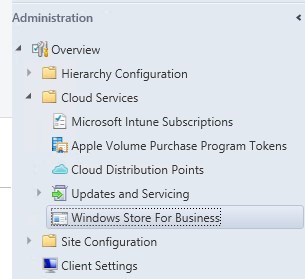
- Go to Administration / Cloud Services / Updates and Servicing / Features
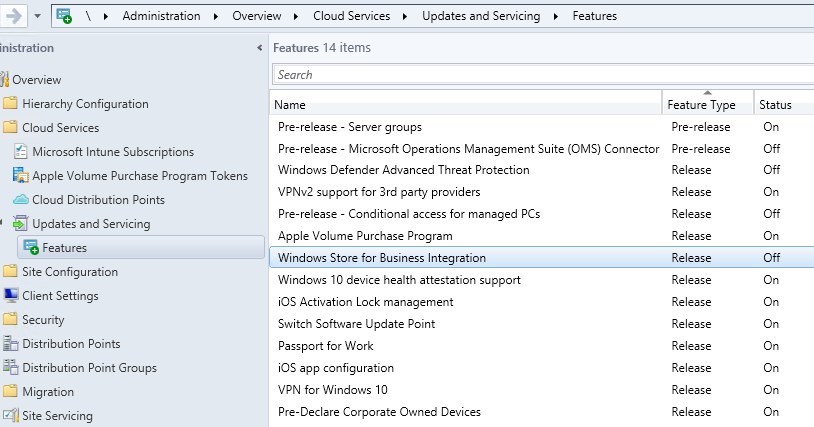
- Find Windows Store for Business Integration and right-click to Turn-On

[su_box title=”Can’t Turn On Windows Store for Business feature?” style=”glass” title_color=”#F0F0F0″]
If you can’t turn it on, the feature is still in pre-release despite saying it’s Release under the Feature Type.
You might want to Consent to use Pre-release Features under Hierarchy Settings

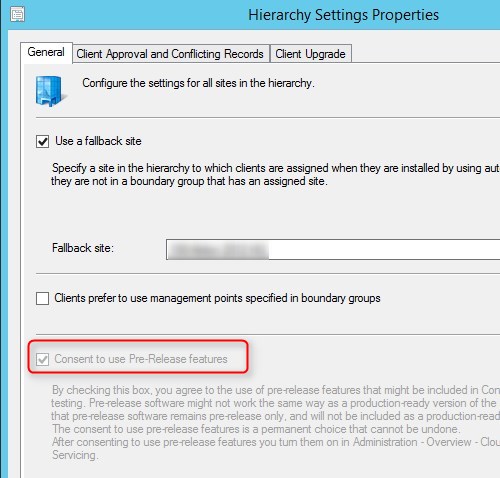
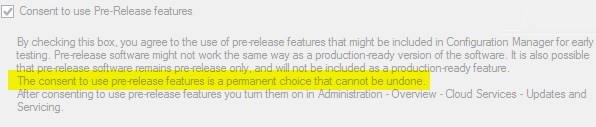
Warning : The consent to use pre-release feature cannot be undone.
You may consider waiting until it is fully released or available to turn on without joining the Pre-Release features
[/su_box]
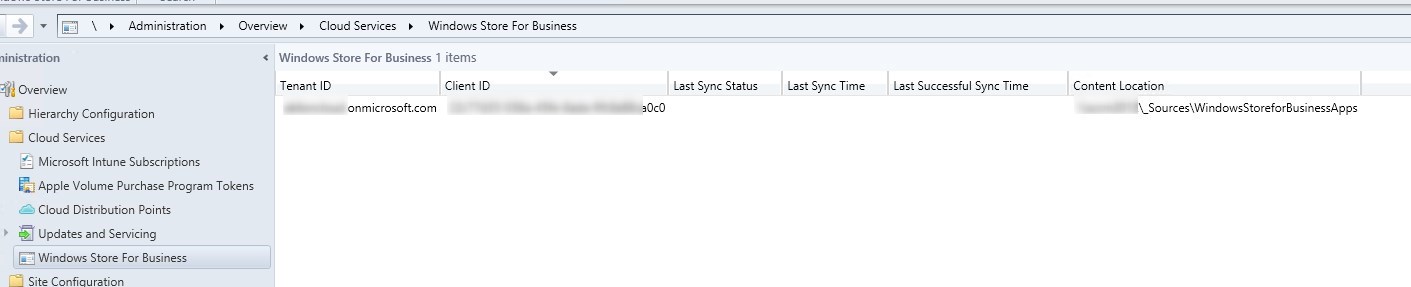
- Windows Store for Business will then be visible under Administration / Cloud Services
- Please allow couple of minutes to see it
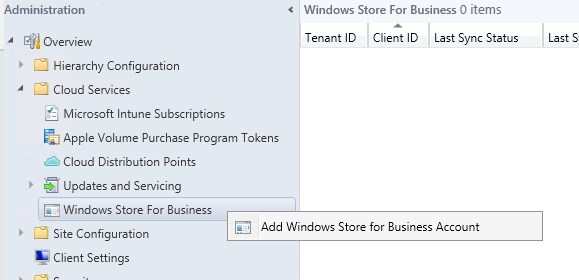
- Right-click on Windows Store for Business and select Add Windows Store for Business Account
- Click Next
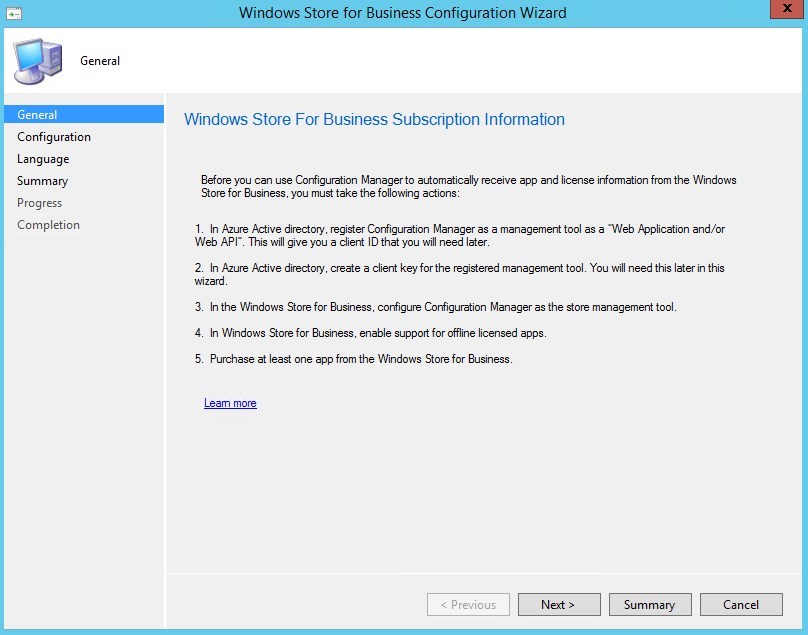
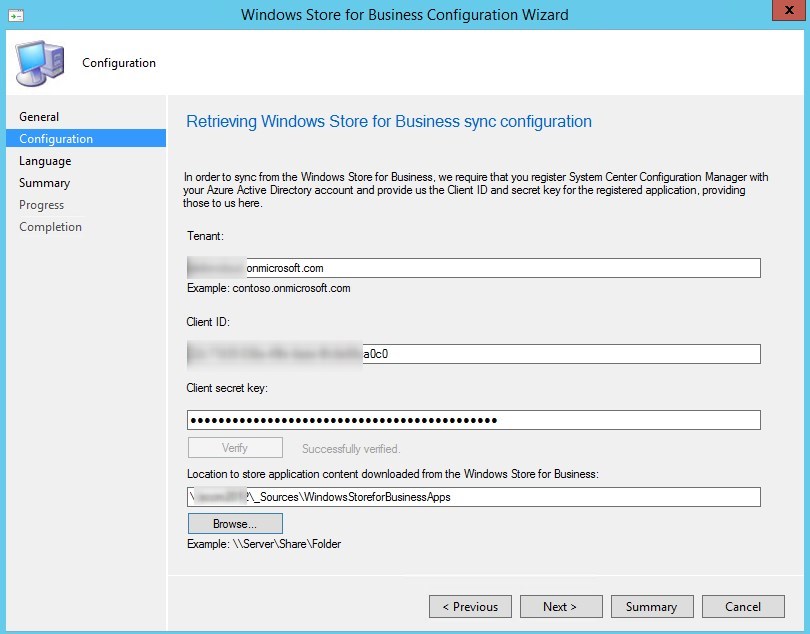
- Provide your Tenant Name, Client ID, Client Secret key and a location to store the application content downloaded
- These are from the Web API created earlier
- Verify the information provided
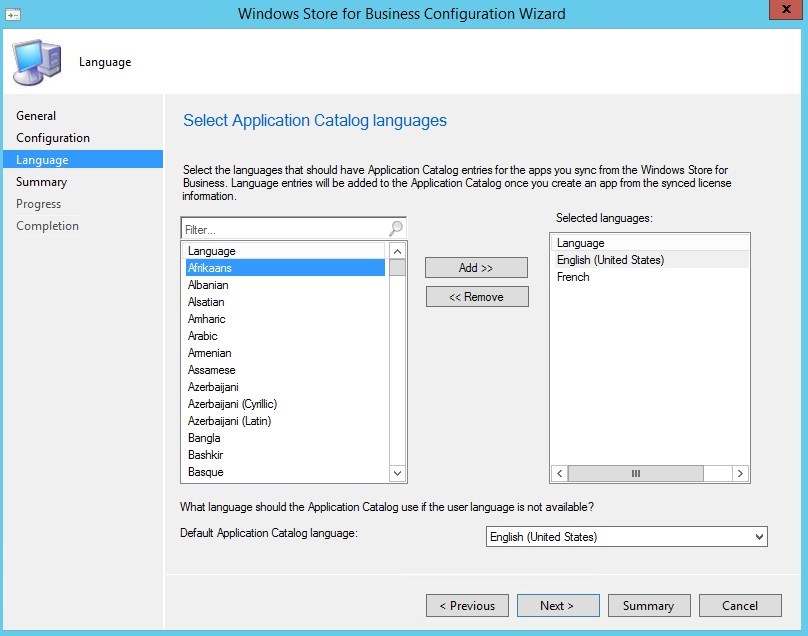
- Select the required Languages for your environment
- Validate the Summary
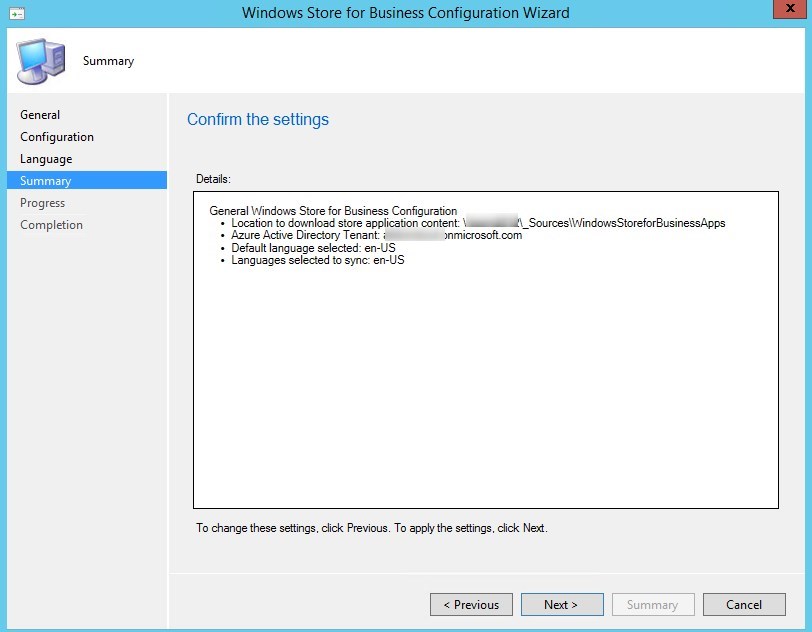
- Windows Store for Business wizard completed and click Close
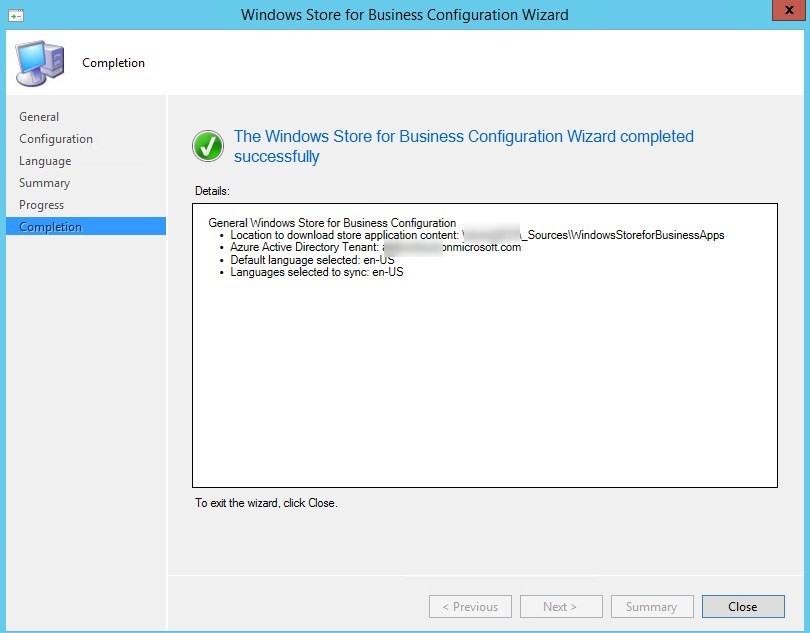
- Windows Store for Business is now integrated to SCCM 1606
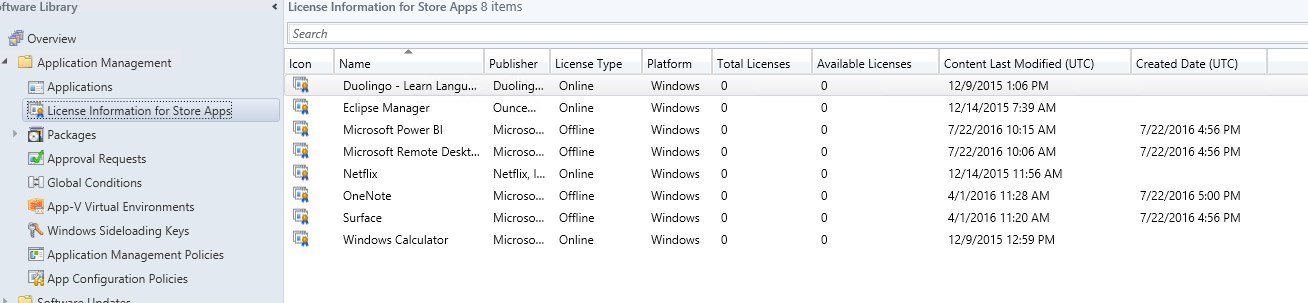
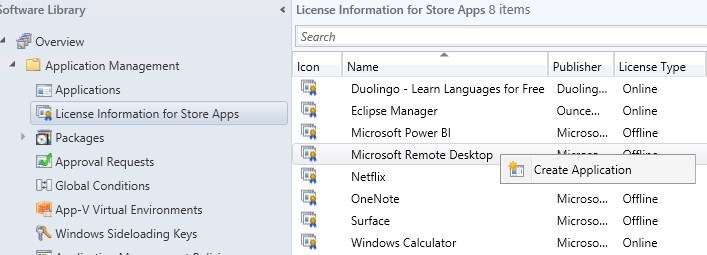
- Under Software Library / Application Management / License Information for Store App, we now see purchased apps
- The initial sync from the Windows Store for Business will take some time
- In our case it took a good 30 minutes before we saw are purchased apps
Take the Apps Offline
- Go in the Windows Store for Business web site and Select Shop or Search store at the top to find an app

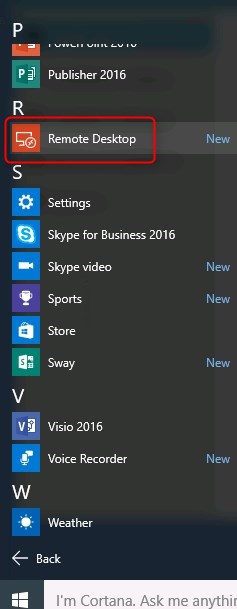
- For this post, we chose Microsoft Remote Desktop
[su_box title=”Note” style=”glass” title_color=”#F0F0F0″]Not all apps are available Offline. Look at Facebook as example.[/su_box]
- Select Offline then Get the app
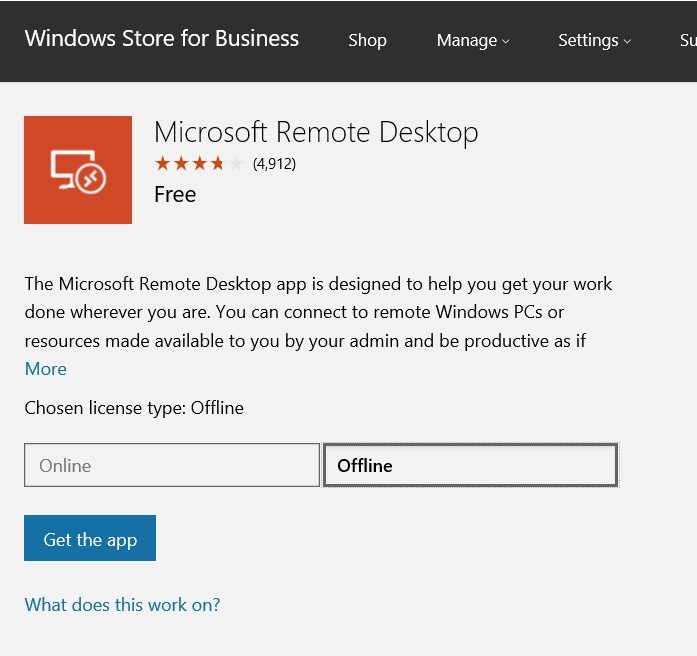
- The app is added to your Inventory
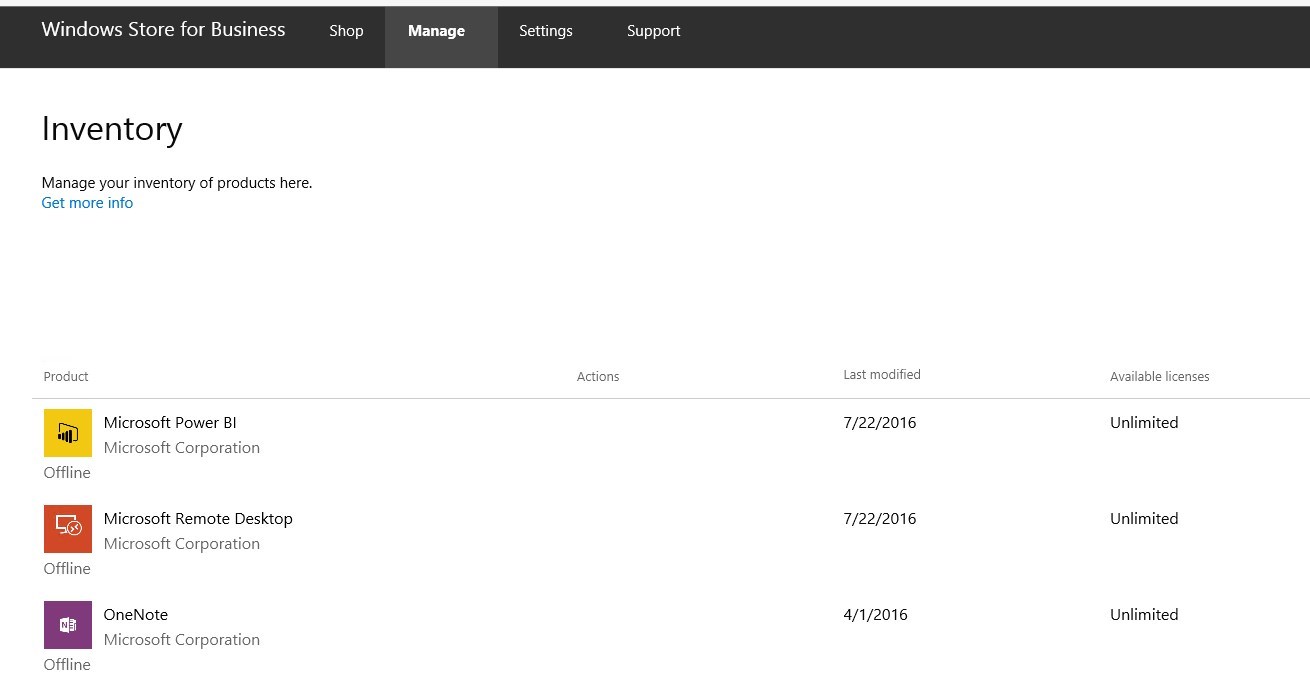
- Within the next 24 hours, SCCM will sync with Windows Store for Business and then we will see the purchased app in the SCCM console
How to deploy an App with SCCM on Windows 10
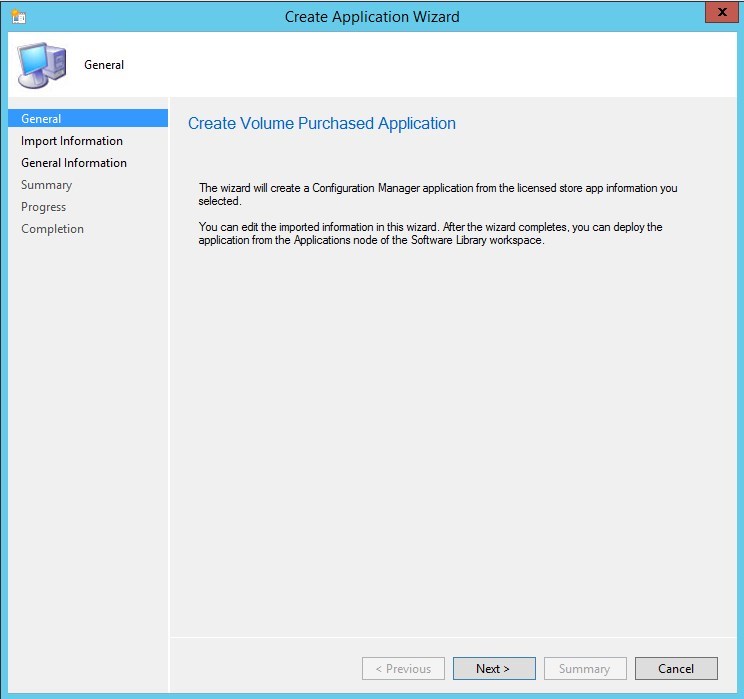
- Under Software Library / Application Management / License Information for Store App, select the App and right click Create Application
- Click Next
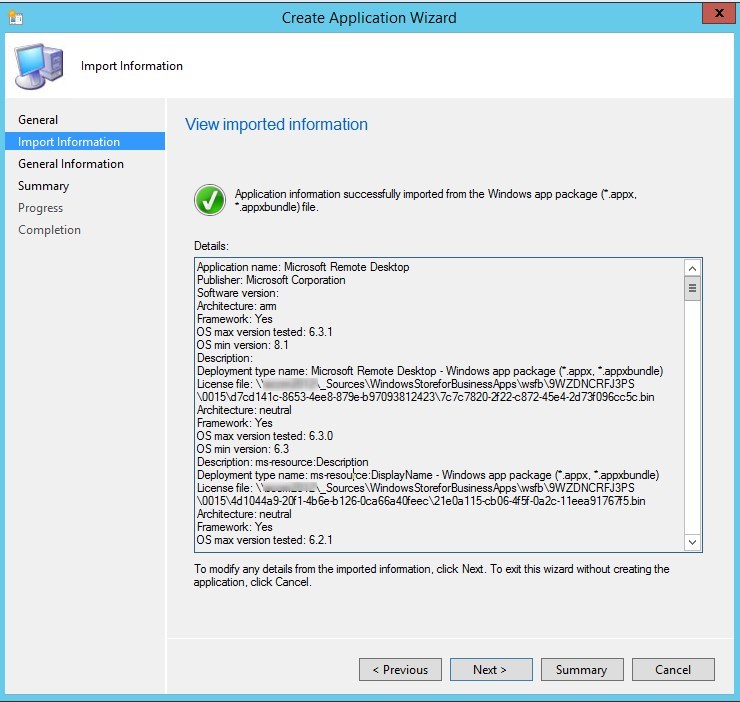
- The application information is imported to SCCM, then click Next
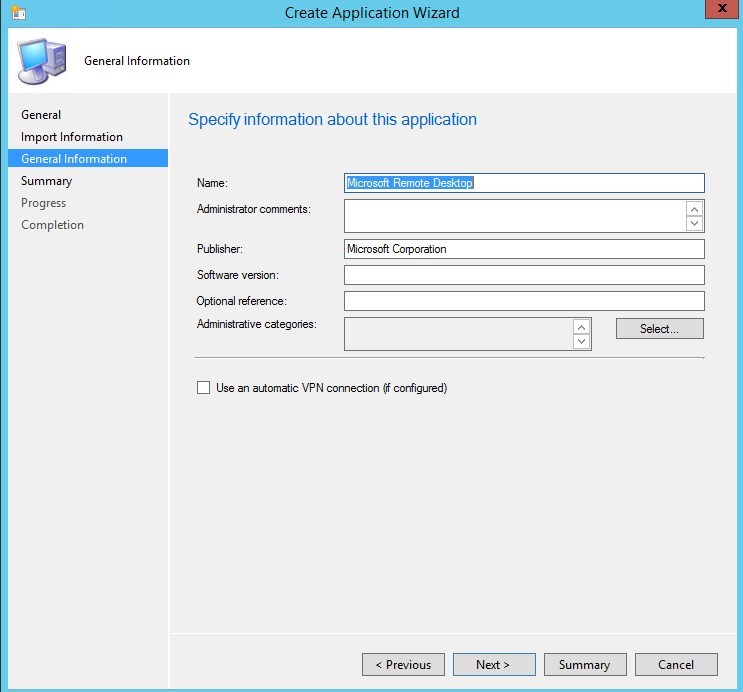
- Specify information and click Next
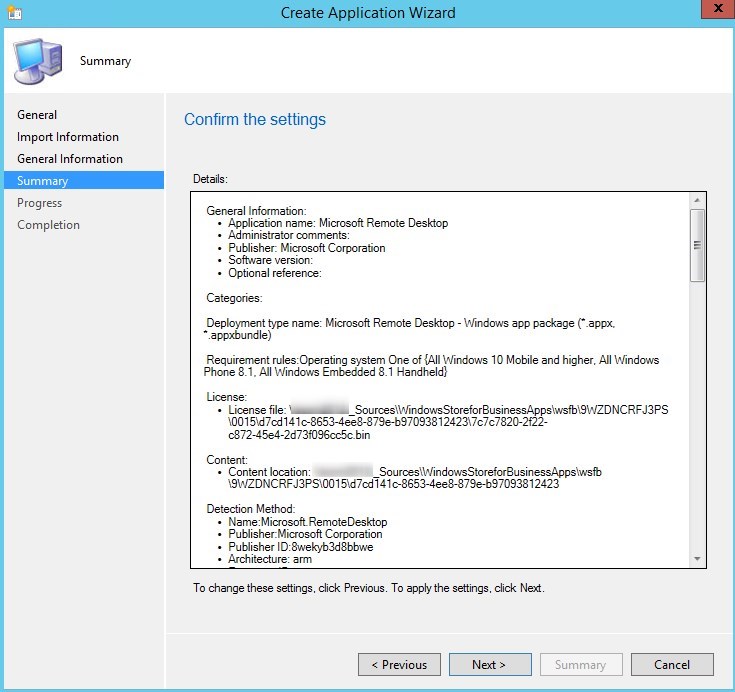
- Validate Summary and click Next
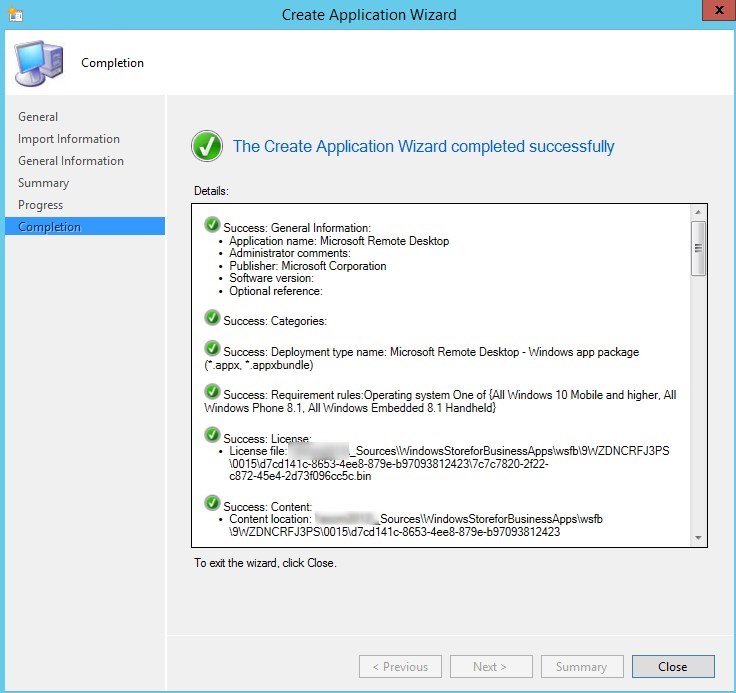
- Completed summary
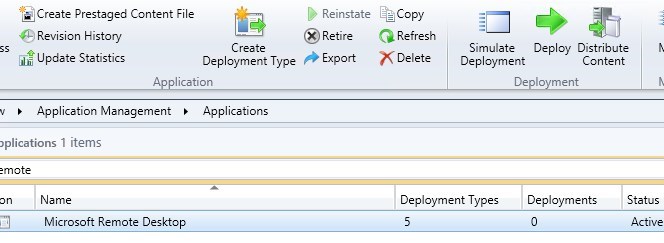
- An Application as been created under Software Library / Application Management / Application
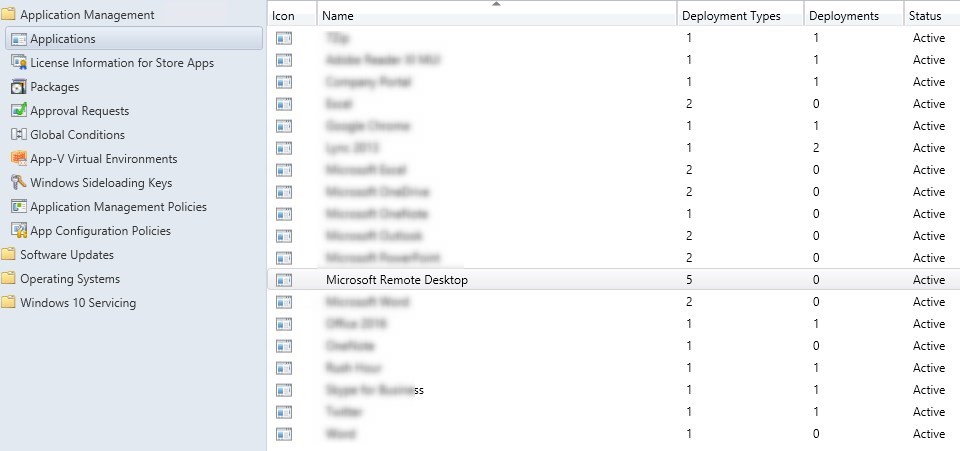
- From this point, the app is manageable just as any other applications
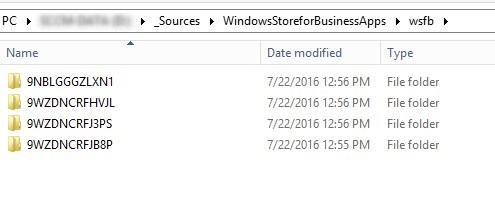
- The source as been downloaded to the source folder for Windows Store apps
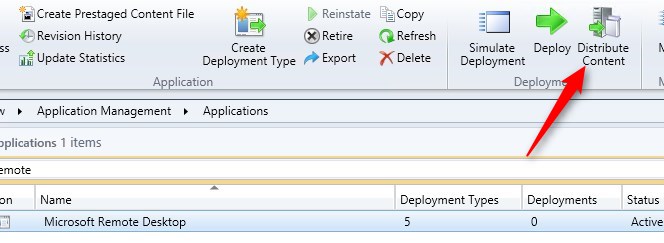
- First we Distribute Content to distribution point
- Next, we will Deploy the application
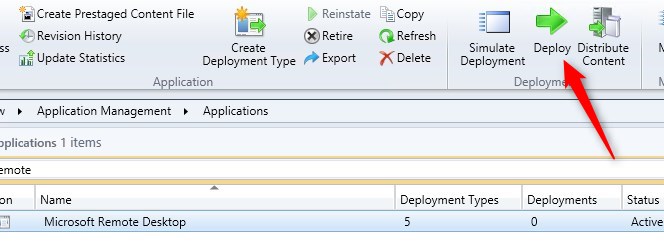
[su_box title=”Note” style=”glass” title_color=”#F0F0F0″]We skipped the wizard for Distribute Content and Deploy as these are standard..[/su_box]
- From the Software Center click on the App Microsoft Remote Desktop
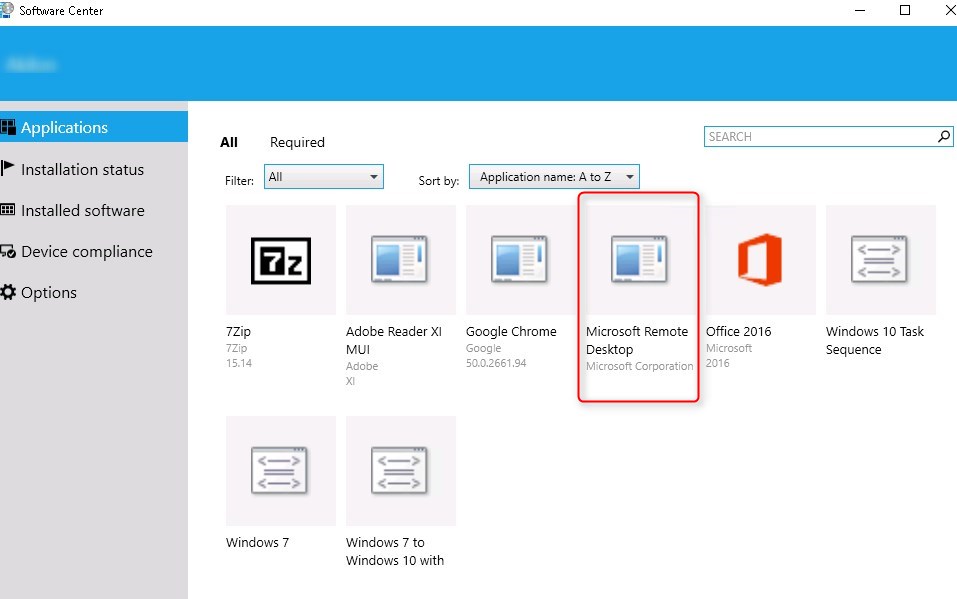
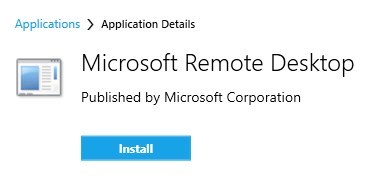
- We can see the detail of the App and click Install
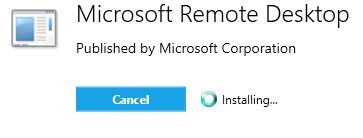
- We can follow the progress
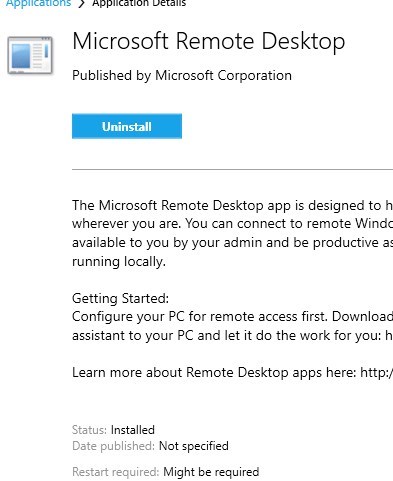
- If installed with success, we can uninstall it from here if needed.
- App Remote desktop is now available from the start menu!
For more information on Windows Store for Business integration, read this TechNet post.
Share
Get the latest insights and exclusive content delivered to your inbox


Anthony Cartwright
03.05.2020 AT 06:58 AMChris
06.26.2018 AT 01:08 PMChris
08.24.2016 AT 07:15 PMJonathan Lefebvre
08.26.2016 AT 11:21 AMChris
09.04.2016 AT 04:44 PMAnthony
08.15.2016 AT 08:14 AMJonathan Lefebvre
08.26.2016 AT 11:16 AMAnthony
08.26.2016 AT 07:10 PMJonathan Lefebvre
09.15.2016 AT 12:28 PMJonathan Lefebvre
08.19.2016 AT 07:52 AMAnthony
08.19.2016 AT 07:27 PMDominic
08.22.2016 AT 03:32 AMAnthony
09.09.2016 AT 08:50 PMAnthony
08.23.2016 AT 06:31 PMAnthony
08.23.2016 AT 12:32 PMAnthony
08.02.2016 AT 10:34 PMAnthony
08.02.2016 AT 10:55 PMRodrigo
07.29.2016 AT 06:30 AMJonathan Lefebvre
07.29.2016 AT 08:48 AM