
Inject Software Updates in your WIM using SCCM Offline Servicing
IT Enthusiast, SCCM administrator for a few years now. Former packager. Certification obtained in 2013. I just love playing with SCCM and push what I can do with it to the limit.

Stephane Faubert


Share


Get the latest insights and exclusive content delivered to your inbox
Offline Servicing in SCCM is the process through which you can inject software updates in your operating system WIM files.
This process can alleviate your build and capture yearly/bi-yearly WIM updates that you most likely run in your enterprise. However, as much as this process is great to shorten your gold image updates, it’s still not perfect. Why? The answer is quite simple. Even if your gold image contains products such as Microsoft Office, offline servicing will not apply Office patches even though these are downloaded to your Software Update Point. Only core Windows applications can get patched through this process.
What are the type of core applications that you can apply patches to? Obviously, Windows, Internet Explorer, .Net Framework and so on and so forth. (also called CBS, for Component Based Servicing)
SCCM Offline Servicing Overview
Here’s what happens in the background when you start the SCCM Offline servicing process :
- SMS_Executive starts the SMS_Offline_Servicing_Manager either via a schedule or manually, depending on how you configured it
- SCCM copies your WIM in a temporary folder
- The WIM gets mounted (or extracted if you will) to a mount directory
- By using DISM the Offline Servicing will attempt to see if a given software update is applicable (installed or not) to your WIM file. If not, it injects it
- This gets repeated for all software updates
- The image gets unmounted and the WIM is rebuild
- A backup of the WIM is created
- The new WIM gets copied back to its original location
- Your distribution point gets updated (if you chose to update them) or else, you should plan to update them
How to Initiate SCCM Offline Servicing
So now that we have all this theory explained, let’s get our hands dirty. How do we actually do this?
- From the SCCM console, navigate to Software Library / Operating System / Operating System Images
- Right click on your image you wish to inject patches to and choose Schedule Updates

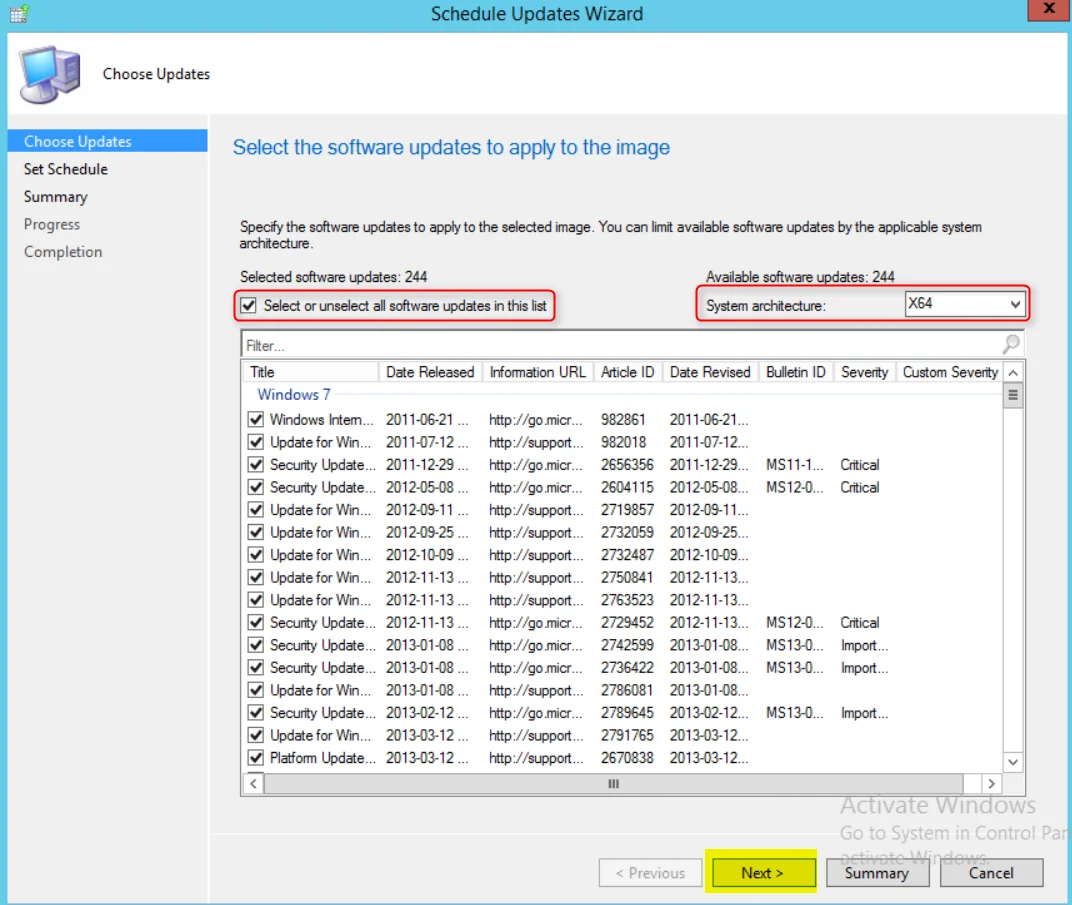
- You can either choose to select all software updates or only a subset. Make sure the correct architecture is selected for your Wim and click Next
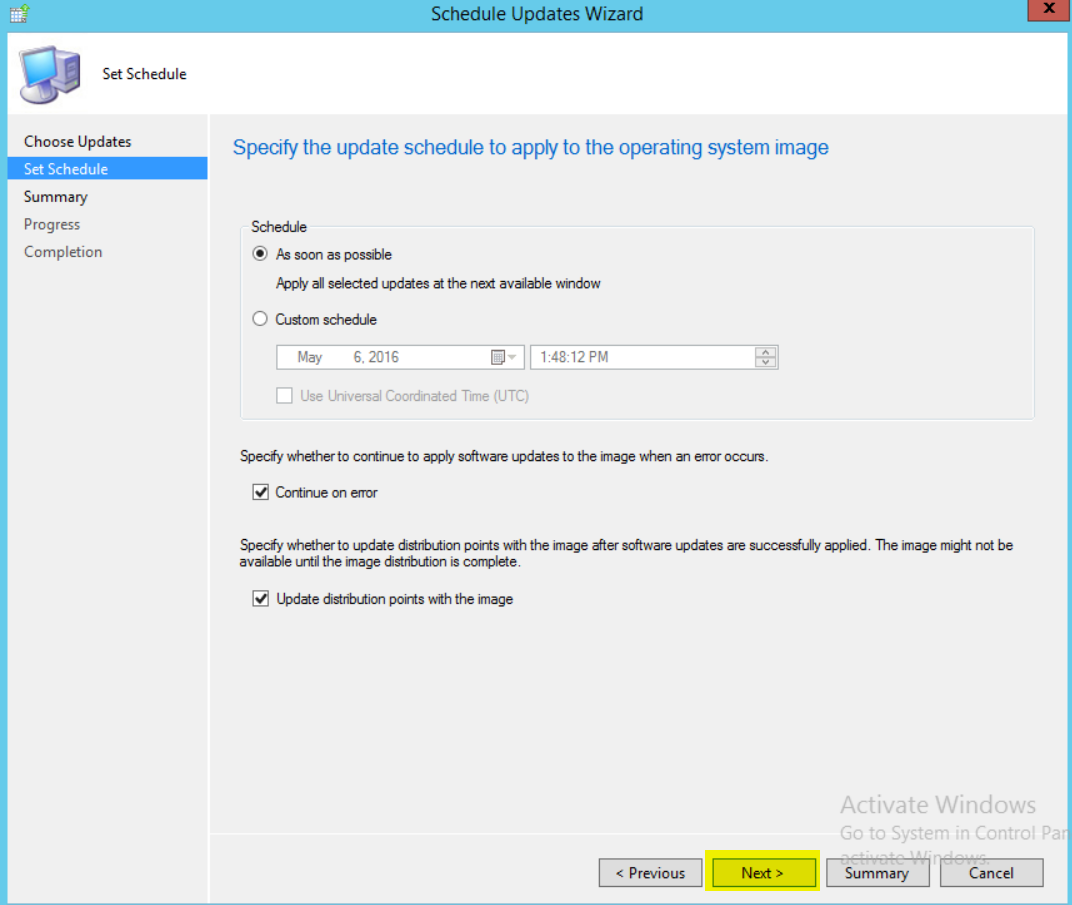
- Set a Schedule if you want to plan ahead, if not, choose As soon as possible. To your choosing, select to Continue on error and Update the distribution points with the image, click Next
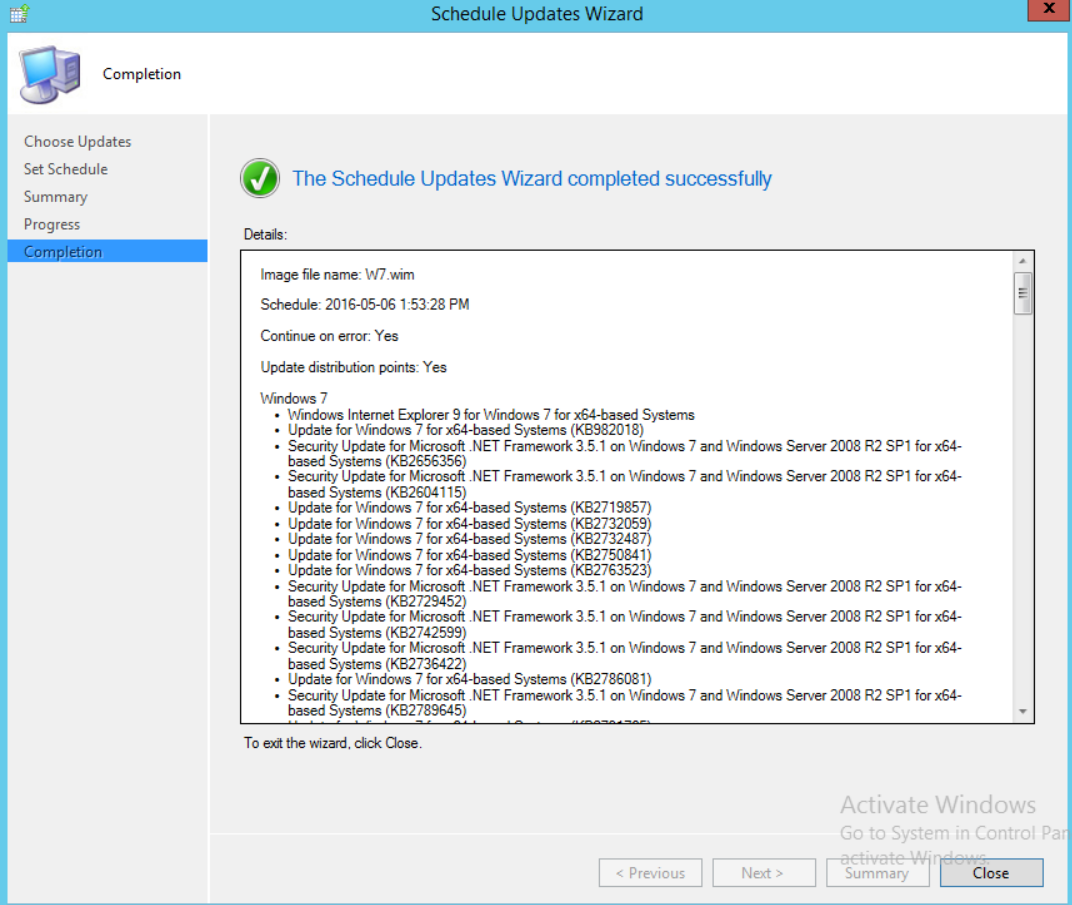
- Validate your selections and click Close
Monitoring
You can monitor the process via 3 log files :
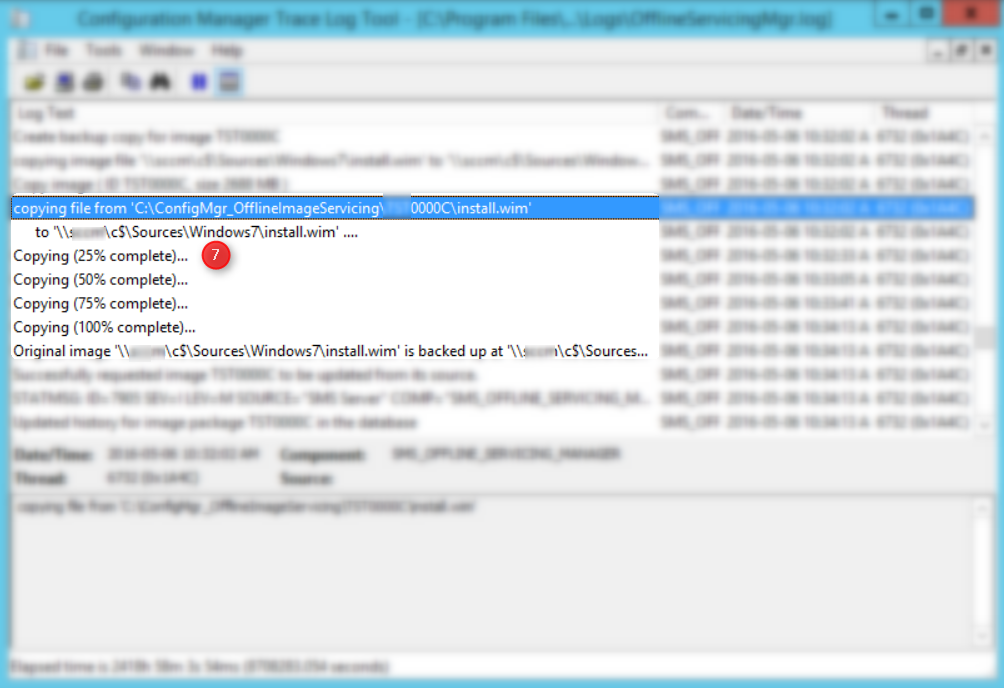
- OfflineServicingMgr.log – ConfigMgrInstallPath\Logs
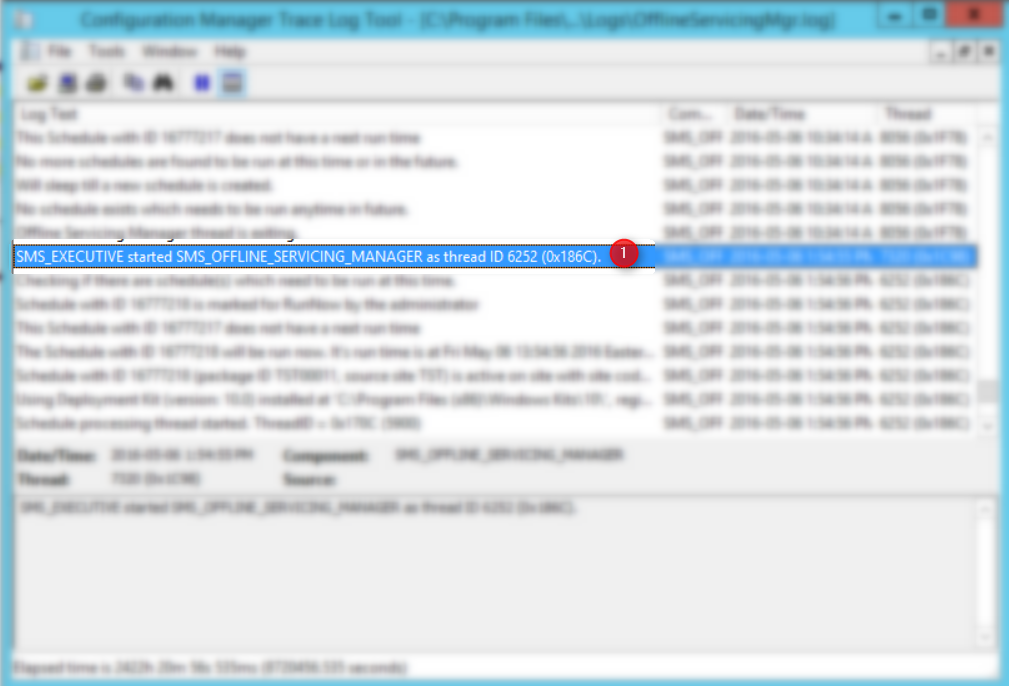
You can refer to the high level steps above to match the numbers in the screenshots with the steps
- SMS_Executive calls SMS_OFFLINE_SERVICE_MANAGER (1)
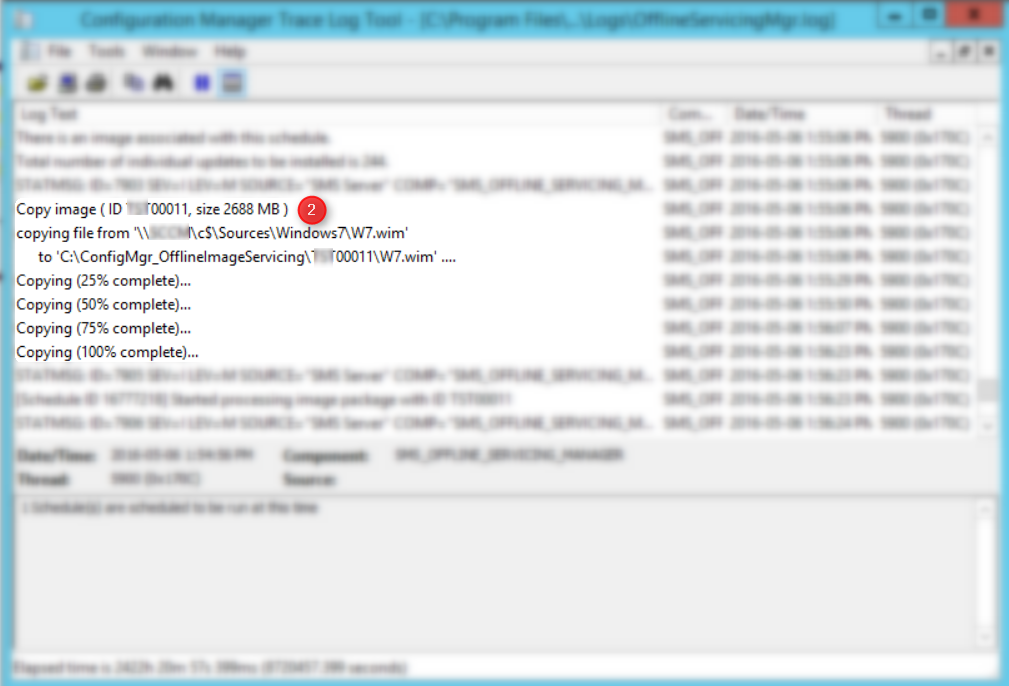
- A backup is taken (2)
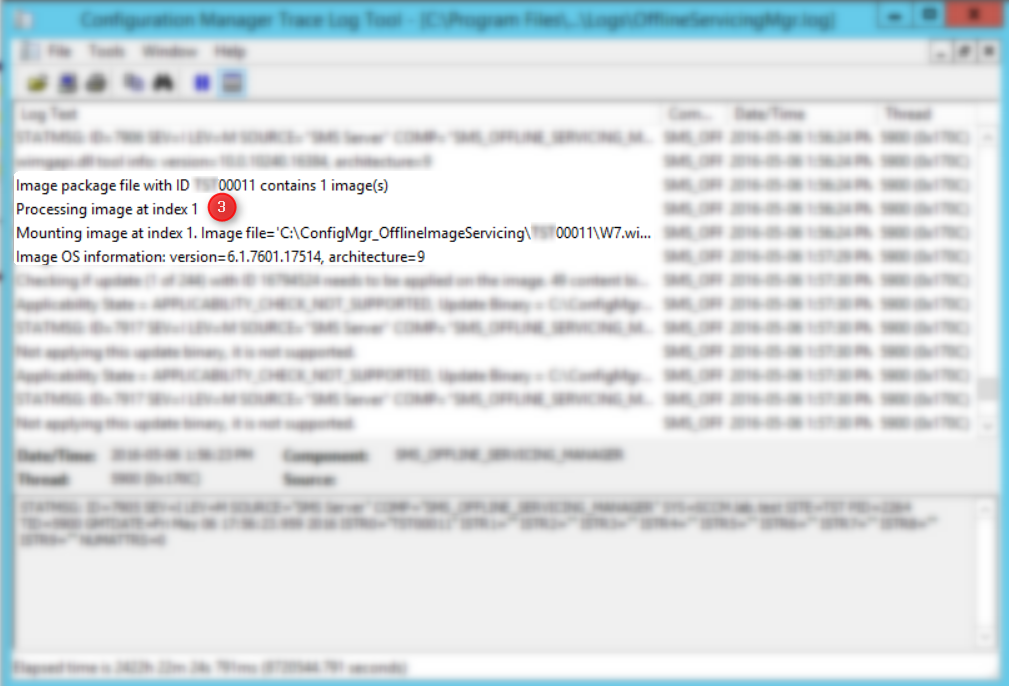
- WIM file gets mounted (3)
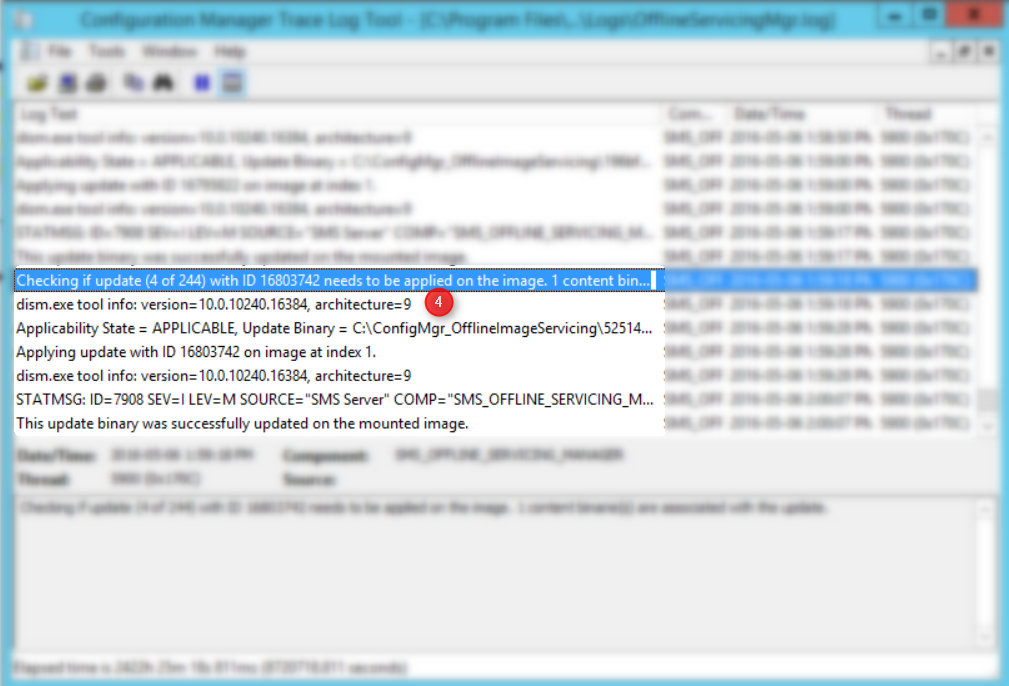
- Updates get applied (4)
- WIM gets unmounted (5)

- The backup copy is moved (6)
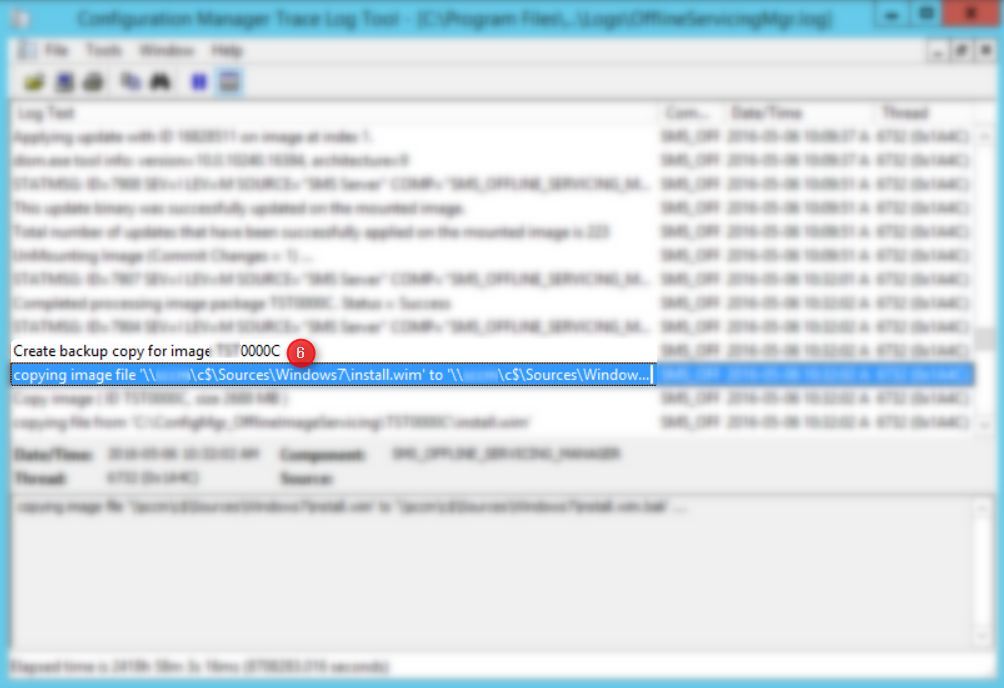
- WIM gets copied back (7)
- DISM.log – Windows\Logs\Dism\DISM.log
You can also view the details of what DISM does patch per patch in this log. Take heed though, DISM.log tends to be very chatty/verbosy.
- DistMgr.log – ConfigMgrInstallPath\Logs
To view your WIM file get distributed on all your DPs.
Here’s to hoping this clears up the whole Offline Servicing for you all!
Share
Get the latest insights and exclusive content delivered to your inbox


thomas chandler
11.07.2019 AT 02:47 PMDavid Leemans
02.23.2018 AT 10:44 AMGlenn Turner
02.12.2018 AT 11:28 PMBrian
04.30.2019 AT 04:03 PMDan
01.29.2018 AT 11:18 AMJordan
01.22.2018 AT 09:52 AMLuke
11.30.2017 AT 02:10 AMAJP
11.16.2017 AT 03:09 PMJonathan Lefebvre
11.16.2017 AT 10:21 PMUnsatisfied
11.01.2017 AT 03:20 PMRAIL_BOY
02.06.2020 AT 01:16 AMJames Leroux
09.29.2017 AT 07:36 AMTapsee
06.22.2017 AT 06:23 AMRob
05.19.2017 AT 05:20 AM